> ## Documentation Index
> Fetch the complete documentation index at: https://docs.t3gemstone.org/llms.txt
> Use this file to discover all available pages before exploring further.
# GPIO
> General Purpose Input Output (GPIO)
By the end of this section, you will gain experience in the following topics:
* Using GPIO via Gemstone
* Preliminary preparation for the [t3gemstone/examples/gpio](https://github.com/t3gemstone/examples/tree/main/gpio) project.
GPIO (General Purpose Input/Output) refers to pins used for general-purpose input and output operations in
microcontrollers and development boards. These pins can be configured for both receiving digital data (input)
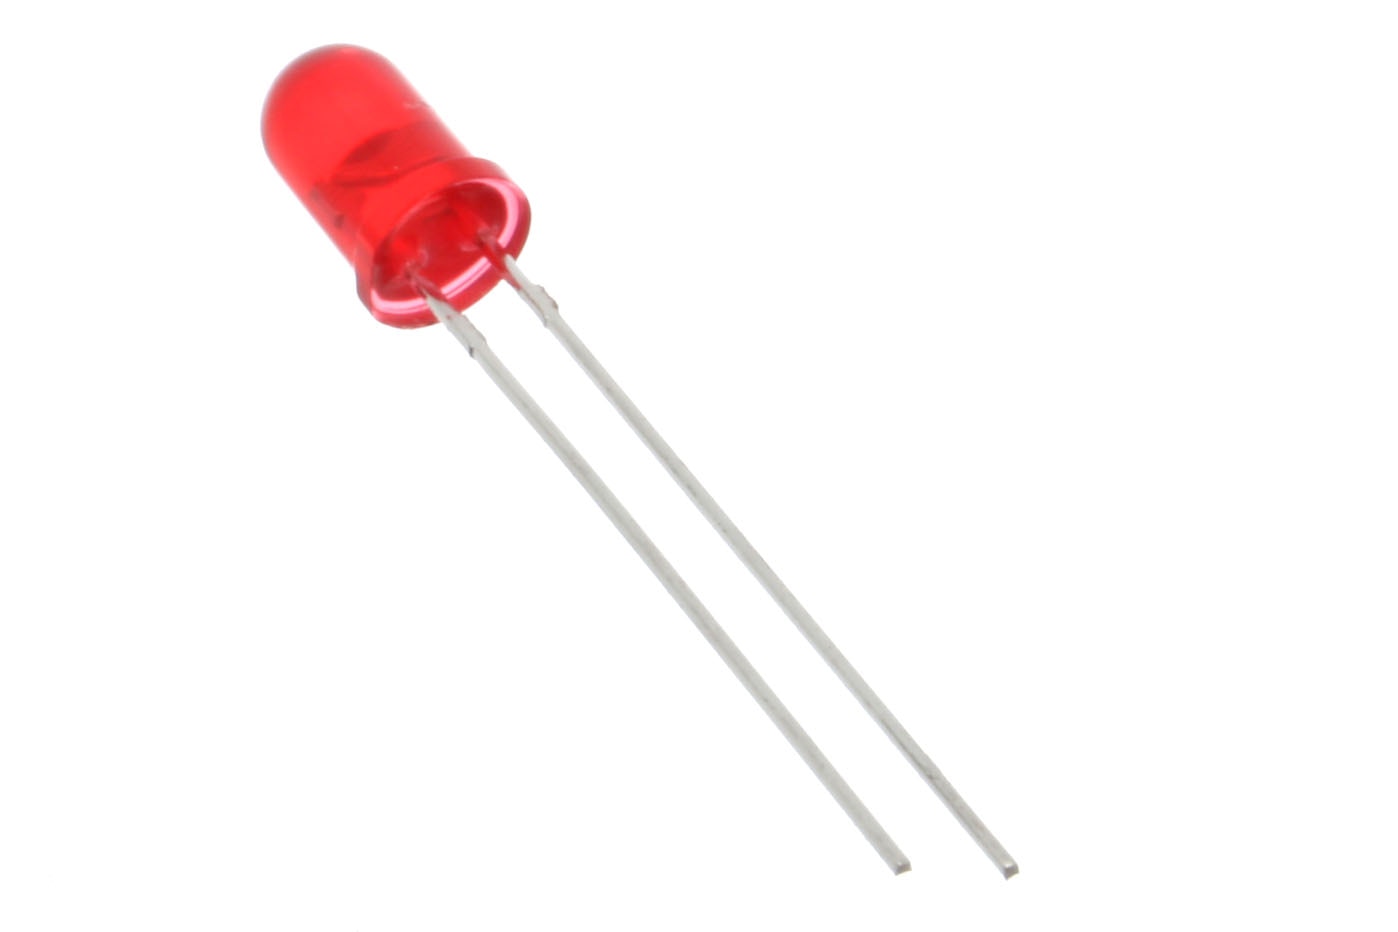
and sending digital signals (output). Below is an example of an LED blink operation performed via GPIO pins on the Gemstone.
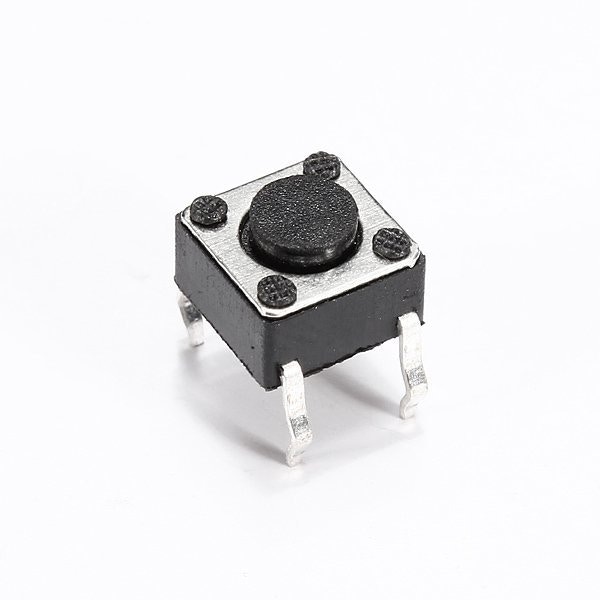
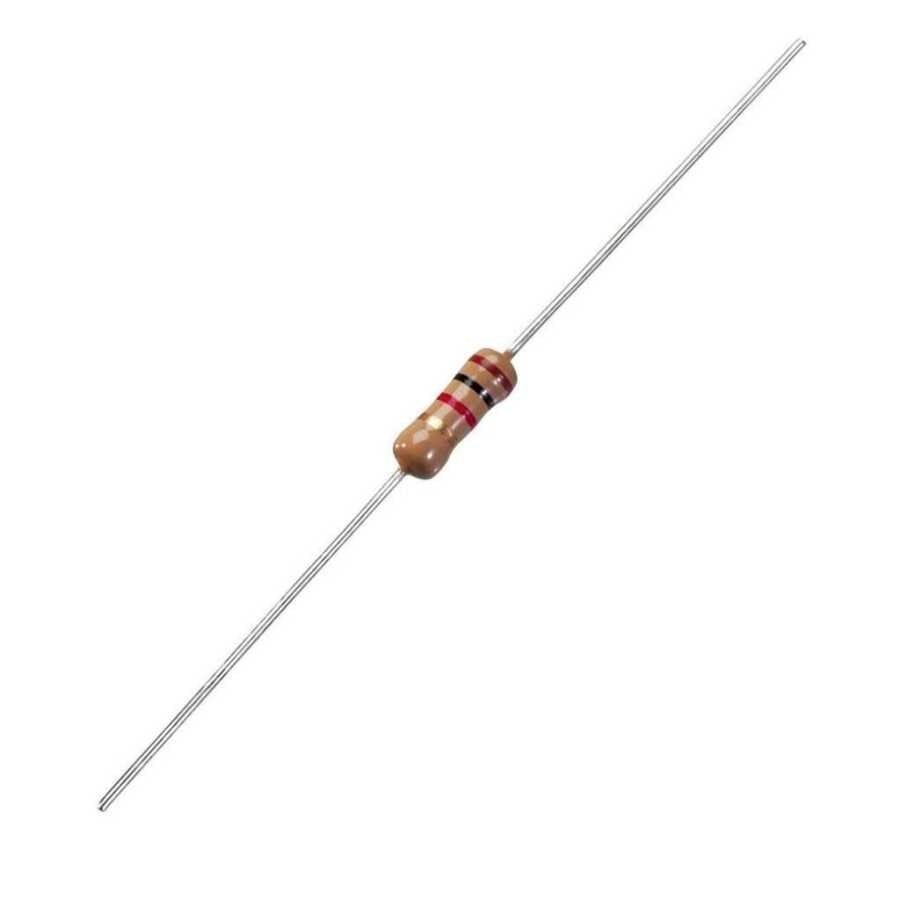
 In addition to the materials listed on the [Quick Start](/en/quickstart) page, you will need an LED, a button,
and a resistor.
In addition to the materials listed on the [Quick Start](/en/quickstart) page, you will need an LED, a button,
and a resistor.
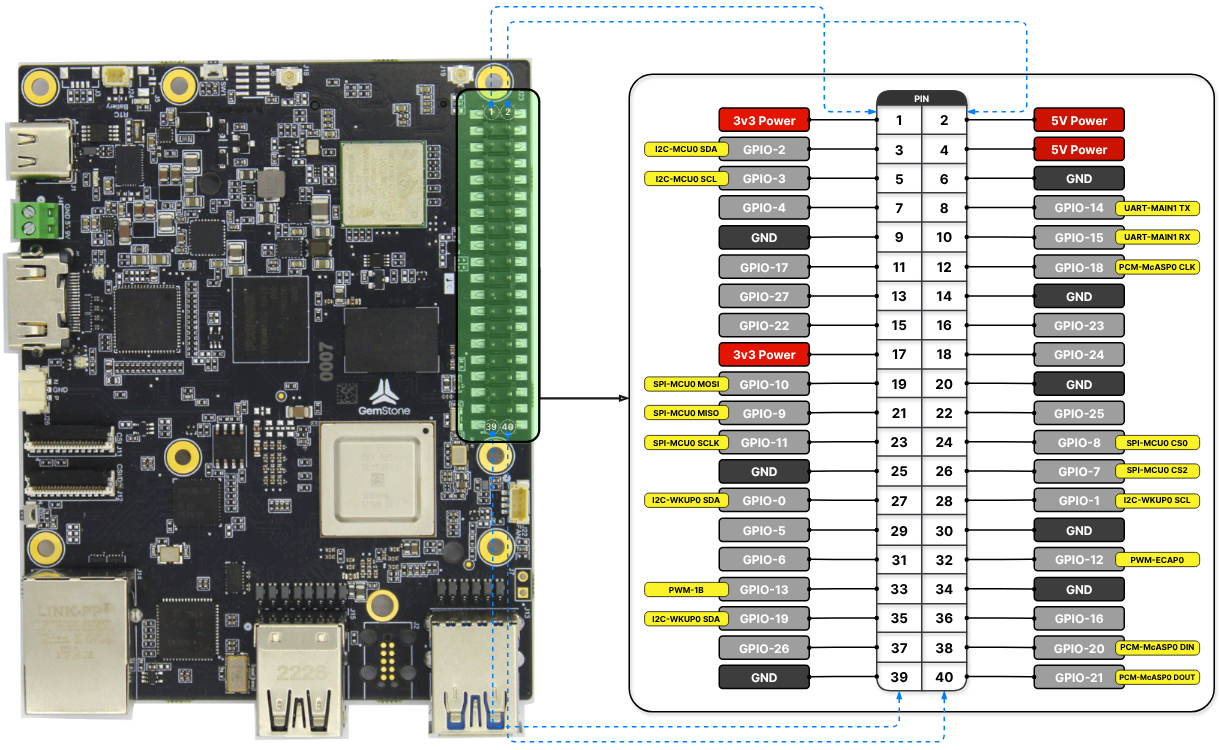
 Make the GPIO connections to the Gemstone board.
Connect to the development board using either [SSH](../../../quickstart#2-3-connecting-via-ssh-over-network) or
[VNC](../../../quickstart#2-2-remote-desktop-connection-via-vnc-from-browser).
Create Bash Shell scripts.
## 1. Turning on an LED
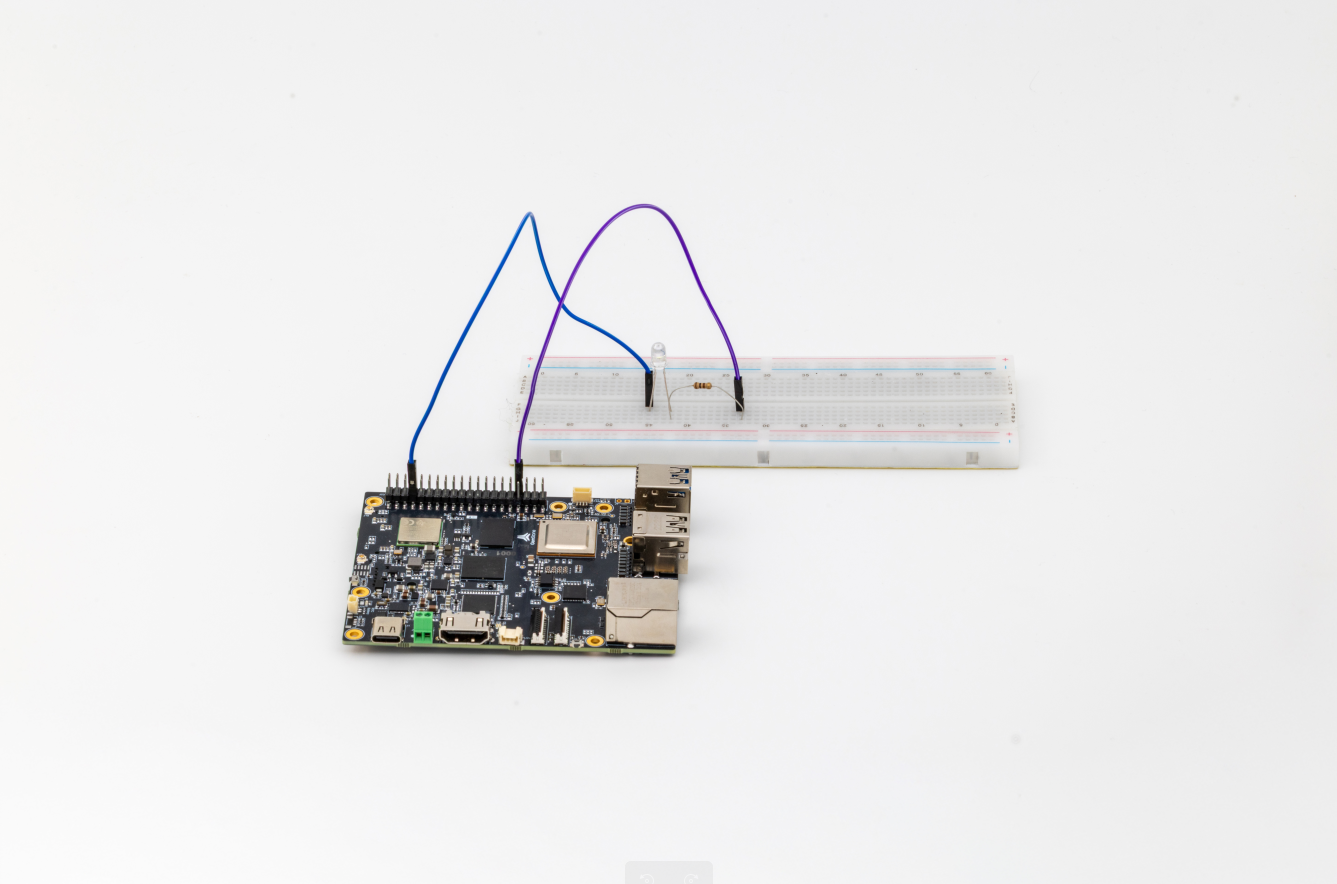
### 1.1. GPIO Connections
Connect the LED to GPIOX on the Gemstone, which is available for Input/Output, as shown below.
Make the GPIO connections to the Gemstone board.
Connect to the development board using either [SSH](../../../quickstart#2-3-connecting-via-ssh-over-network) or
[VNC](../../../quickstart#2-2-remote-desktop-connection-via-vnc-from-browser).
Create Bash Shell scripts.
## 1. Turning on an LED
### 1.1. GPIO Connections
Connect the LED to GPIOX on the Gemstone, which is available for Input/Output, as shown below.
 ### 1.2. Creating a Shell Script
After connecting to the Gemstone, create a script file for the LED blink operation.
```bash theme={"system"}
touch led-blink.sh
```
Open the `led-blink.sh` file using the `nano` text editor in the terminal interface.
```bash theme={"system"}
nano led-blink.sh
```
Copy and paste the following code into the `led-blink.sh` file.
```bash lines theme={"system"}
#!/bin/bash
while :
do
gpioset $(gpiofind GPIOX)=1
sleep 1
gpioset $(gpiofind GPIOX)=0
sleep 1
done
```
Press `CTRL+X`, then `Y` to exit the nano editor and save the file.
### 1.3. Running the Shell Script
Make the `led-blink.sh` file executable using the `chmod` command.
```bash theme={"system"}
chmod +x led-blink.sh
```
Run the `led-blink.sh` script.
```bash theme={"system"}
./led-blink.sh
```
Finally, observe the LED blinking at 1-second intervals as shown in the video below.
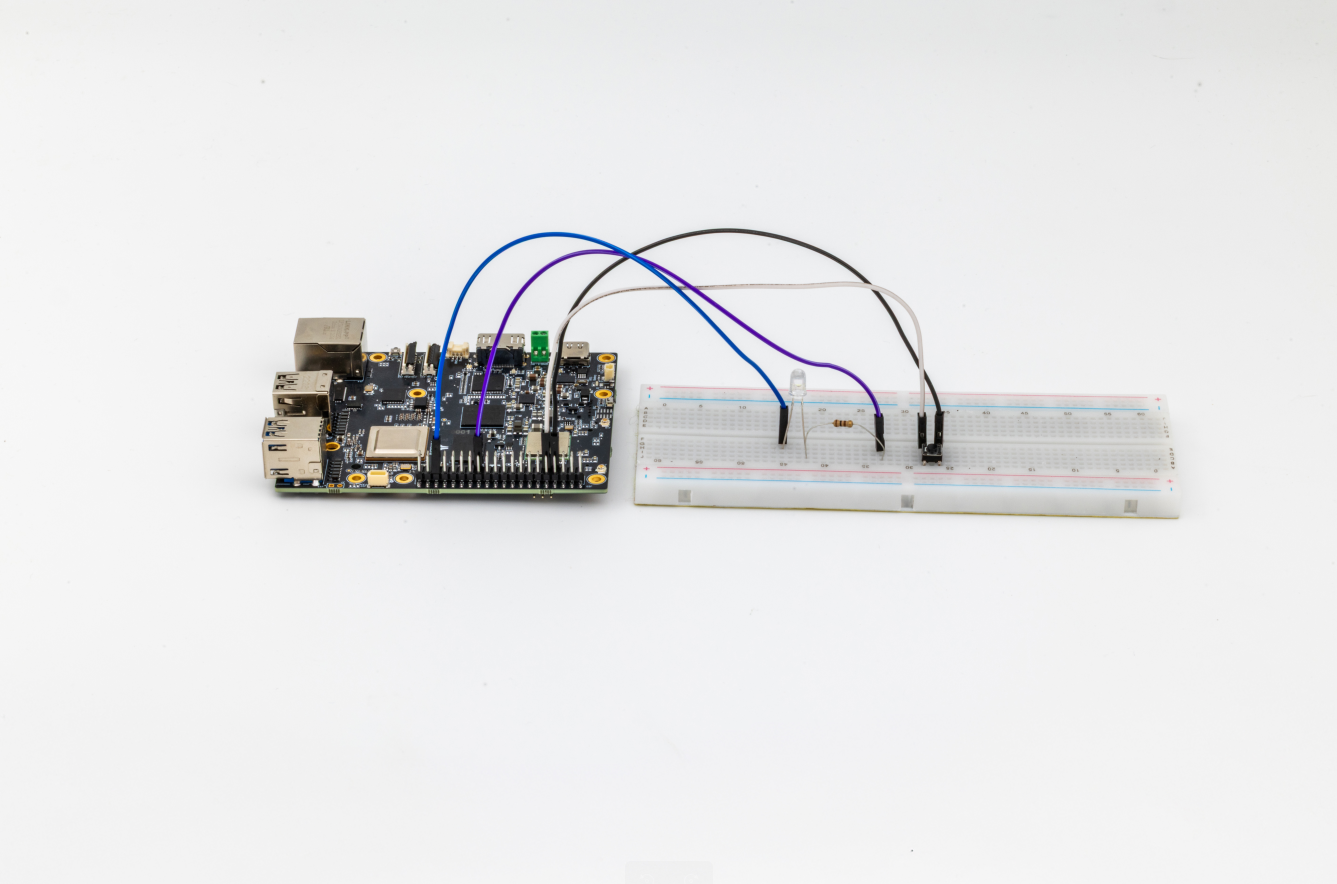
## 2. Reading a Button and Turning on an LED
### 2.1. GPIO Connections
Connect the LED to GPIOX and the button to GPIOY on the Gemstone, as shown below.
### 1.2. Creating a Shell Script
After connecting to the Gemstone, create a script file for the LED blink operation.
```bash theme={"system"}
touch led-blink.sh
```
Open the `led-blink.sh` file using the `nano` text editor in the terminal interface.
```bash theme={"system"}
nano led-blink.sh
```
Copy and paste the following code into the `led-blink.sh` file.
```bash lines theme={"system"}
#!/bin/bash
while :
do
gpioset $(gpiofind GPIOX)=1
sleep 1
gpioset $(gpiofind GPIOX)=0
sleep 1
done
```
Press `CTRL+X`, then `Y` to exit the nano editor and save the file.
### 1.3. Running the Shell Script
Make the `led-blink.sh` file executable using the `chmod` command.
```bash theme={"system"}
chmod +x led-blink.sh
```
Run the `led-blink.sh` script.
```bash theme={"system"}
./led-blink.sh
```
Finally, observe the LED blinking at 1-second intervals as shown in the video below.
## 2. Reading a Button and Turning on an LED
### 2.1. GPIO Connections
Connect the LED to GPIOX and the button to GPIOY on the Gemstone, as shown below.
 ### 2.2. Creating a Shell Script
Create the script file.
```bash theme={"system"}
touch button-led.sh
```
Open the `button-led.sh` file using the `nano` text editor in the terminal interface.
```bash theme={"system"}
nano button-led.sh
```
Copy and paste the following code into the `button-led.sh` file.
Press `CTRL+X`, then `Y` to exit the nano editor and save the file.
### 2.3. Running the Shell Script
Make the `button-led.sh` file executable using the `chmod` command.
```bash theme={"system"}
chmod +x button-led.sh
```
Run the `button-led.sh` script.
```bash theme={"system"}
./button-led.sh
```
Finally, observe the LED turning on while the button is pressed, as shown in the video below.
### 2.2. Creating a Shell Script
Create the script file.
```bash theme={"system"}
touch button-led.sh
```
Open the `button-led.sh` file using the `nano` text editor in the terminal interface.
```bash theme={"system"}
nano button-led.sh
```
Copy and paste the following code into the `button-led.sh` file.
Press `CTRL+X`, then `Y` to exit the nano editor and save the file.
### 2.3. Running the Shell Script
Make the `button-led.sh` file executable using the `chmod` command.
```bash theme={"system"}
chmod +x button-led.sh
```
Run the `button-led.sh` script.
```bash theme={"system"}
./button-led.sh
```
Finally, observe the LED turning on while the button is pressed, as shown in the video below.