> ## Documentation Index
> Fetch the complete documentation index at: https://docs.t3gemstone.org/llms.txt
> Use this file to discover all available pages before exploring further.
# Home Assistant
> T3 Gemstone O1 Smart Home Hub Management System
 By the end of this section, you will have knowledge about the following topics:
* **Home Assistant** smart home system installation on the T3 Gemstone O1 development board
* Connecting sensors using the Deneyap Kart and providing home automation to develop smart home applications with this project
## 1. Introduction
Today, controlling home automation data and securing smart devices is more important than ever.
You might want to manage your lighting, security cameras, smart plugs, and sensors in a centralized system
without depending on major cloud providers like Amazon, Google, Xiaomi, or Tuya.
To do this, you need to host your own smart home server on your own device and control your devices over your local network.
However, running such a hub in your home brings technical challenges: enabling communication between devices from different brands,
providing secure remote access from outside the world, and keeping the system continuously operational.
These problems are often solved with complex configurations and high-cost hardware.
The T3 Gemstone O1 development board, with its Home Assistant integration, provides an easy, cost-effective, and secure solution to these problems.
## 2. Home Assistant Installation
Home Assistant is an open-source smart home and automation platform. It offers features such as monitoring sensor data, controlling lights, plugs, and other devices, creating automated scenarios, and providing mobile access—all in a single system.
The Home Assistant installation only works on **Debian** images. Images of other distributions
such as Ubuntu are not supported, because the Home Assistant Supervisor service does not work properly on them.
Therefore, make sure you select a Debian image when writing the image to the board, as explained in the
[Select the operating system to install on the board](/en/quickstart#1-2-4-select-the-operating-system-to-install-on-the-board) section.
After establishing a [terminal connection](/en/quickstart/#2-explore-gemstone) to the T3 Gemstone O1 development board, start the Docker installation with the following command:
```bash theme={"system"}
sudo curl -fsSL https://get.docker.com | sudo sh
```
After the Docker installation is complete, you can install **Home Assistant**.
```bash theme={"system"}
sudo apt install homeassistant-supervised
```
After the installation is complete, you need to reboot the development board so that the Home Assistant services
can start properly.
```bash theme={"system"}
sudo reboot
```
After the board restarts, it may take 5-10 minutes for the Supervisor to download and start all services, depending on your internet speed.
You can monitor the status with the following command:
```bash theme={"system"}
sudo docker logs -f hassio_supervisor
```
When you see that the `hassio_supervisor` and `homeassistant` services are in the `Up` (Running) state on the screen, you can access the interface from your browser:
`http://gemstone.local:8123` or `http://:8123`
To access from outside your home, you can use the [Tailscale](/en/projects/cloud#3-external-access) network for which an installation guide is available, and securely connect to your system via your Tailscale IP address (`http://:8123`).
## 3. Accessing the Home Assistant Interface and Initial Setup
Once the system services are active, when you first access the interface via your browser at `http://gemstone.local:8123` or
`http://:8123`, Home Assistant will greet you with a setup wizard.
At this stage, you can create your administrator account and complete the basic configuration of your smart home.
You can easily complete the interface setup by following the images below:
If you encounter an error connecting to the interface, you can resolve it by changing `https://` in the address bar to `http://`.
By the end of this section, you will have knowledge about the following topics:
* **Home Assistant** smart home system installation on the T3 Gemstone O1 development board
* Connecting sensors using the Deneyap Kart and providing home automation to develop smart home applications with this project
## 1. Introduction
Today, controlling home automation data and securing smart devices is more important than ever.
You might want to manage your lighting, security cameras, smart plugs, and sensors in a centralized system
without depending on major cloud providers like Amazon, Google, Xiaomi, or Tuya.
To do this, you need to host your own smart home server on your own device and control your devices over your local network.
However, running such a hub in your home brings technical challenges: enabling communication between devices from different brands,
providing secure remote access from outside the world, and keeping the system continuously operational.
These problems are often solved with complex configurations and high-cost hardware.
The T3 Gemstone O1 development board, with its Home Assistant integration, provides an easy, cost-effective, and secure solution to these problems.
## 2. Home Assistant Installation
Home Assistant is an open-source smart home and automation platform. It offers features such as monitoring sensor data, controlling lights, plugs, and other devices, creating automated scenarios, and providing mobile access—all in a single system.
The Home Assistant installation only works on **Debian** images. Images of other distributions
such as Ubuntu are not supported, because the Home Assistant Supervisor service does not work properly on them.
Therefore, make sure you select a Debian image when writing the image to the board, as explained in the
[Select the operating system to install on the board](/en/quickstart#1-2-4-select-the-operating-system-to-install-on-the-board) section.
After establishing a [terminal connection](/en/quickstart/#2-explore-gemstone) to the T3 Gemstone O1 development board, start the Docker installation with the following command:
```bash theme={"system"}
sudo curl -fsSL https://get.docker.com | sudo sh
```
After the Docker installation is complete, you can install **Home Assistant**.
```bash theme={"system"}
sudo apt install homeassistant-supervised
```
After the installation is complete, you need to reboot the development board so that the Home Assistant services
can start properly.
```bash theme={"system"}
sudo reboot
```
After the board restarts, it may take 5-10 minutes for the Supervisor to download and start all services, depending on your internet speed.
You can monitor the status with the following command:
```bash theme={"system"}
sudo docker logs -f hassio_supervisor
```
When you see that the `hassio_supervisor` and `homeassistant` services are in the `Up` (Running) state on the screen, you can access the interface from your browser:
`http://gemstone.local:8123` or `http://:8123`
To access from outside your home, you can use the [Tailscale](/en/projects/cloud#3-external-access) network for which an installation guide is available, and securely connect to your system via your Tailscale IP address (`http://:8123`).
## 3. Accessing the Home Assistant Interface and Initial Setup
Once the system services are active, when you first access the interface via your browser at `http://gemstone.local:8123` or
`http://:8123`, Home Assistant will greet you with a setup wizard.
At this stage, you can create your administrator account and complete the basic configuration of your smart home.
You can easily complete the interface setup by following the images below:
If you encounter an error connecting to the interface, you can resolve it by changing `https://` in the address bar to `http://`.
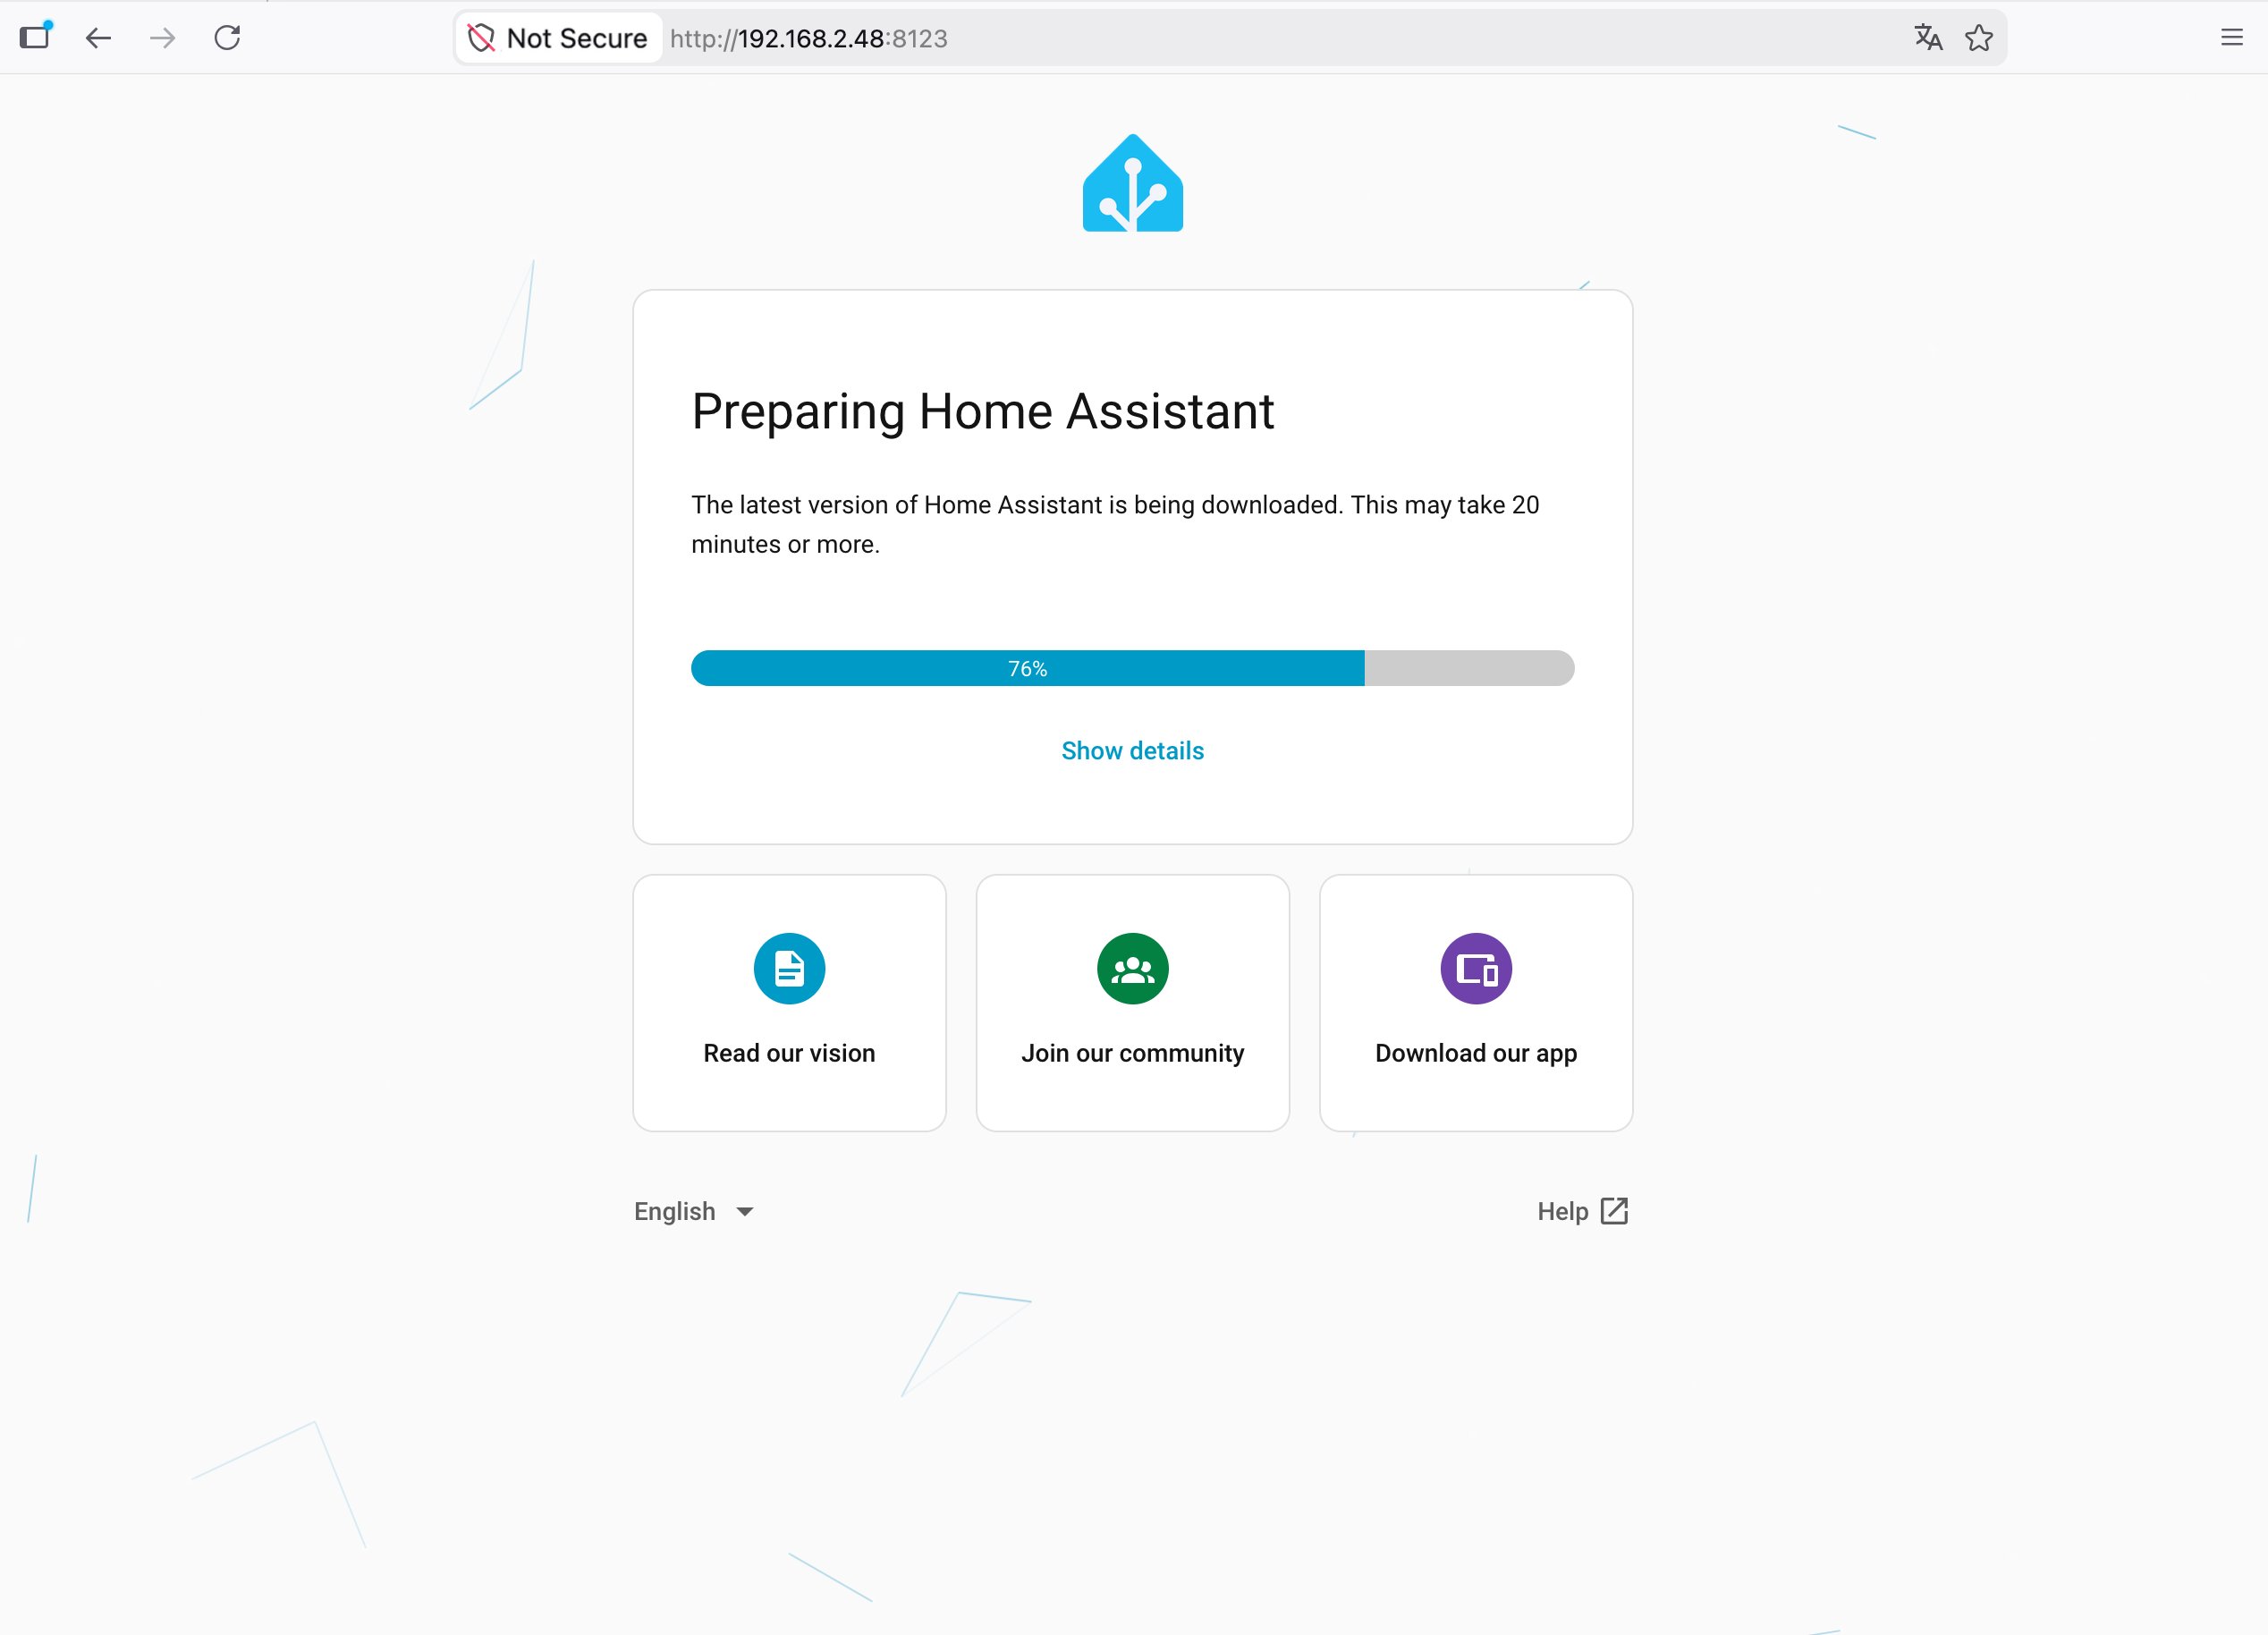 When you enter the address, you will see the Home Assistant preparing screen. The screen displays an estimated time.
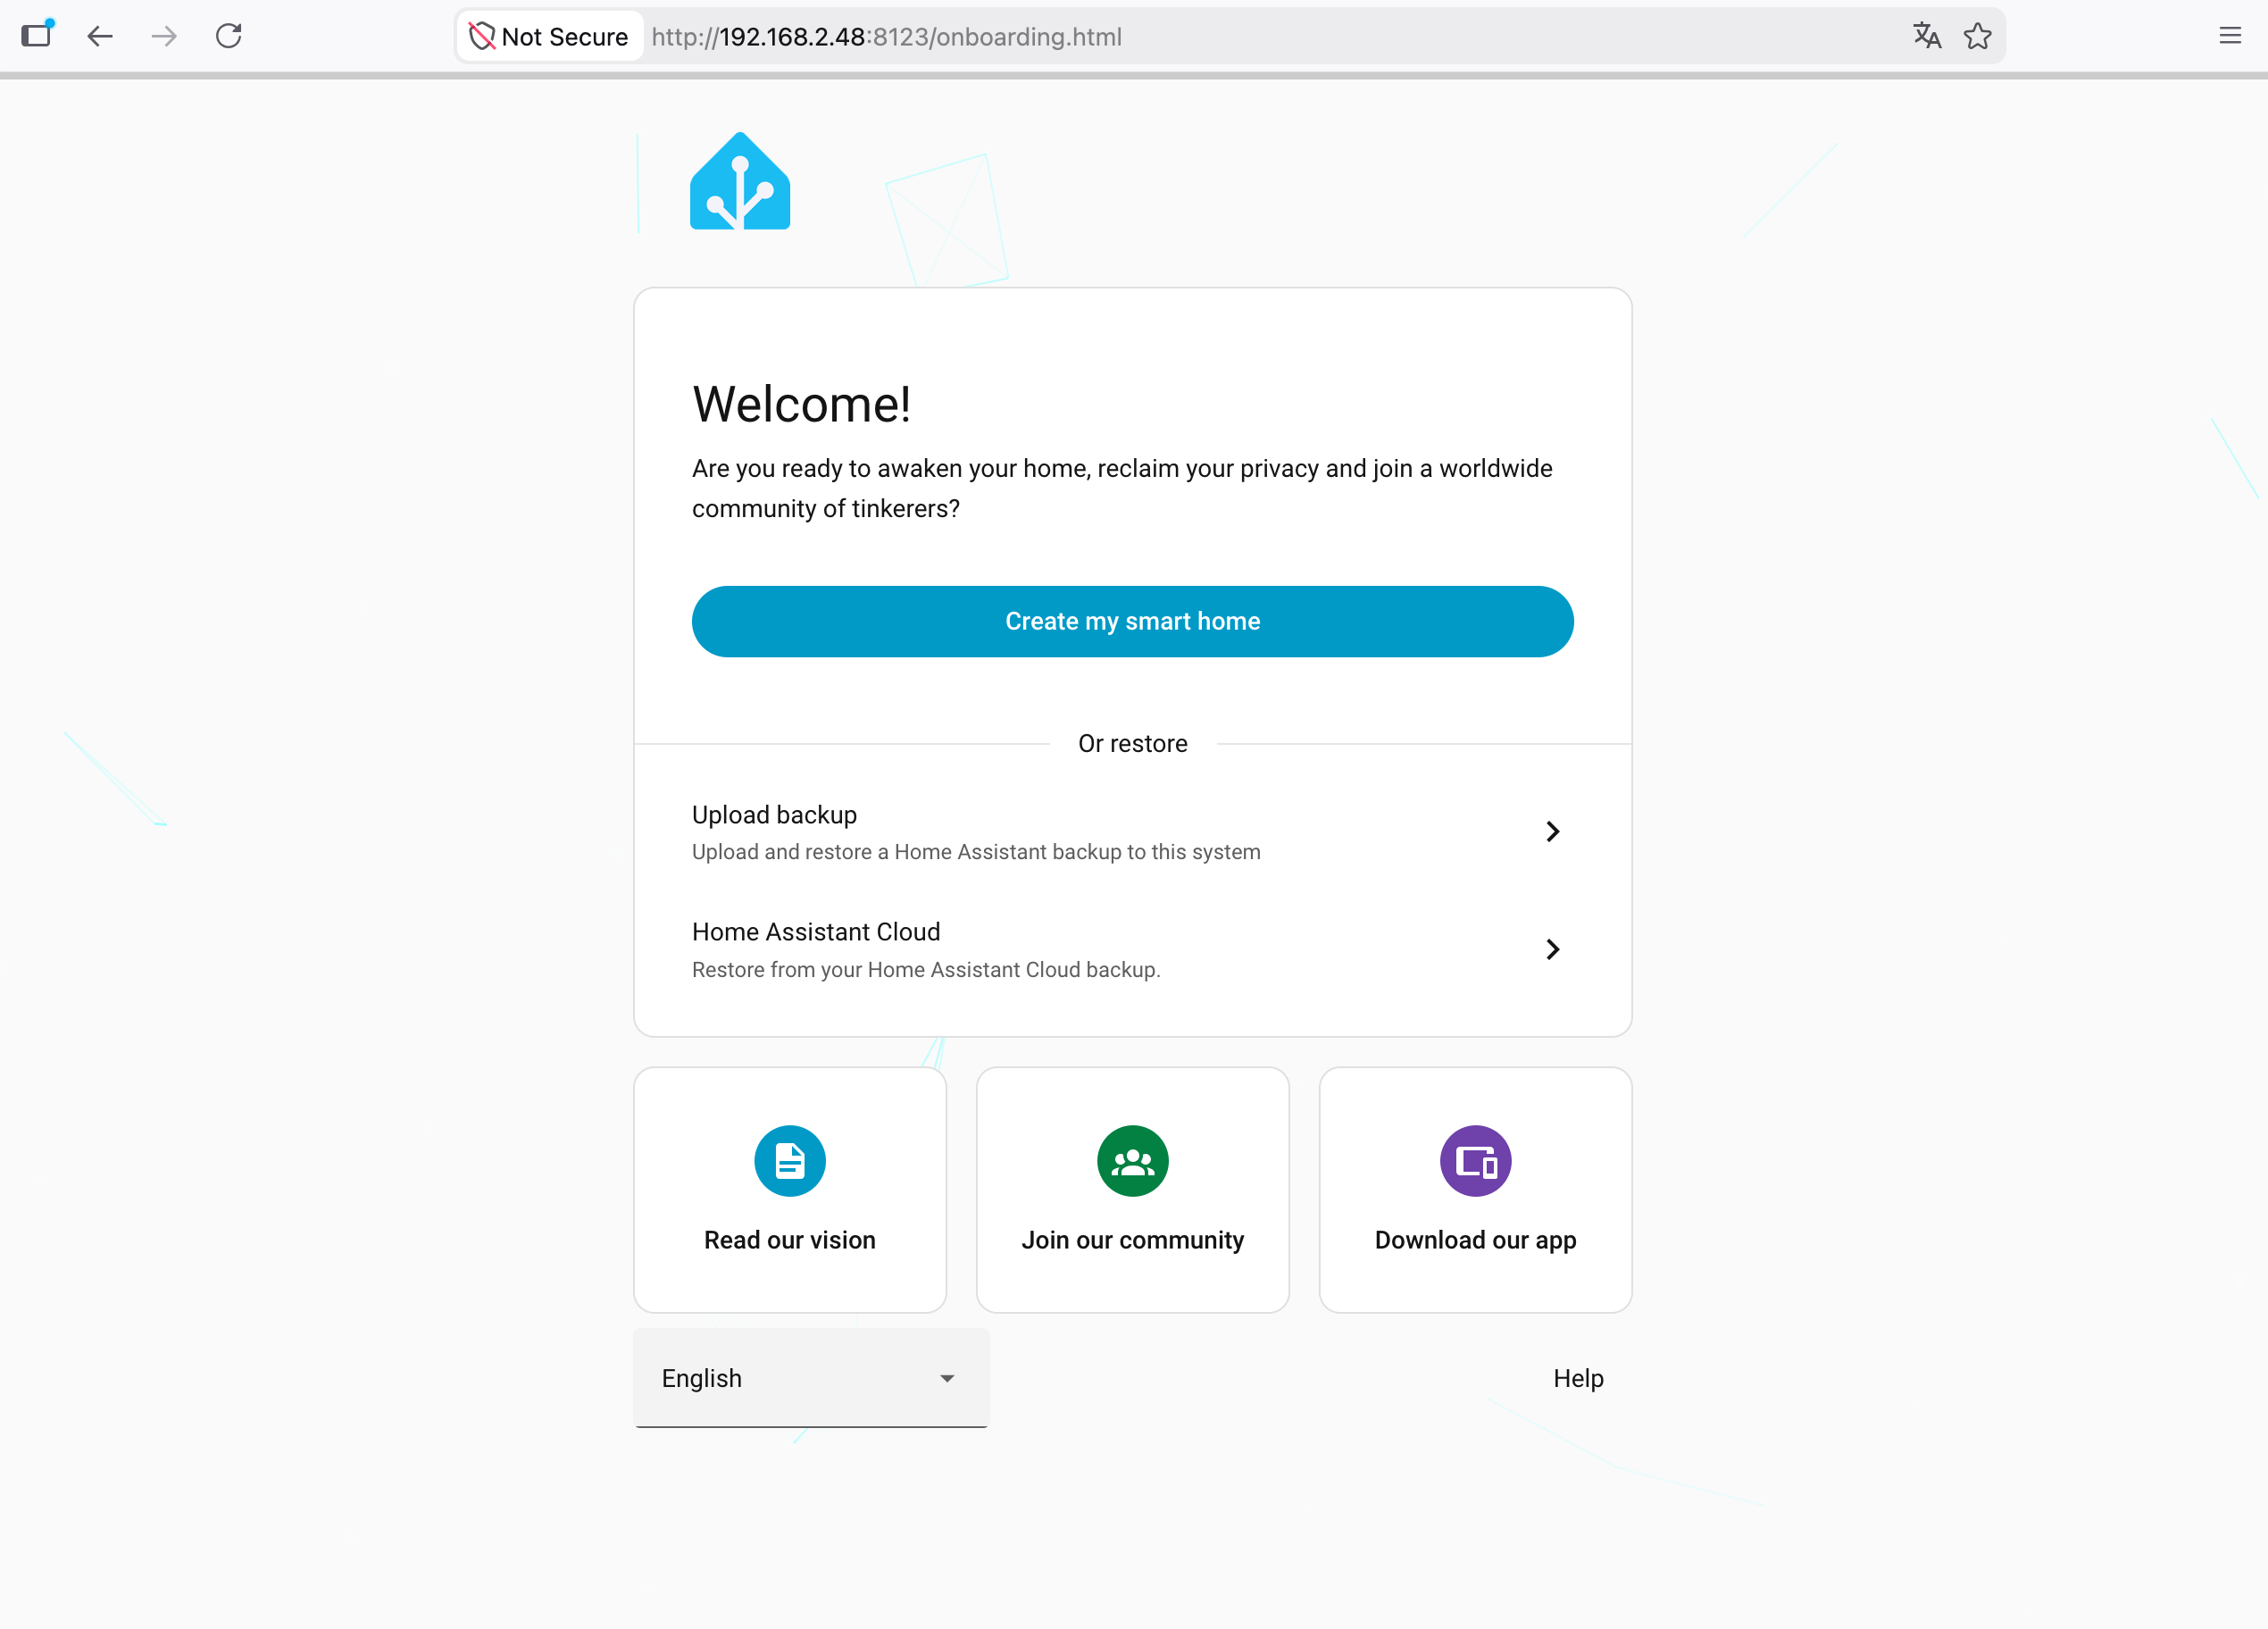 If you are setting up for the first time, you can proceed with the setup from the **Create my smart home** section.
If you have installed before and have backups, you can proceed with the options at the bottom.
If you are setting up for the first time, you can proceed with the setup from the **Create my smart home** section.
If you have installed before and have backups, you can proceed with the options at the bottom.
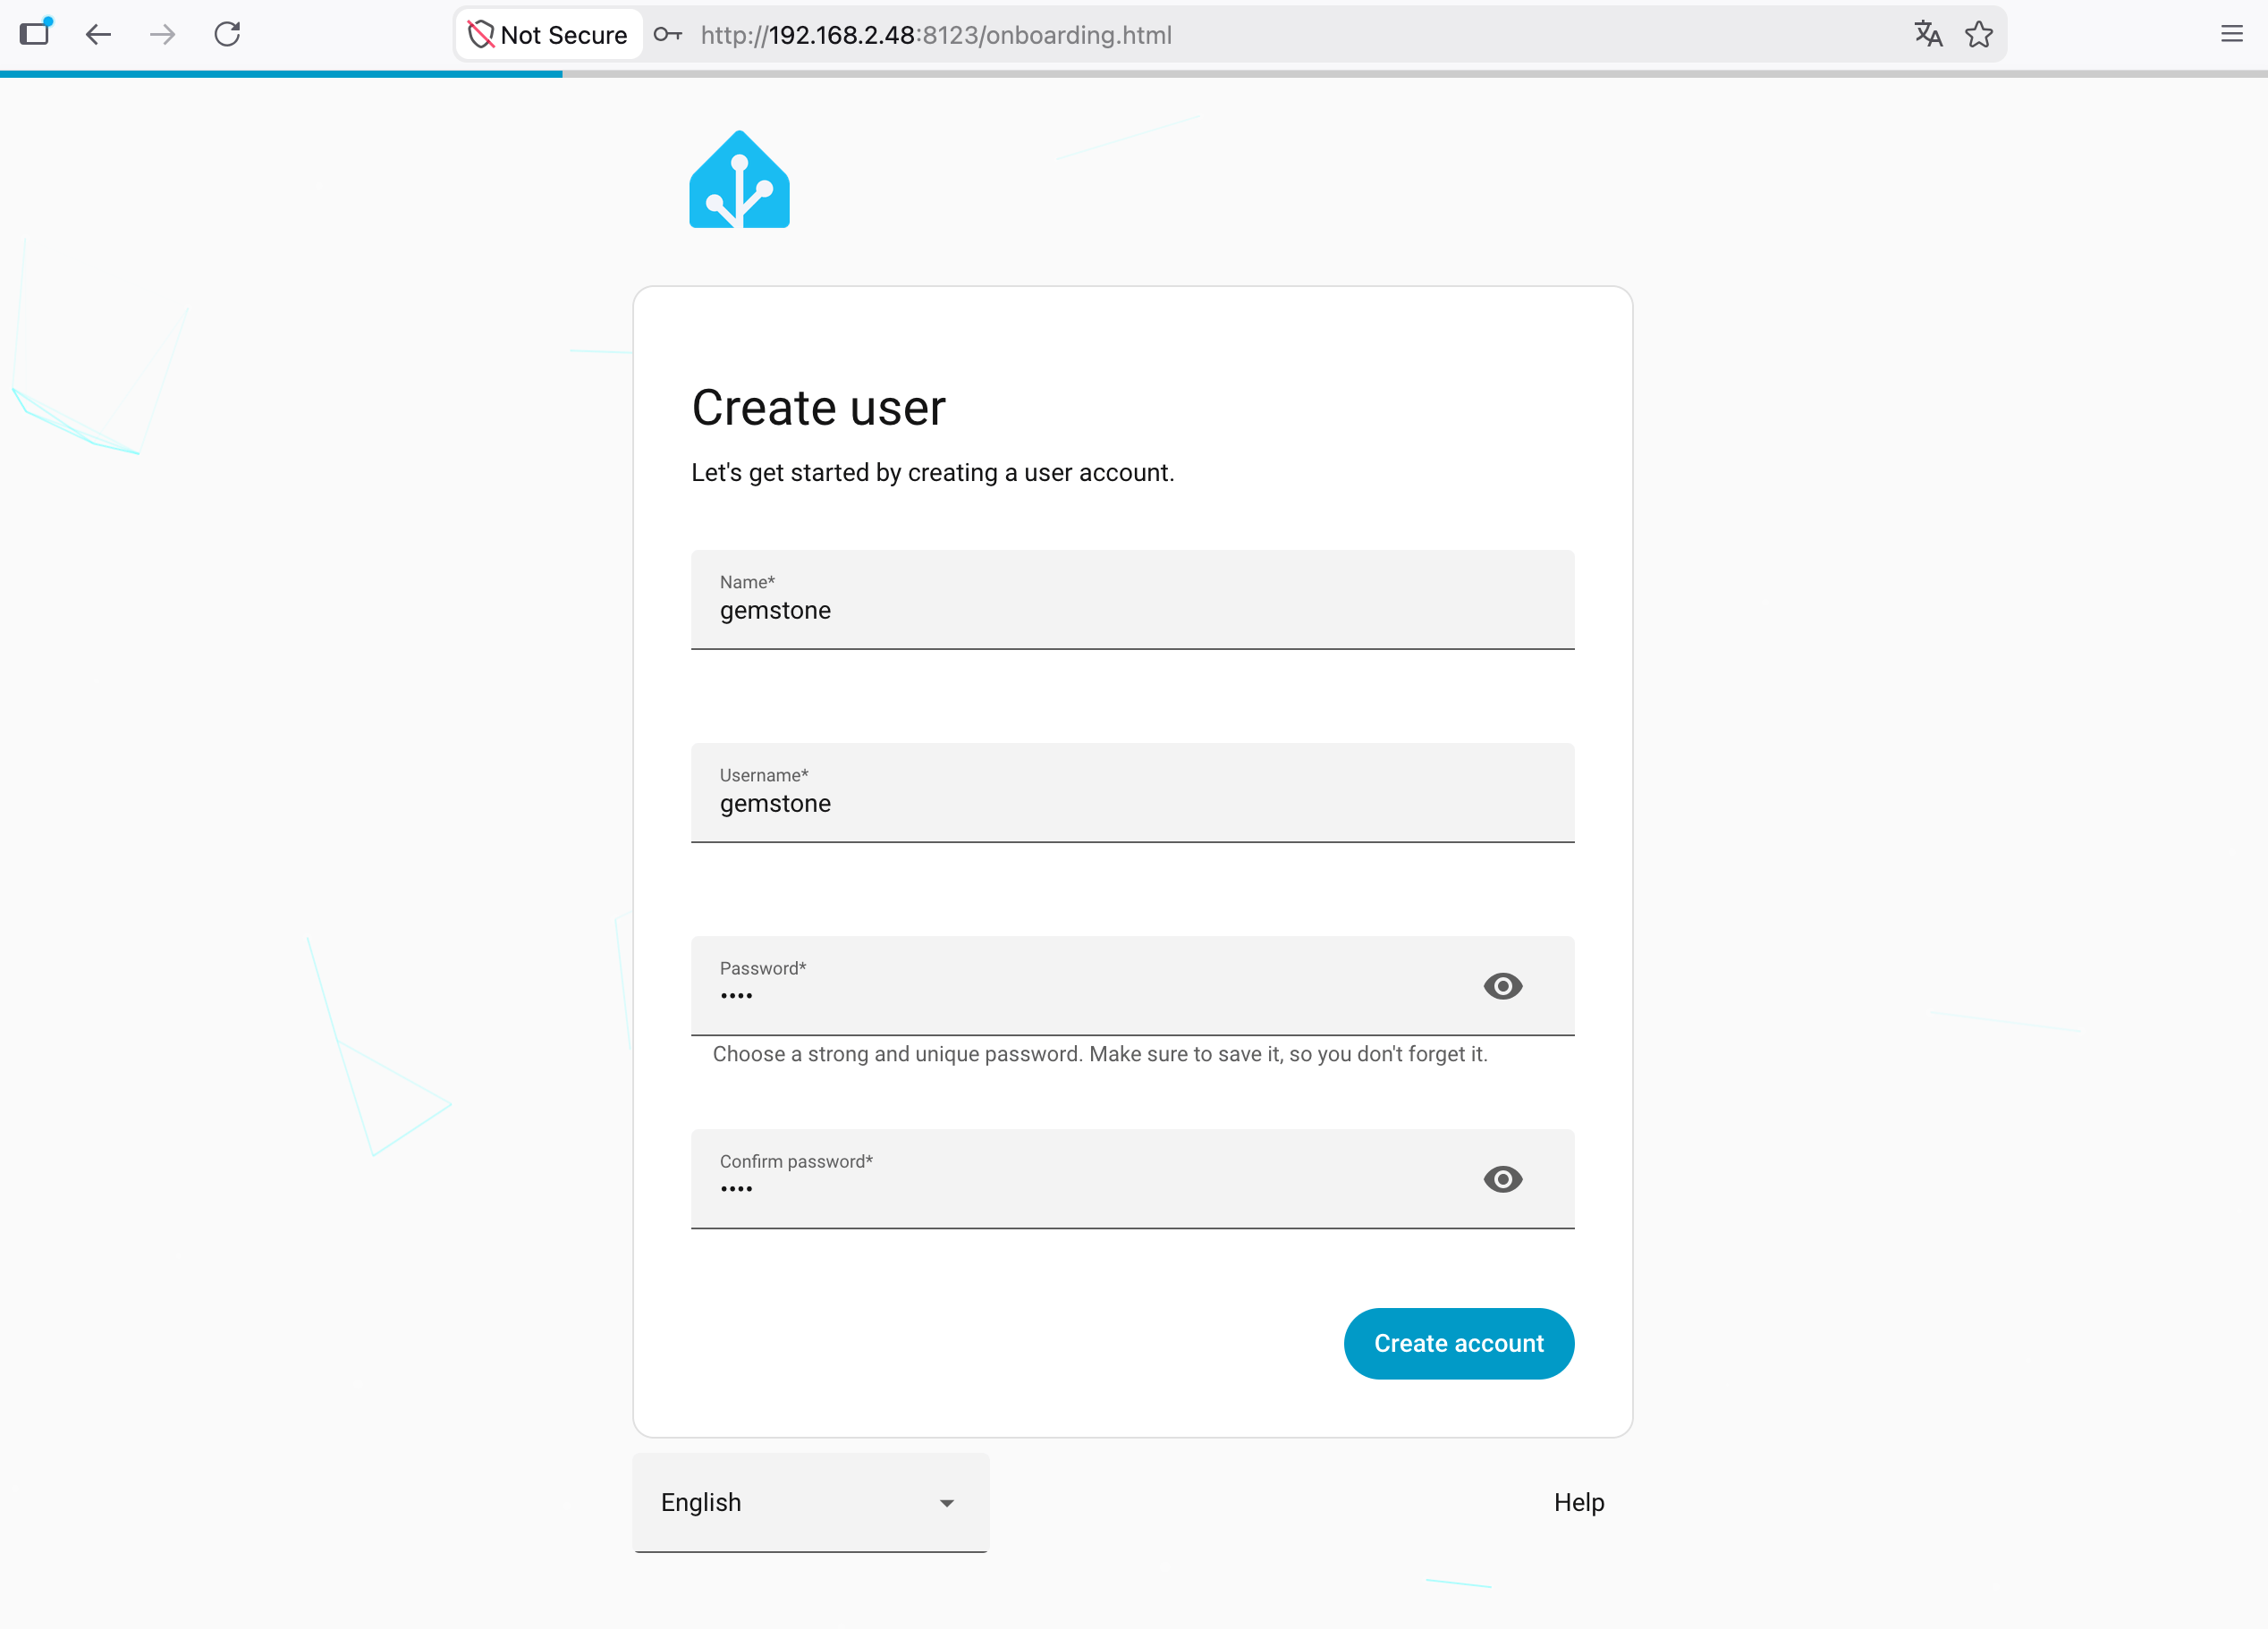 After entering your name, username, and password, click the **Create Account** button to create your account.
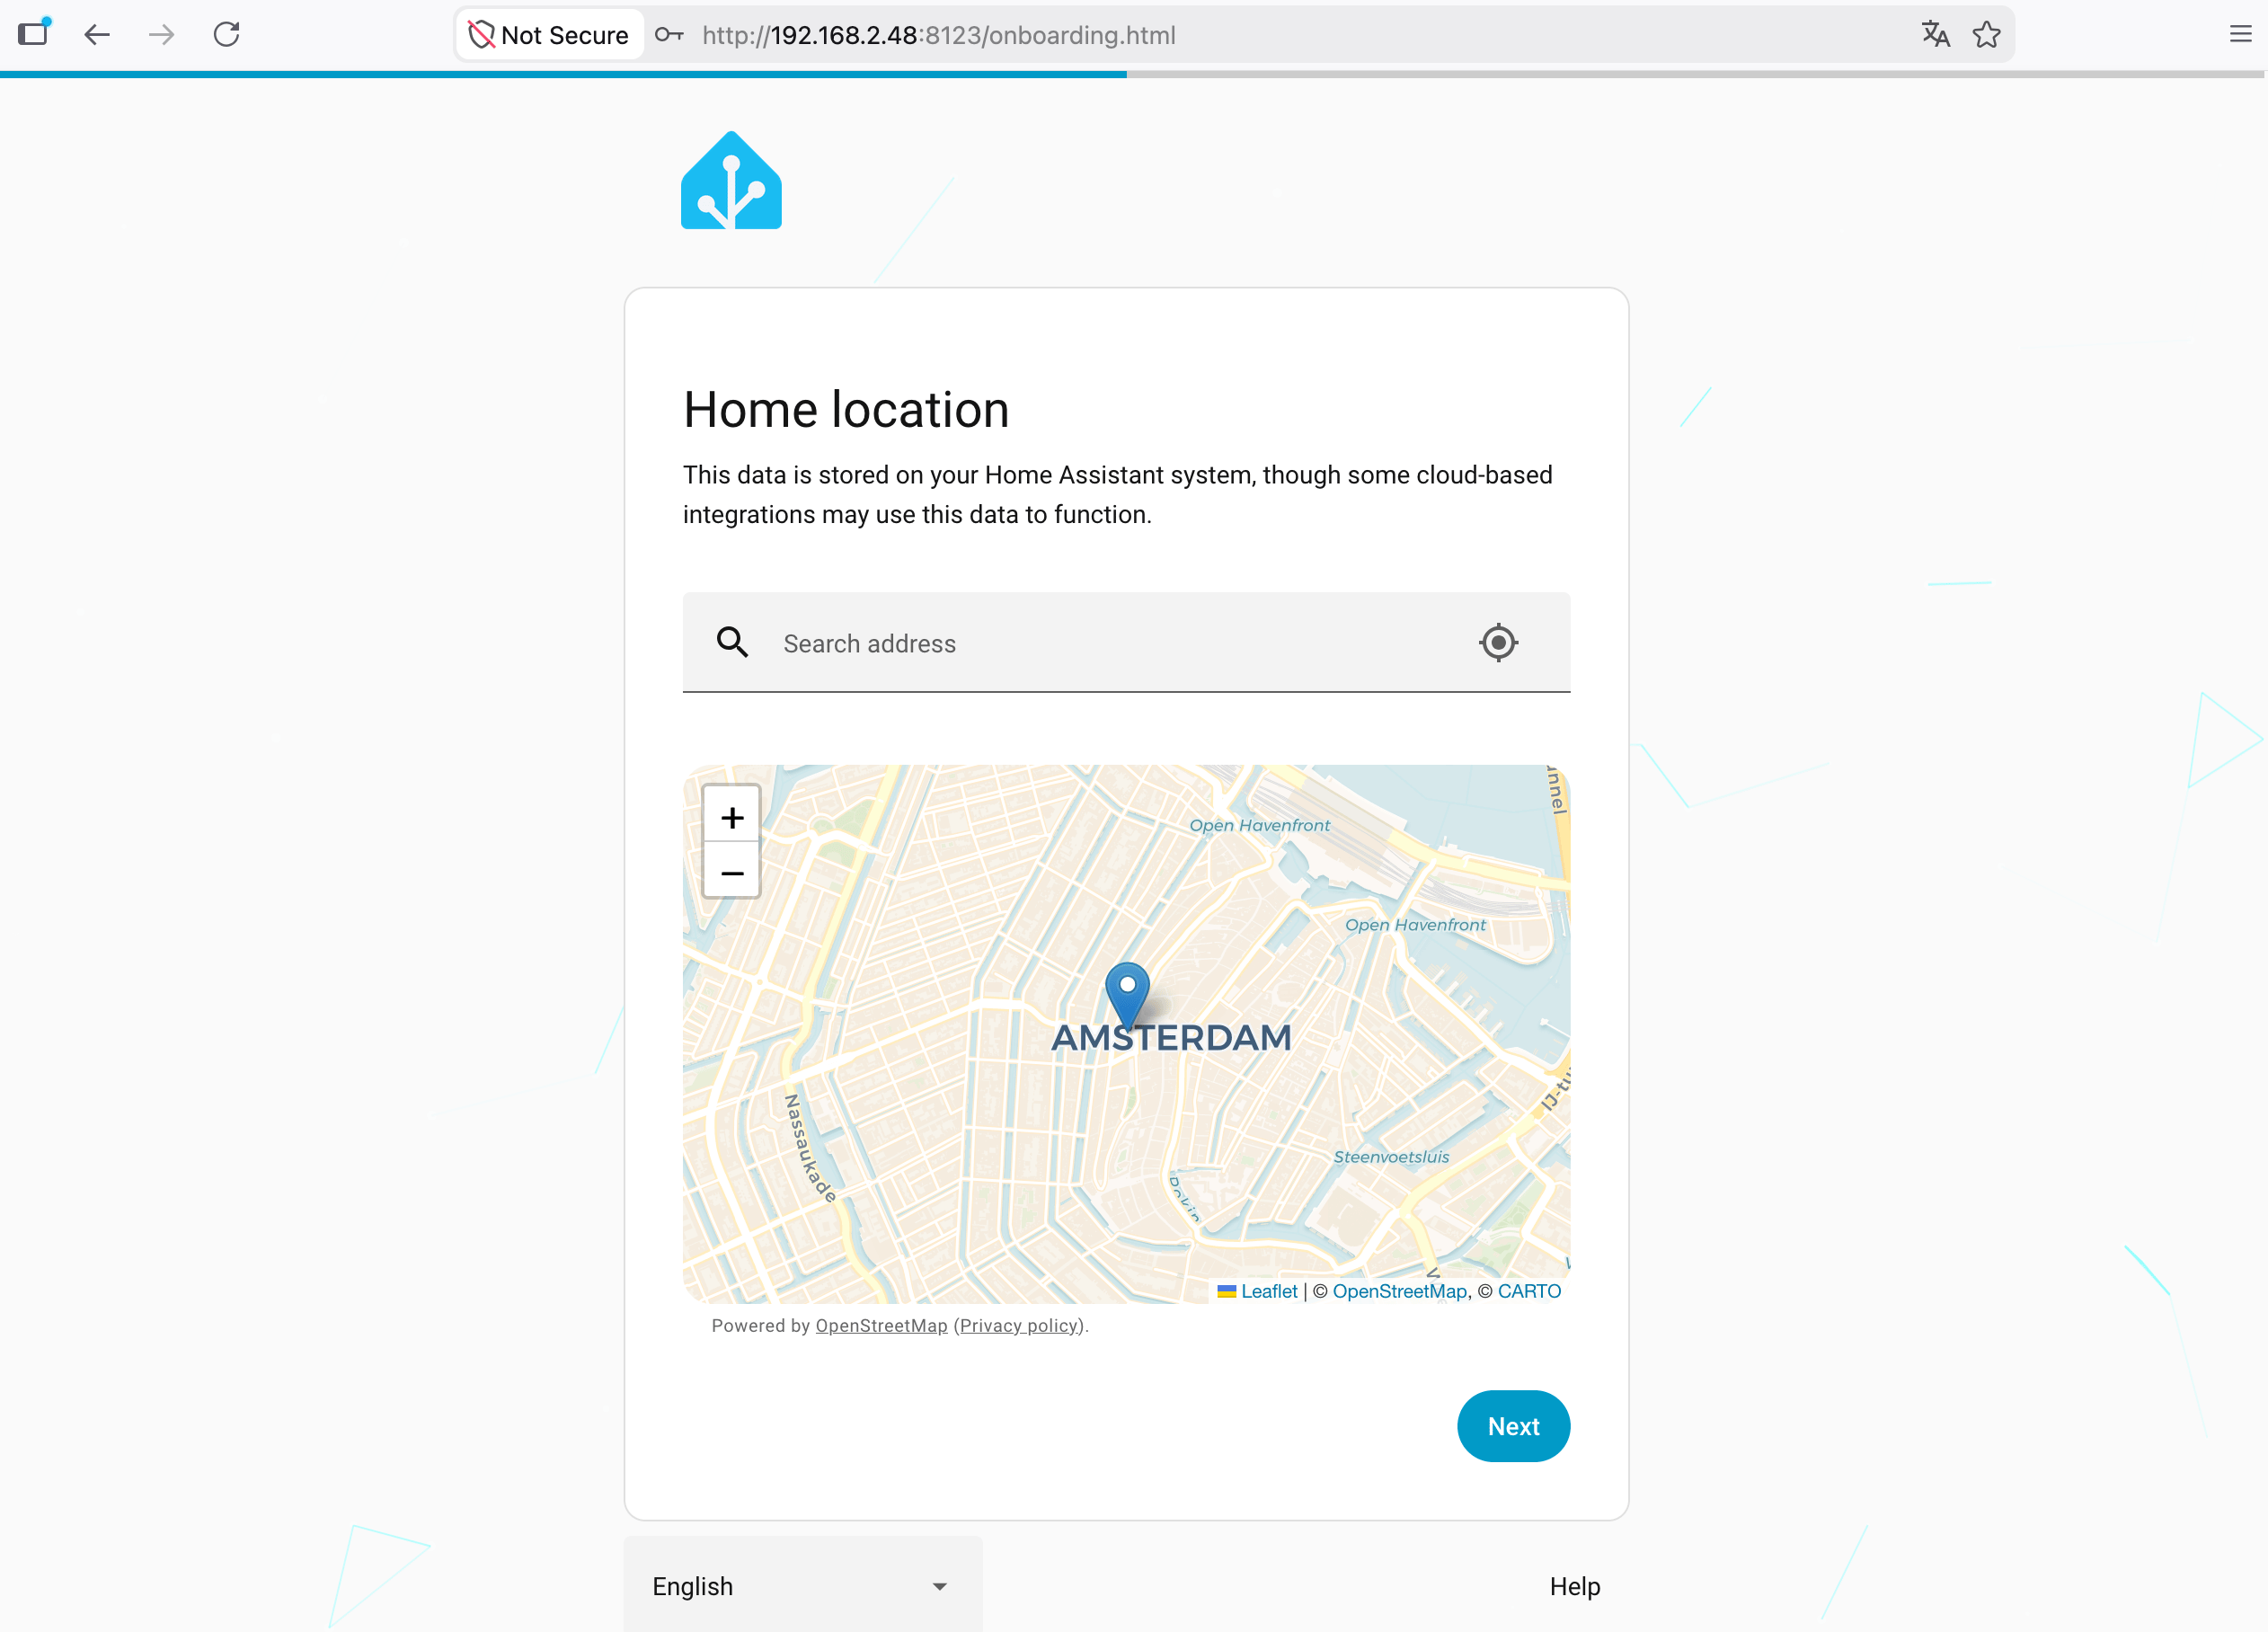 You can select the location of your device, i.e., your **Home Location**.
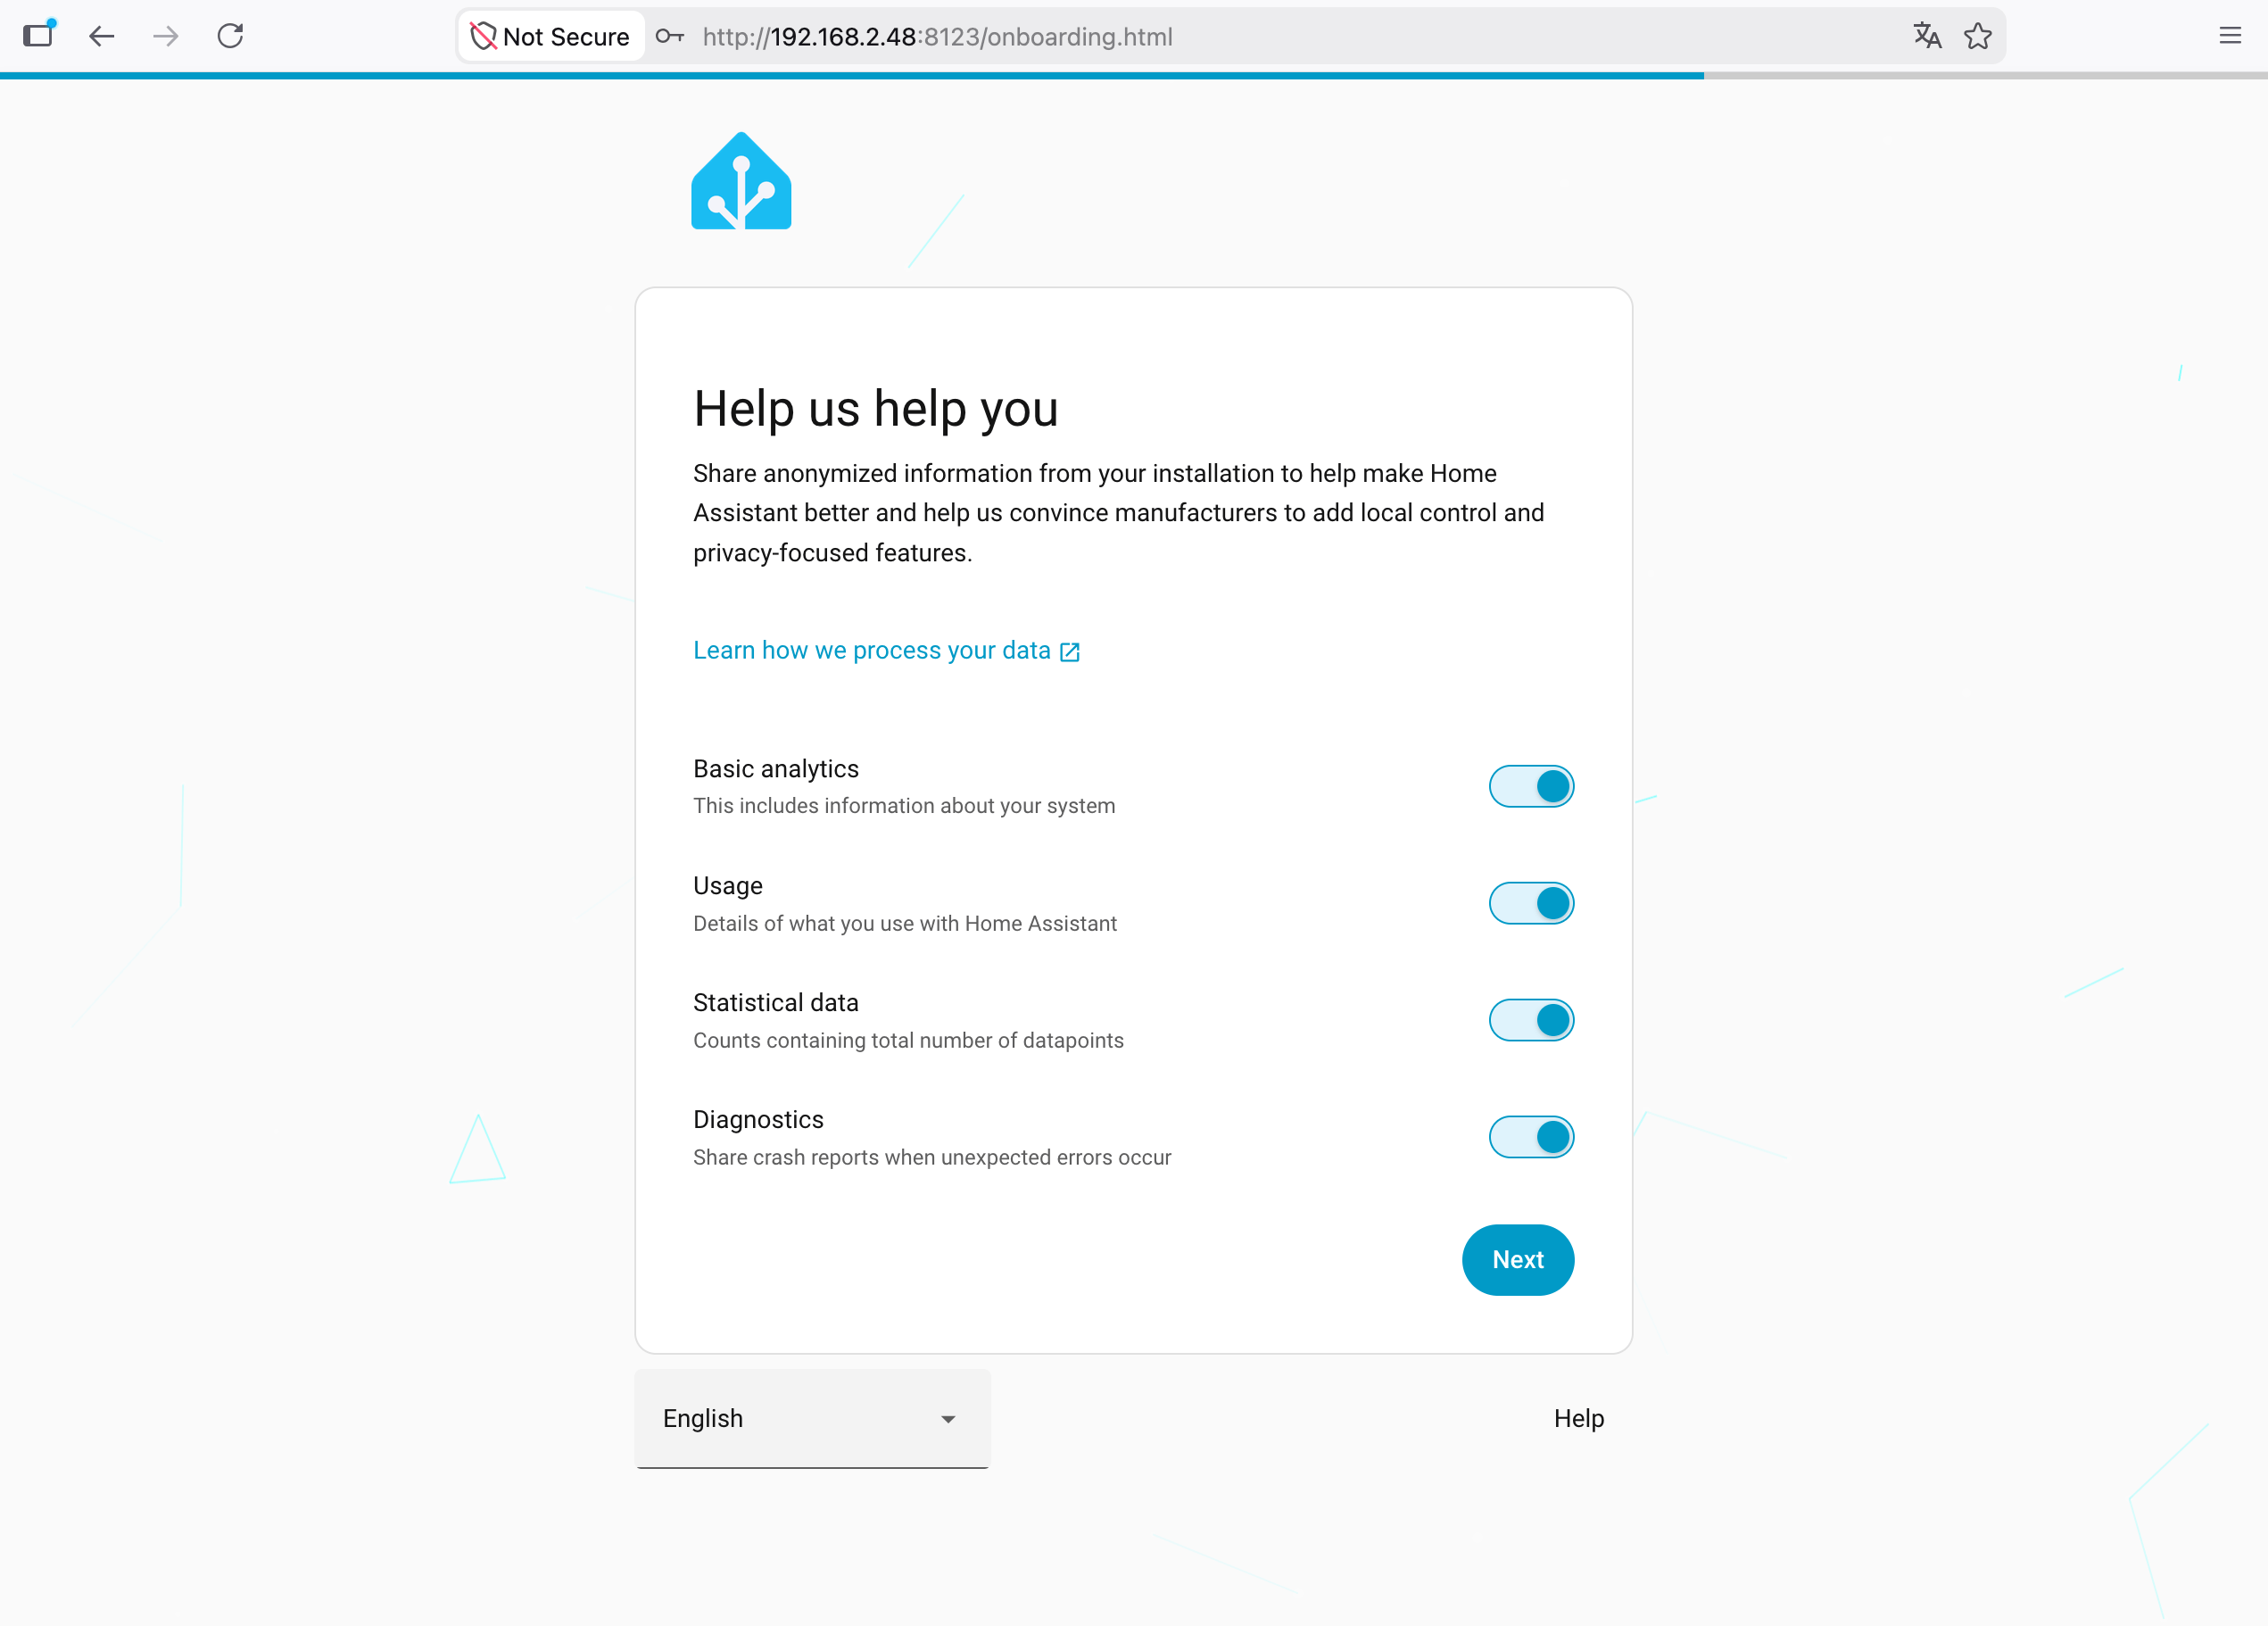 You need to give your consent for Home Assistant to use your data. You can continue with these settings enabled or disabled.
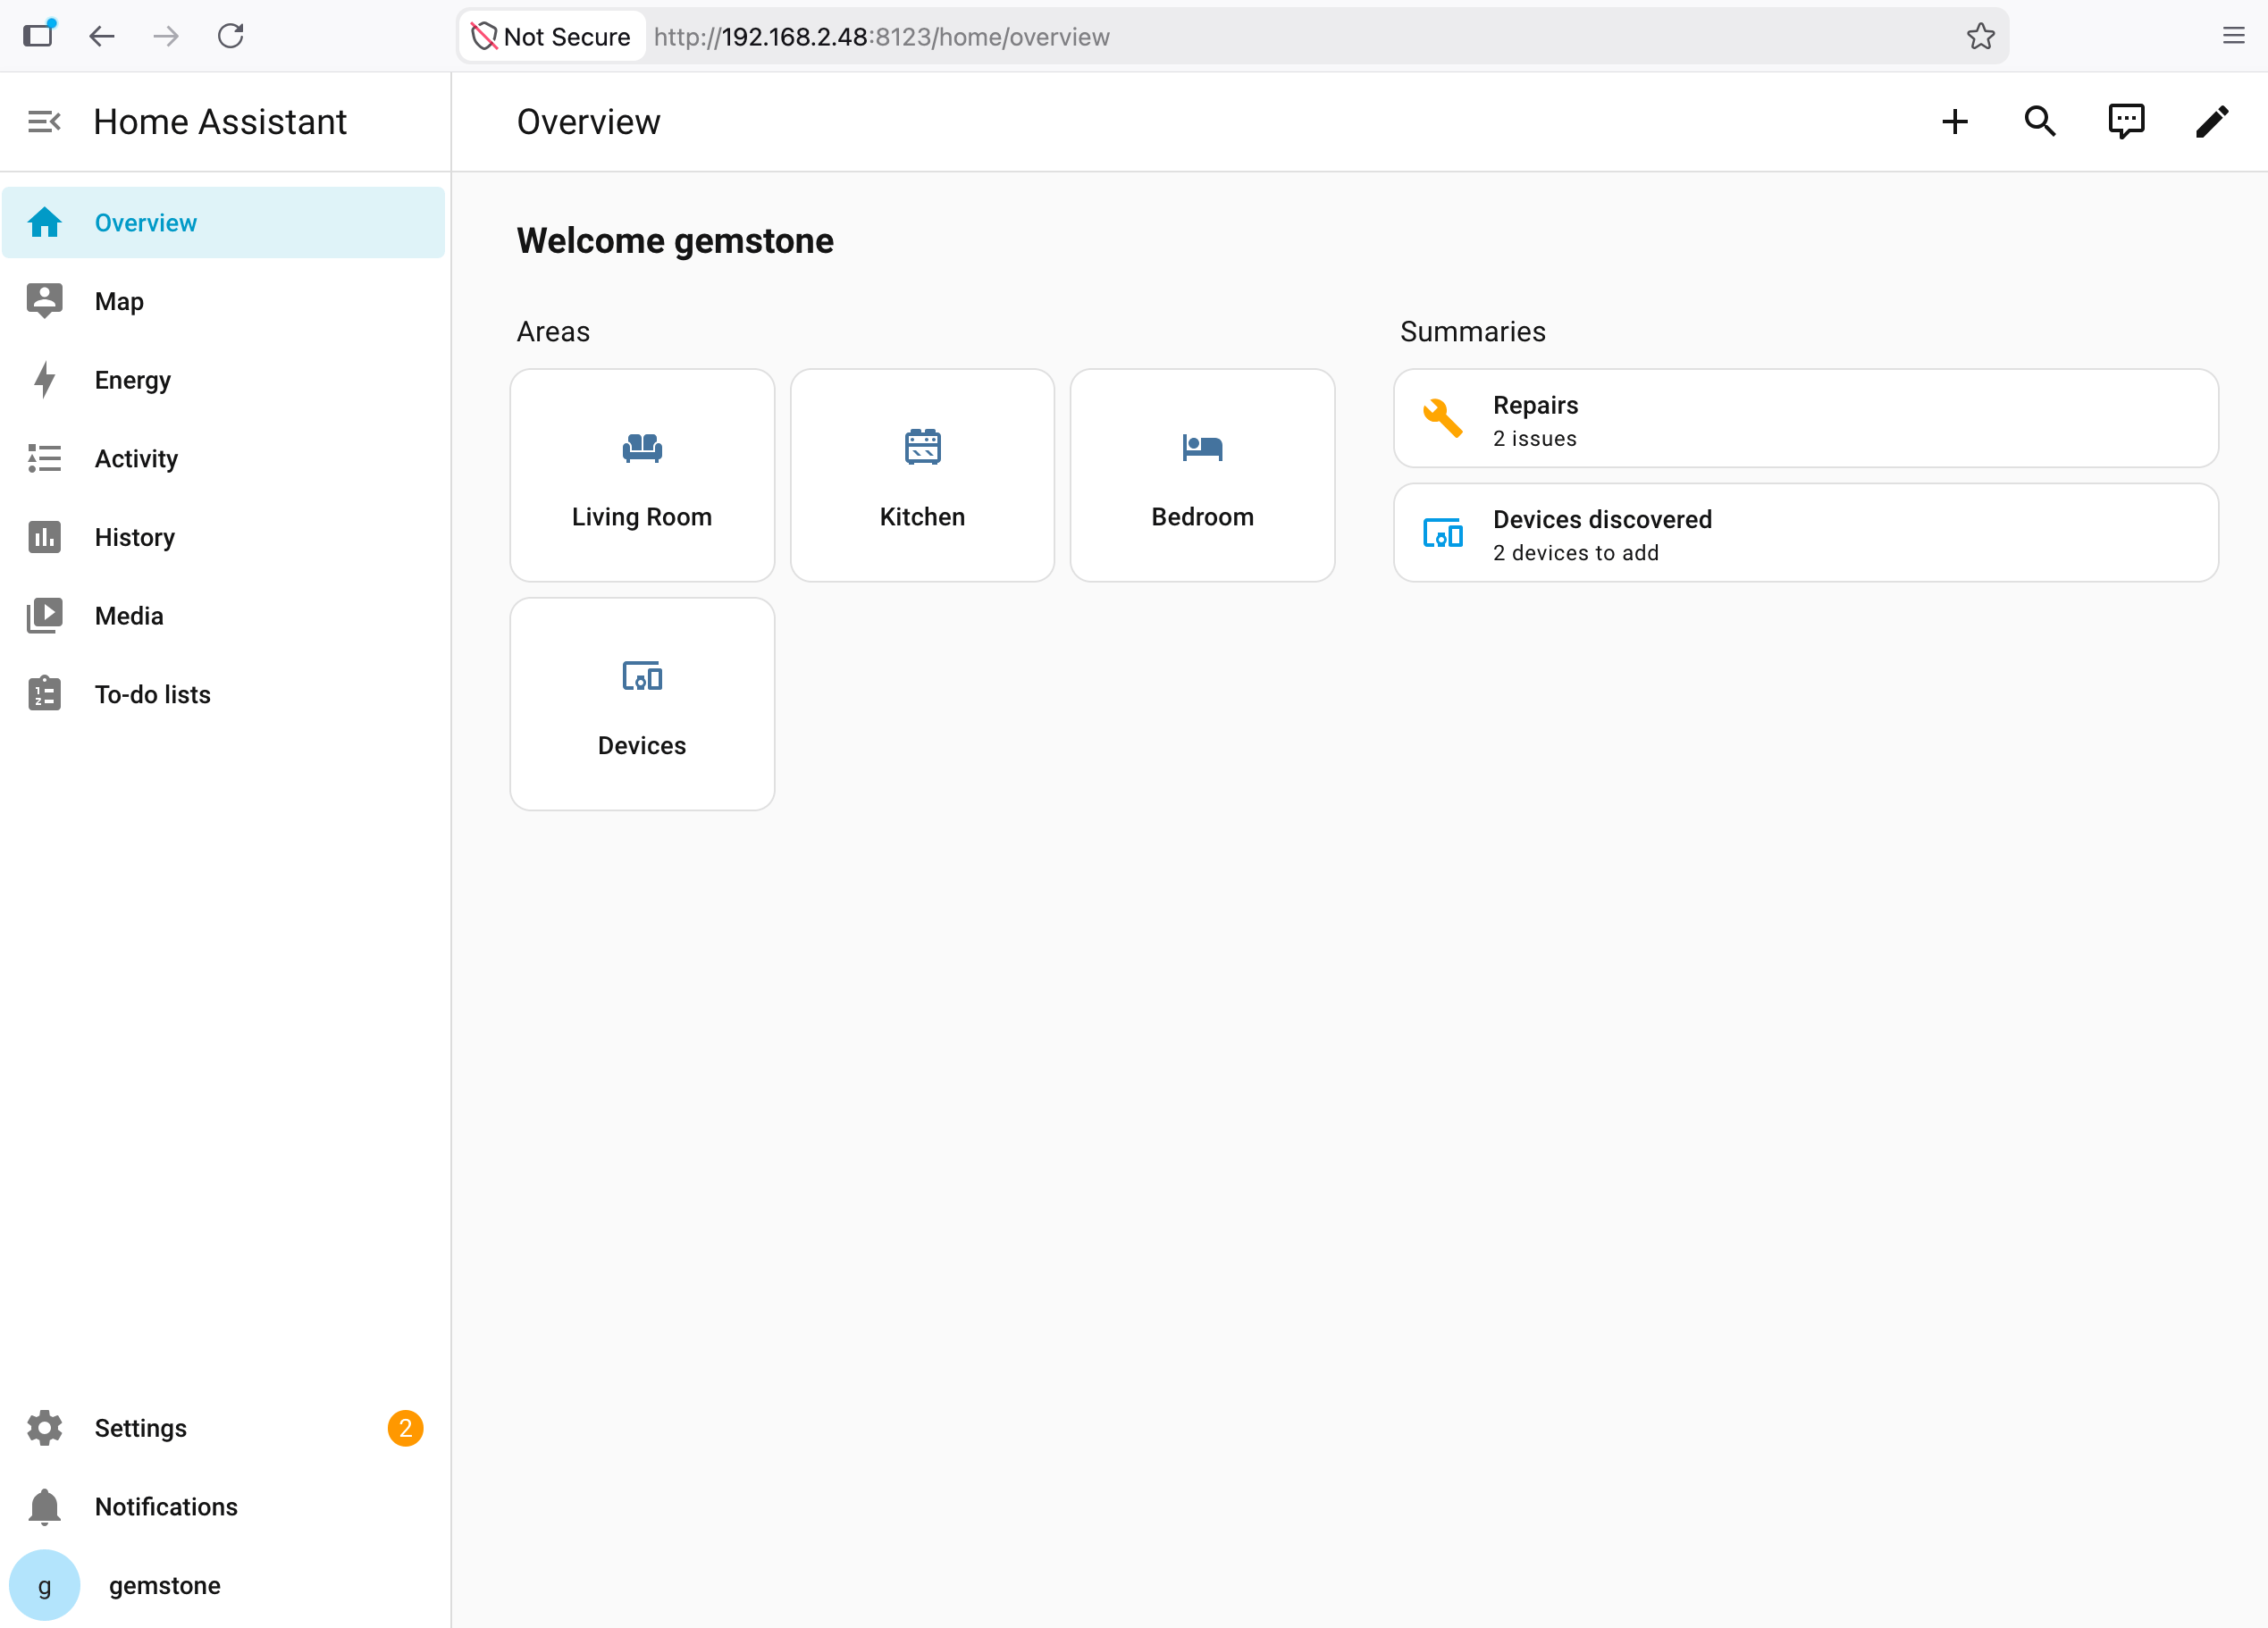 Congratulations! You have successfully completed the setup steps and are now on the Home Assistant main screen. You can now freely configure the hub of your smart home on the T3 Gemstone O1 and start managing your devices.
## 4. Sensor Integration with Deneyap Kart
This section covers the steps for connecting a motion sensor to the Deneyap Kart 1A V2 development board and integrating this sensor into the Home Assistant platform.
### 4.1 Installing ESPHome in Home Assistant
After opening the menu on the left side, click on the Settings option.
Congratulations! You have successfully completed the setup steps and are now on the Home Assistant main screen. You can now freely configure the hub of your smart home on the T3 Gemstone O1 and start managing your devices.
## 4. Sensor Integration with Deneyap Kart
This section covers the steps for connecting a motion sensor to the Deneyap Kart 1A V2 development board and integrating this sensor into the Home Assistant platform.
### 4.1 Installing ESPHome in Home Assistant
After opening the menu on the left side, click on the Settings option.
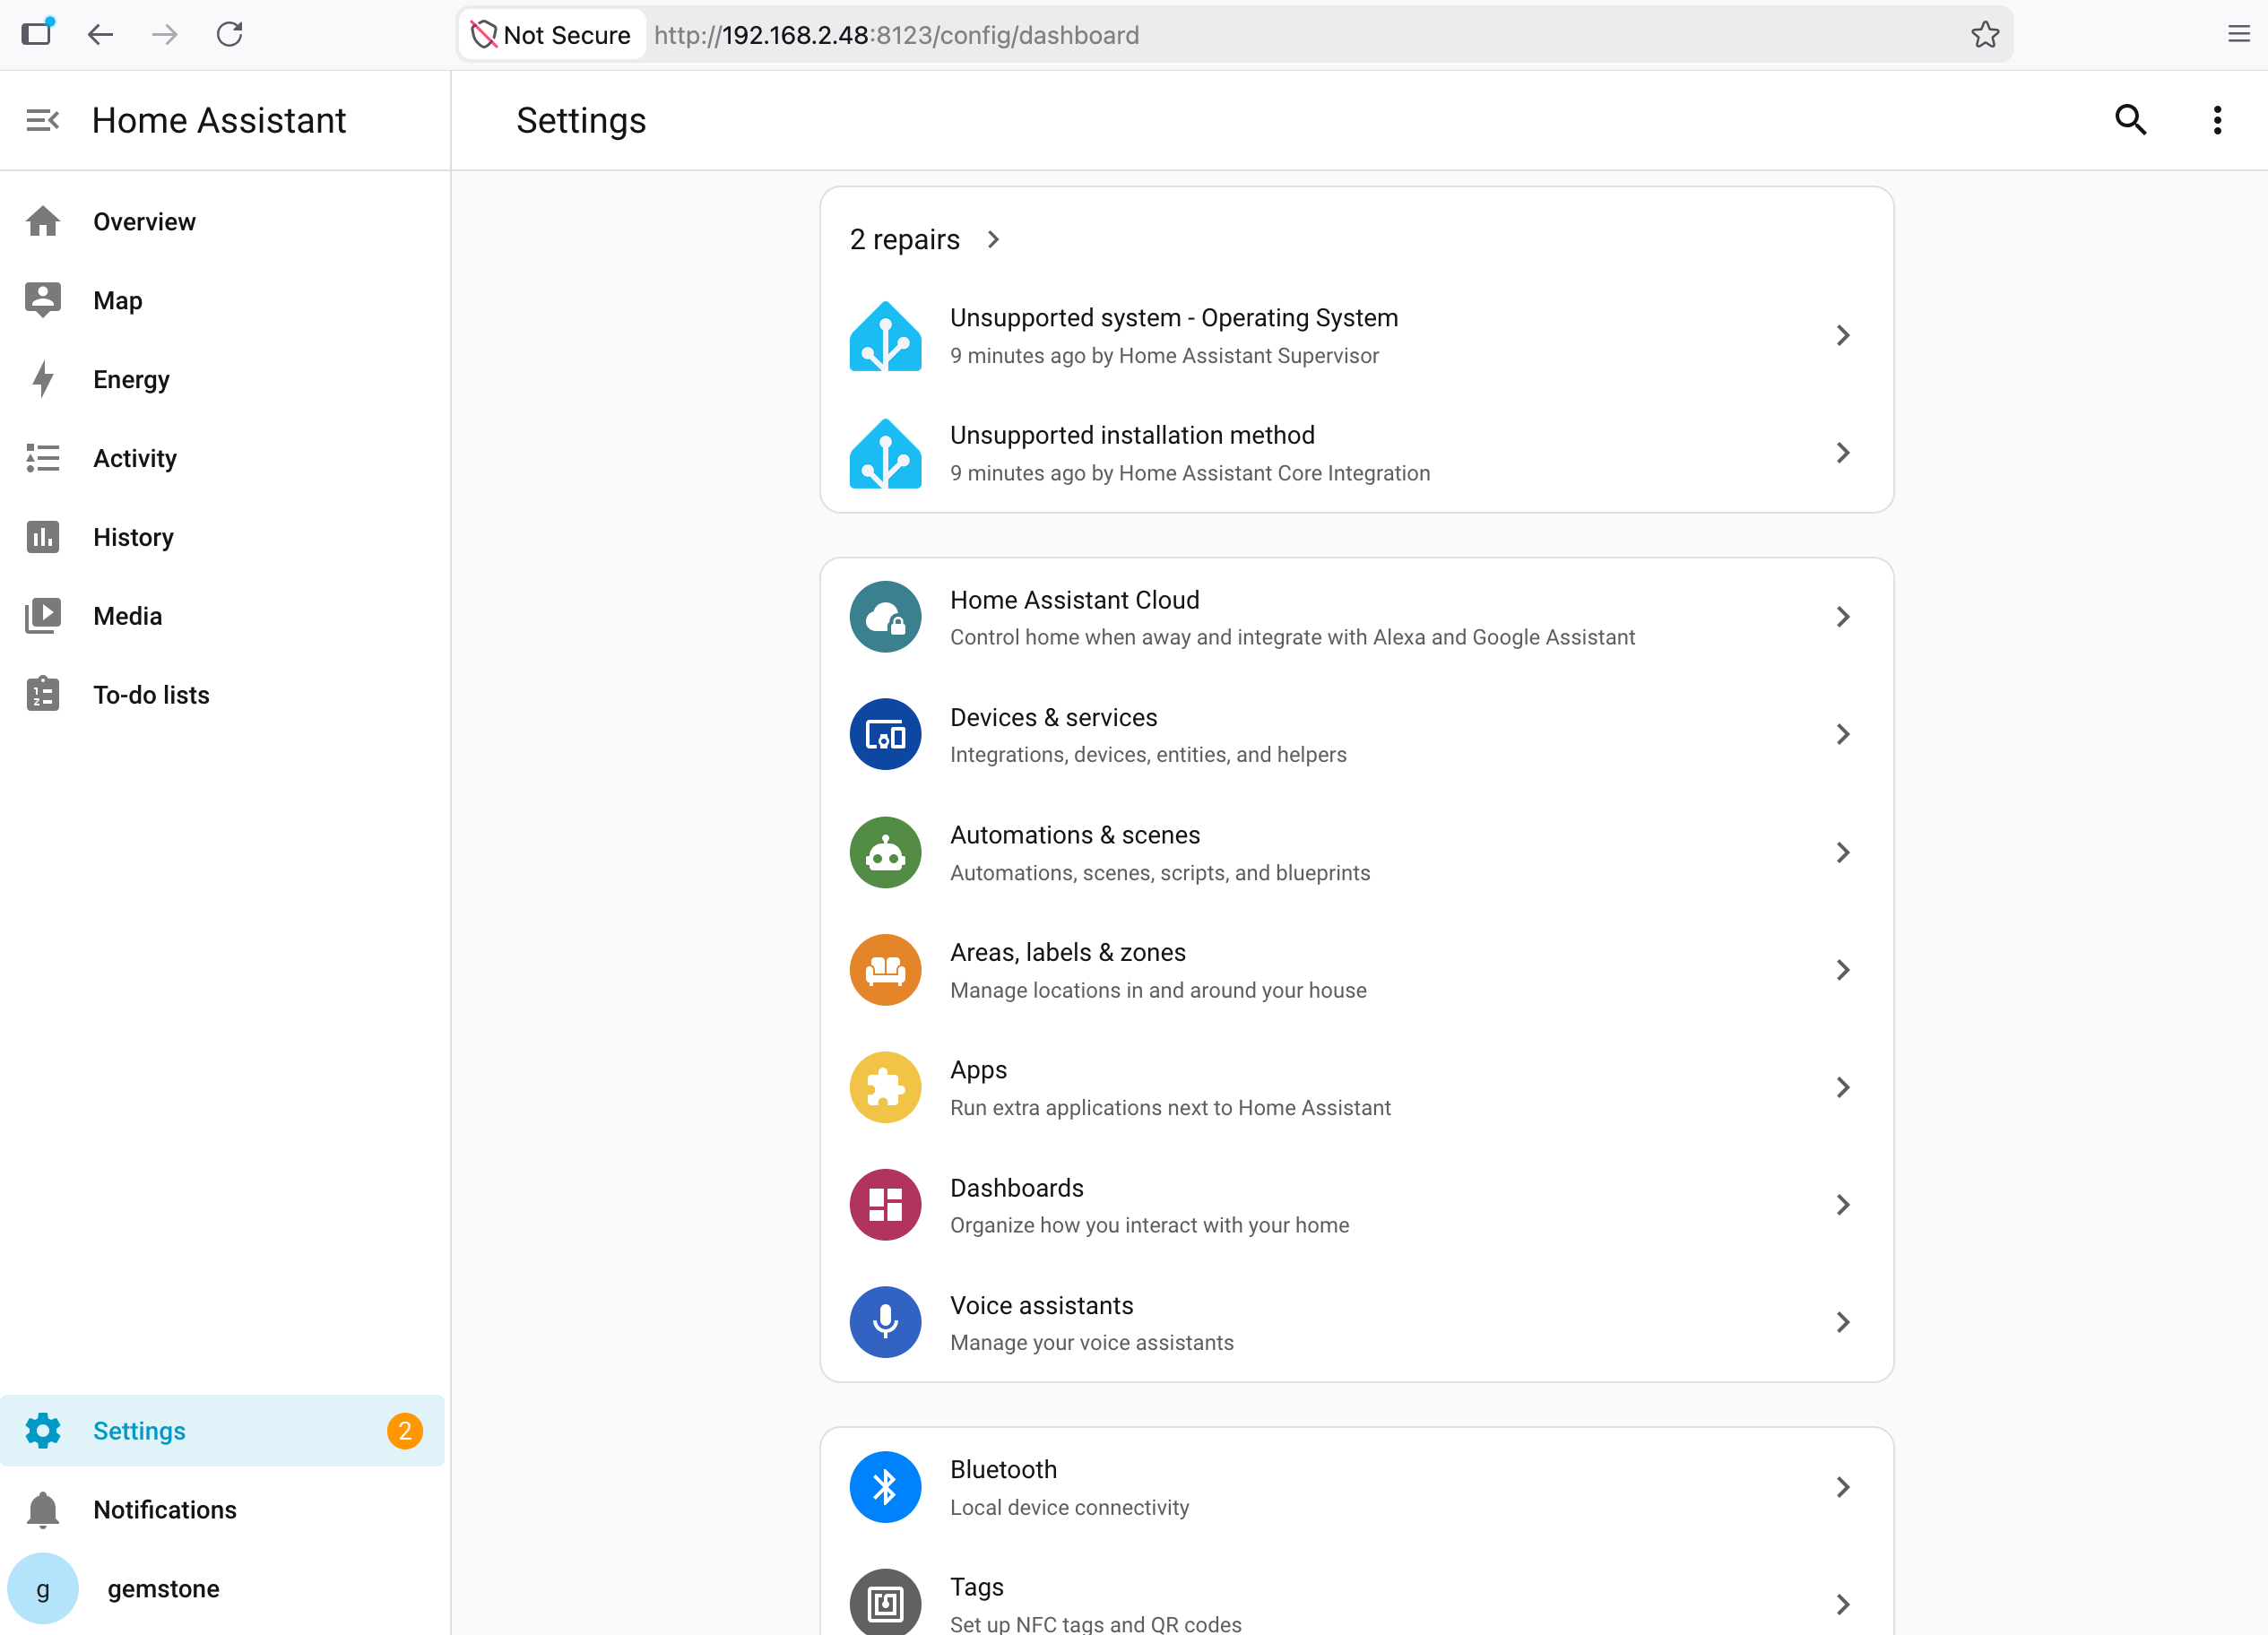 From the opened menu, select the Add-ons option.
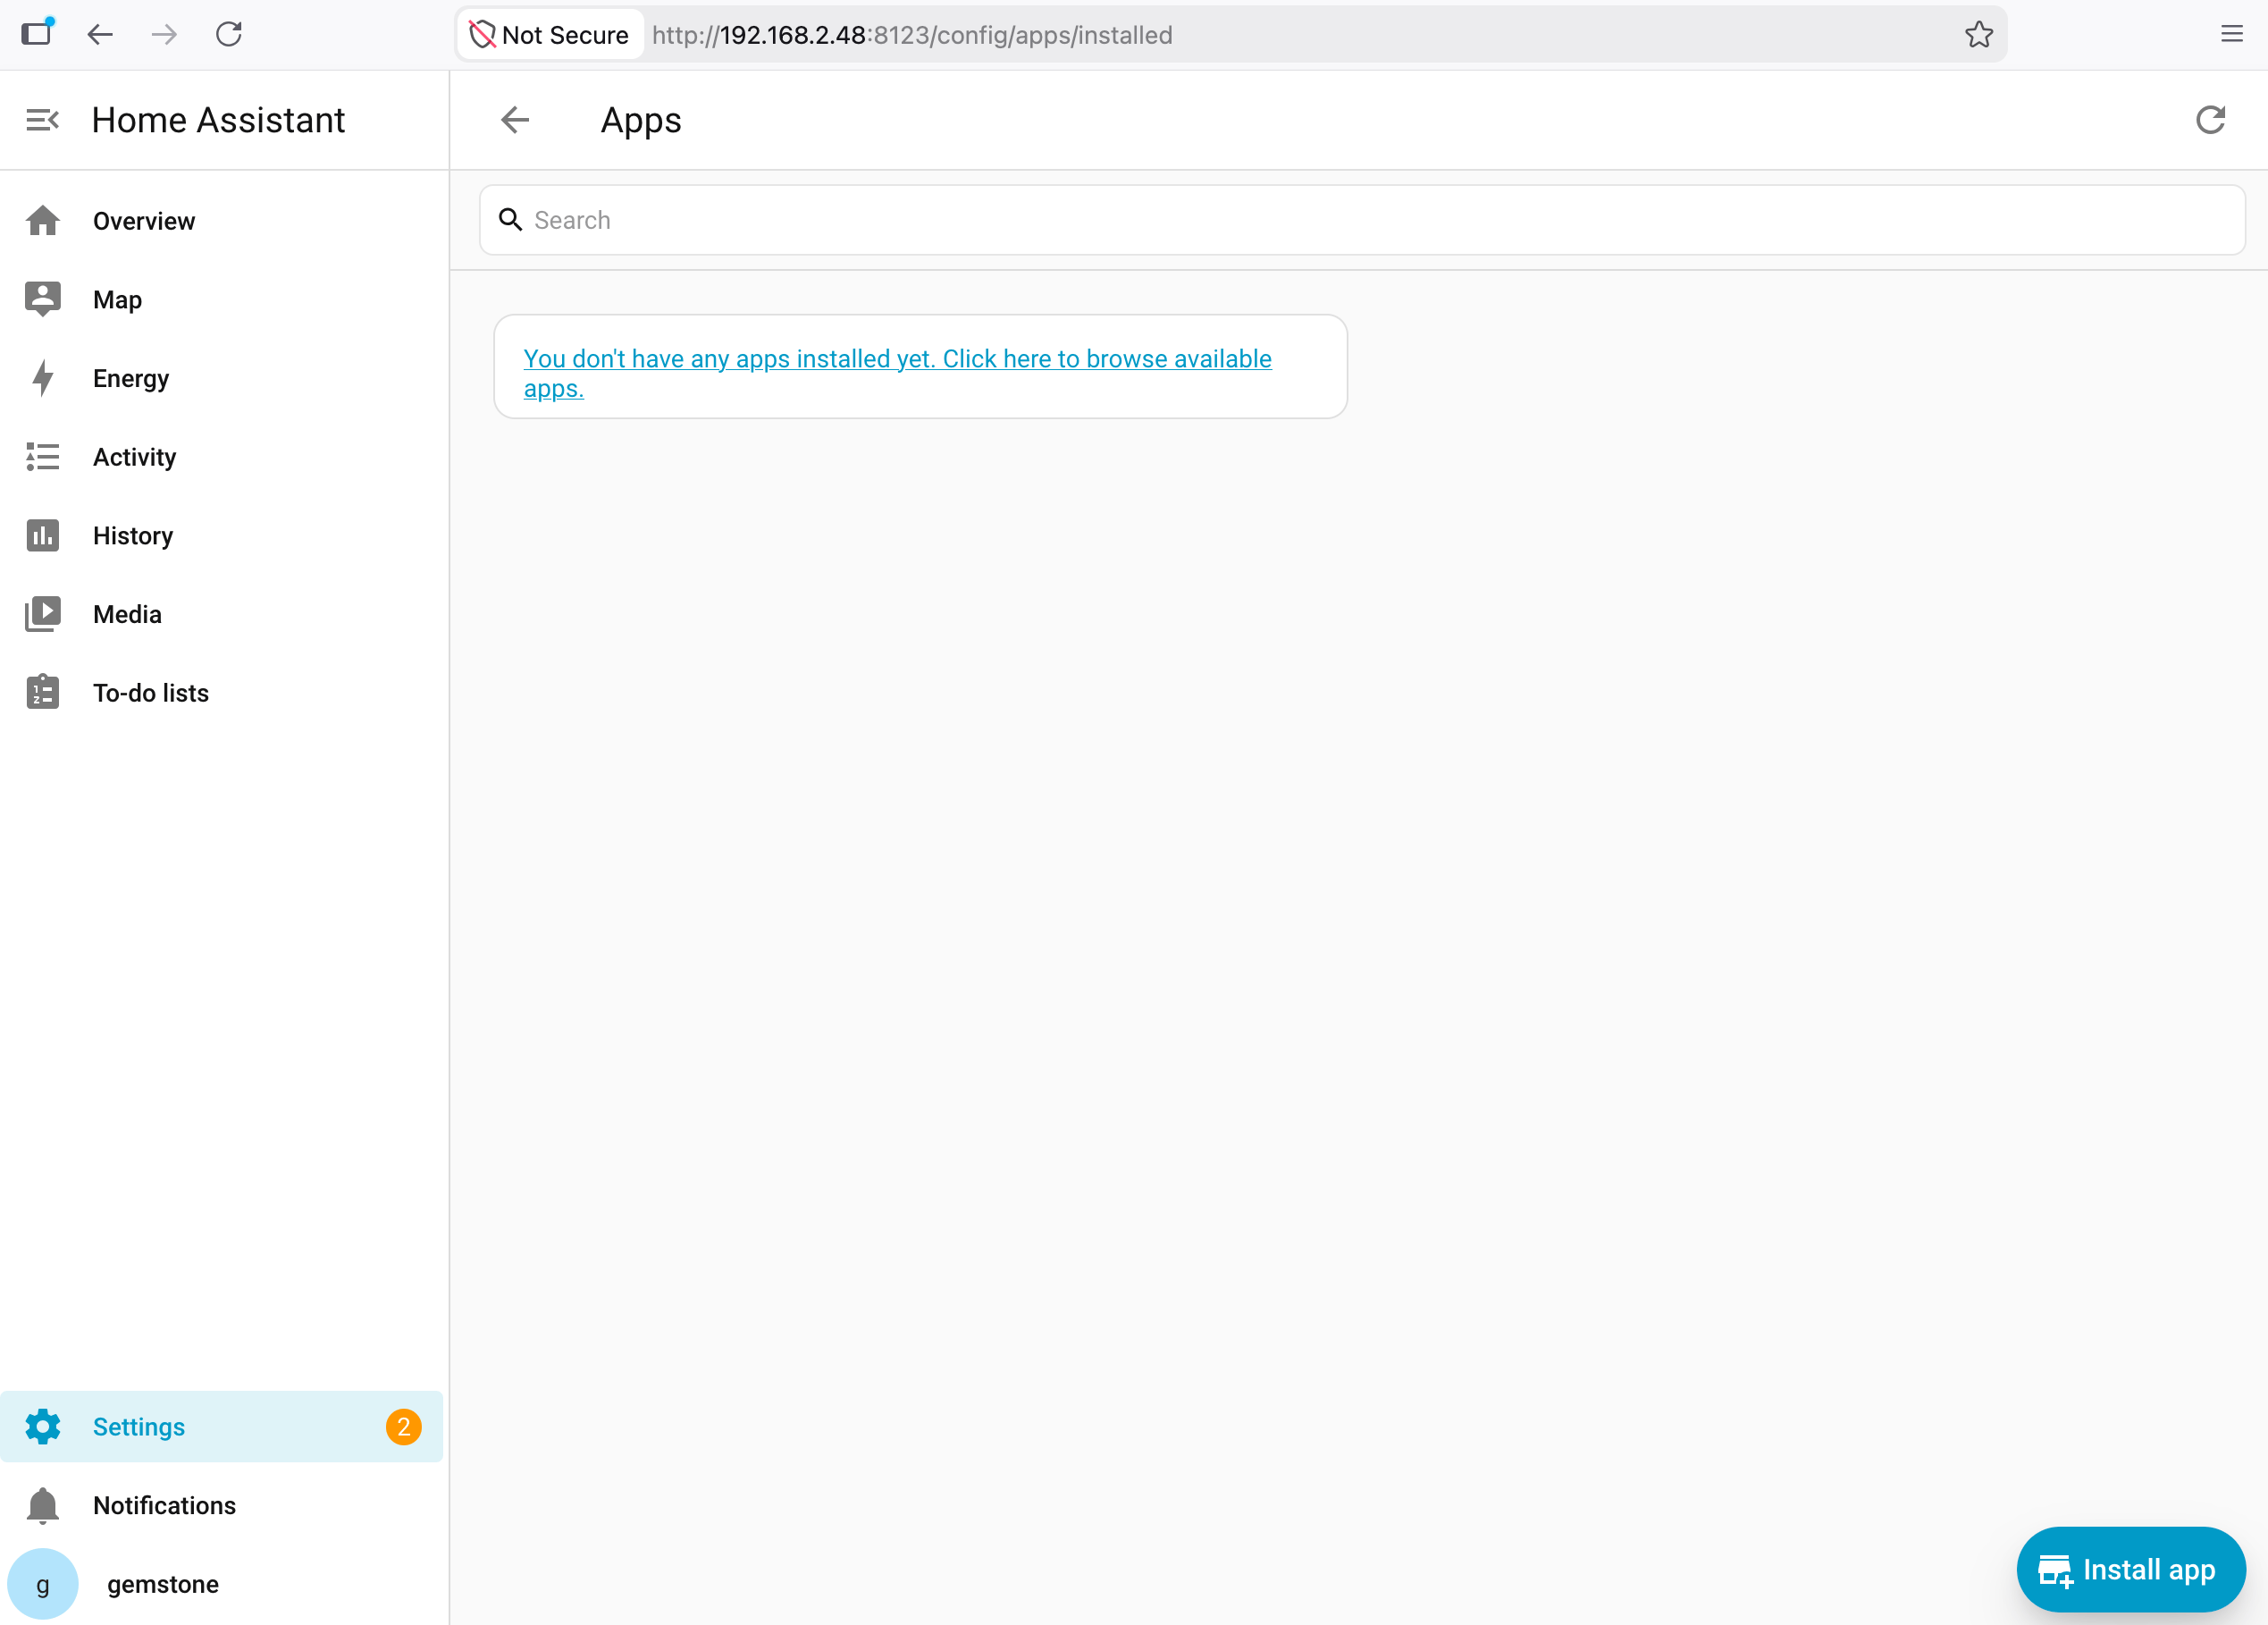 Click the "Install Add-on" button located in the bottom right corner.
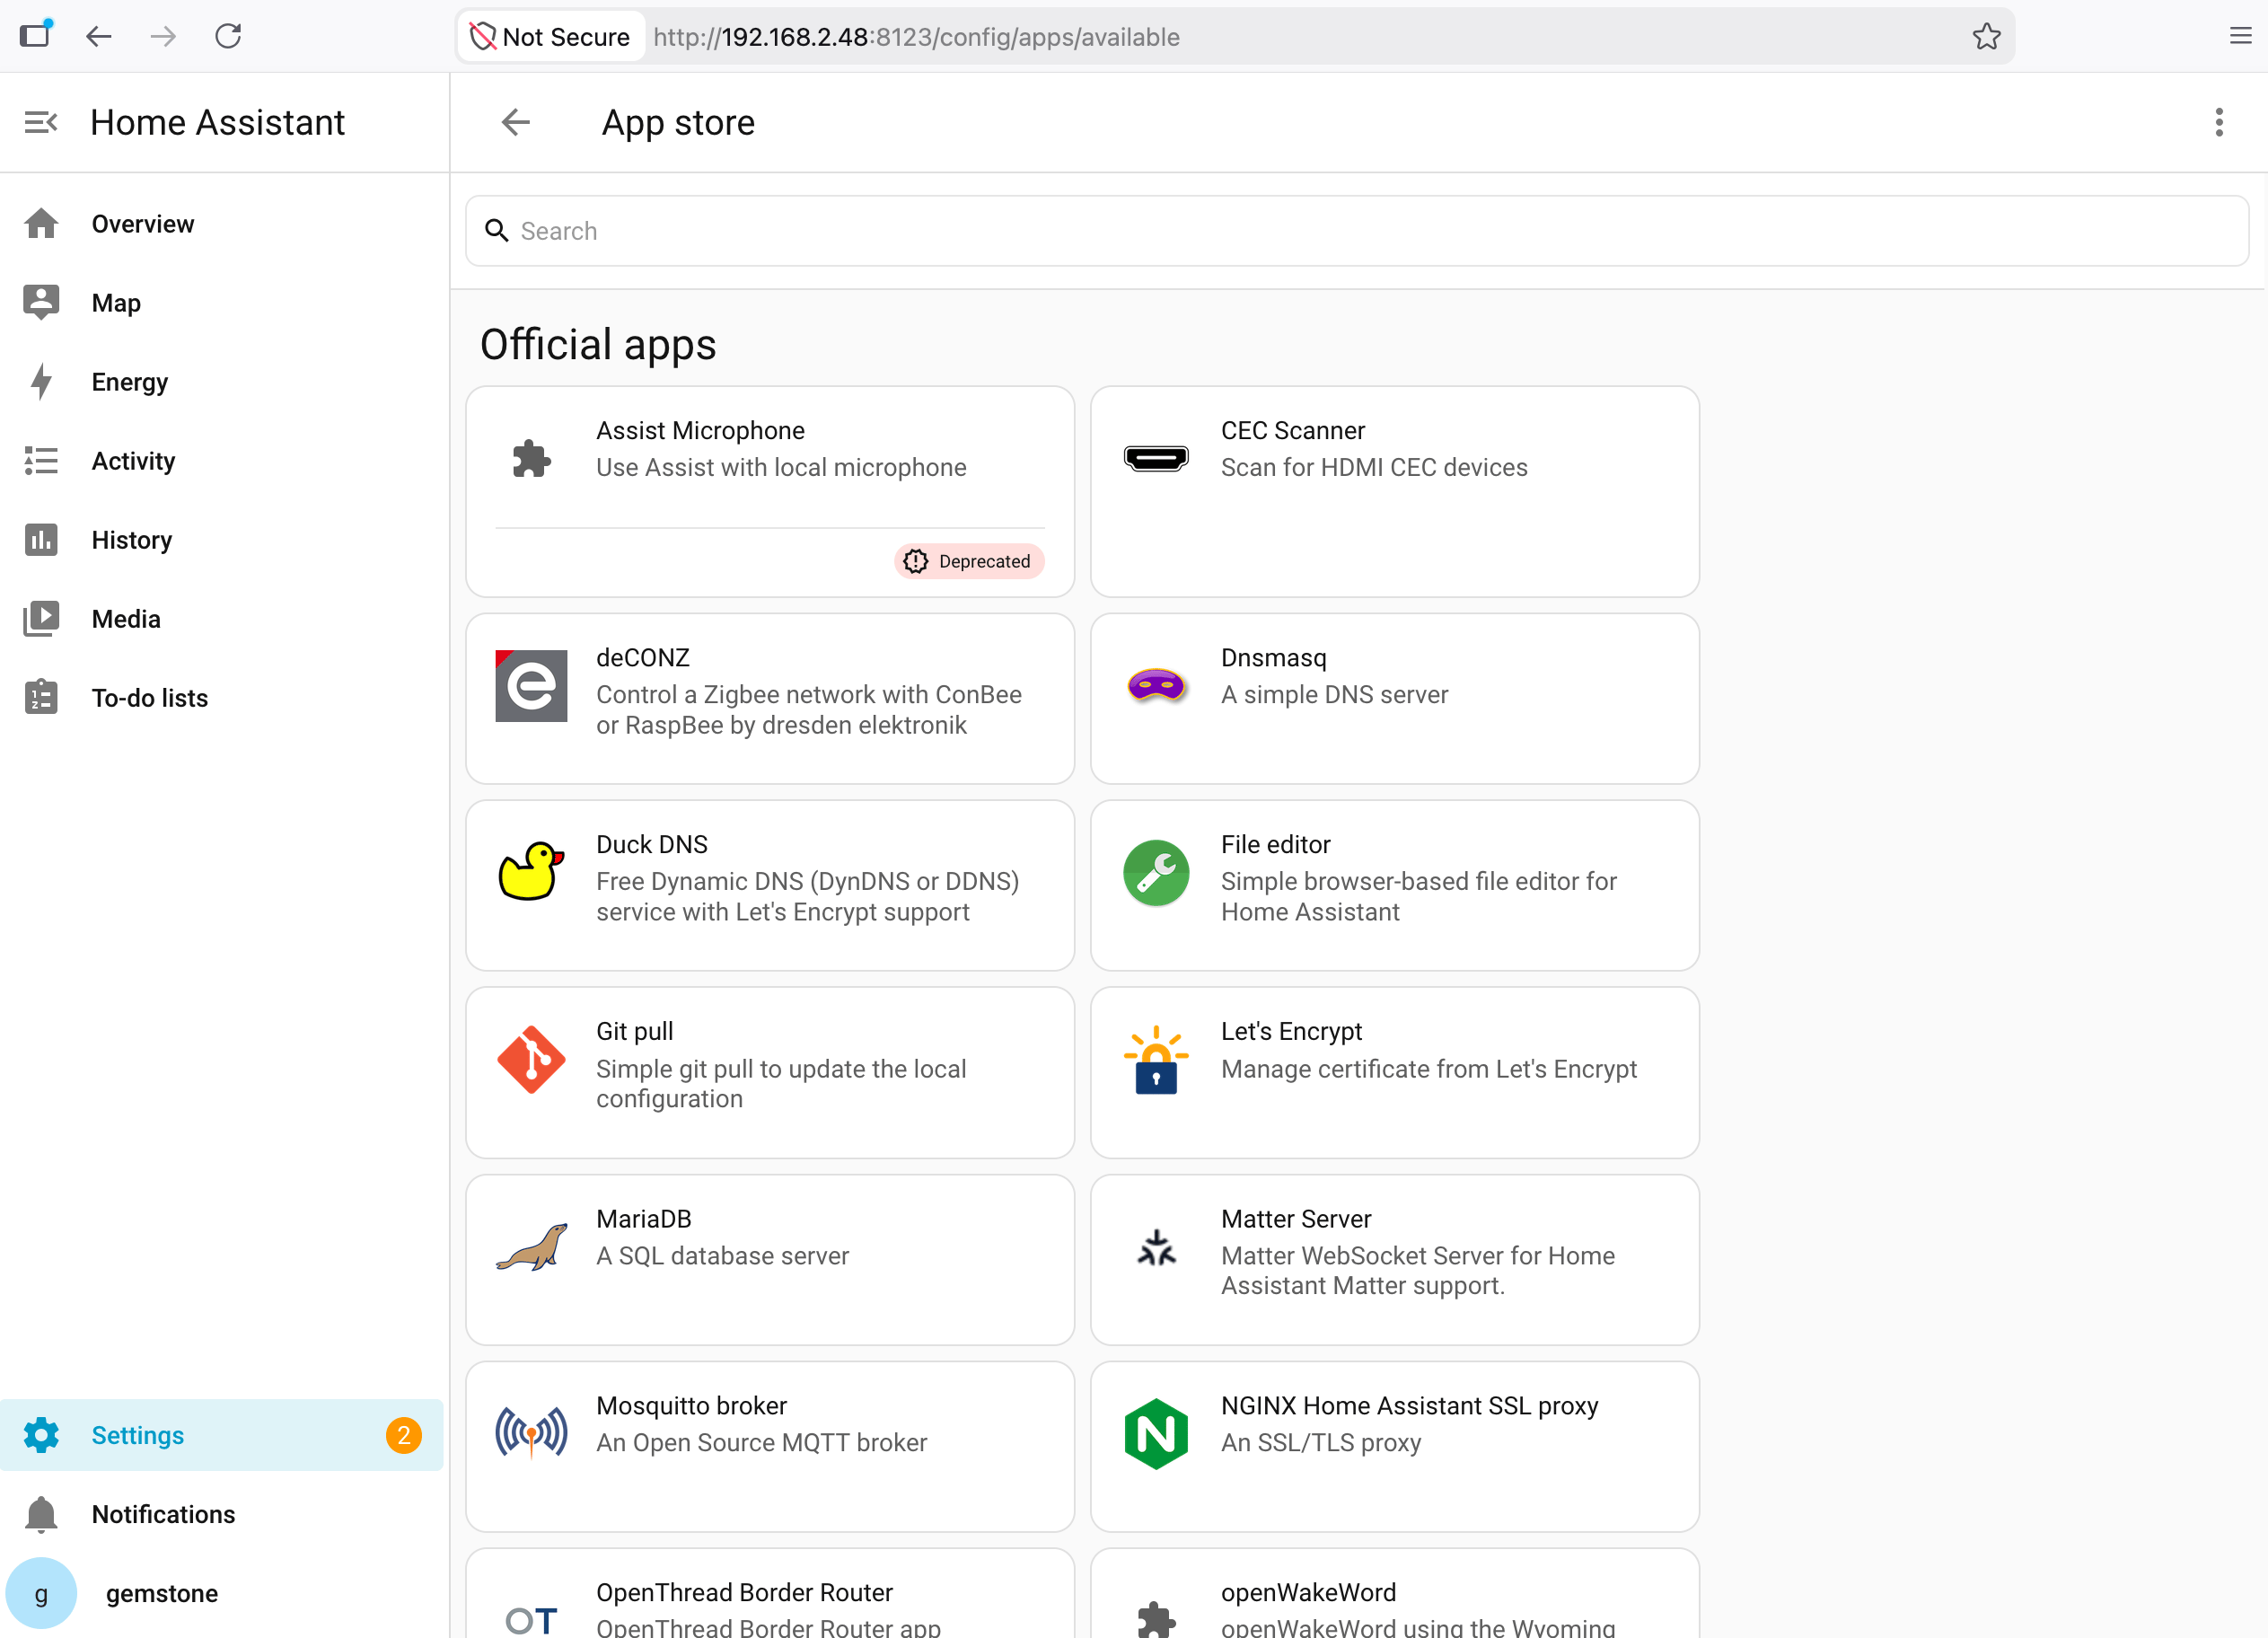 Type "esphome" in the search field in the opened menu.
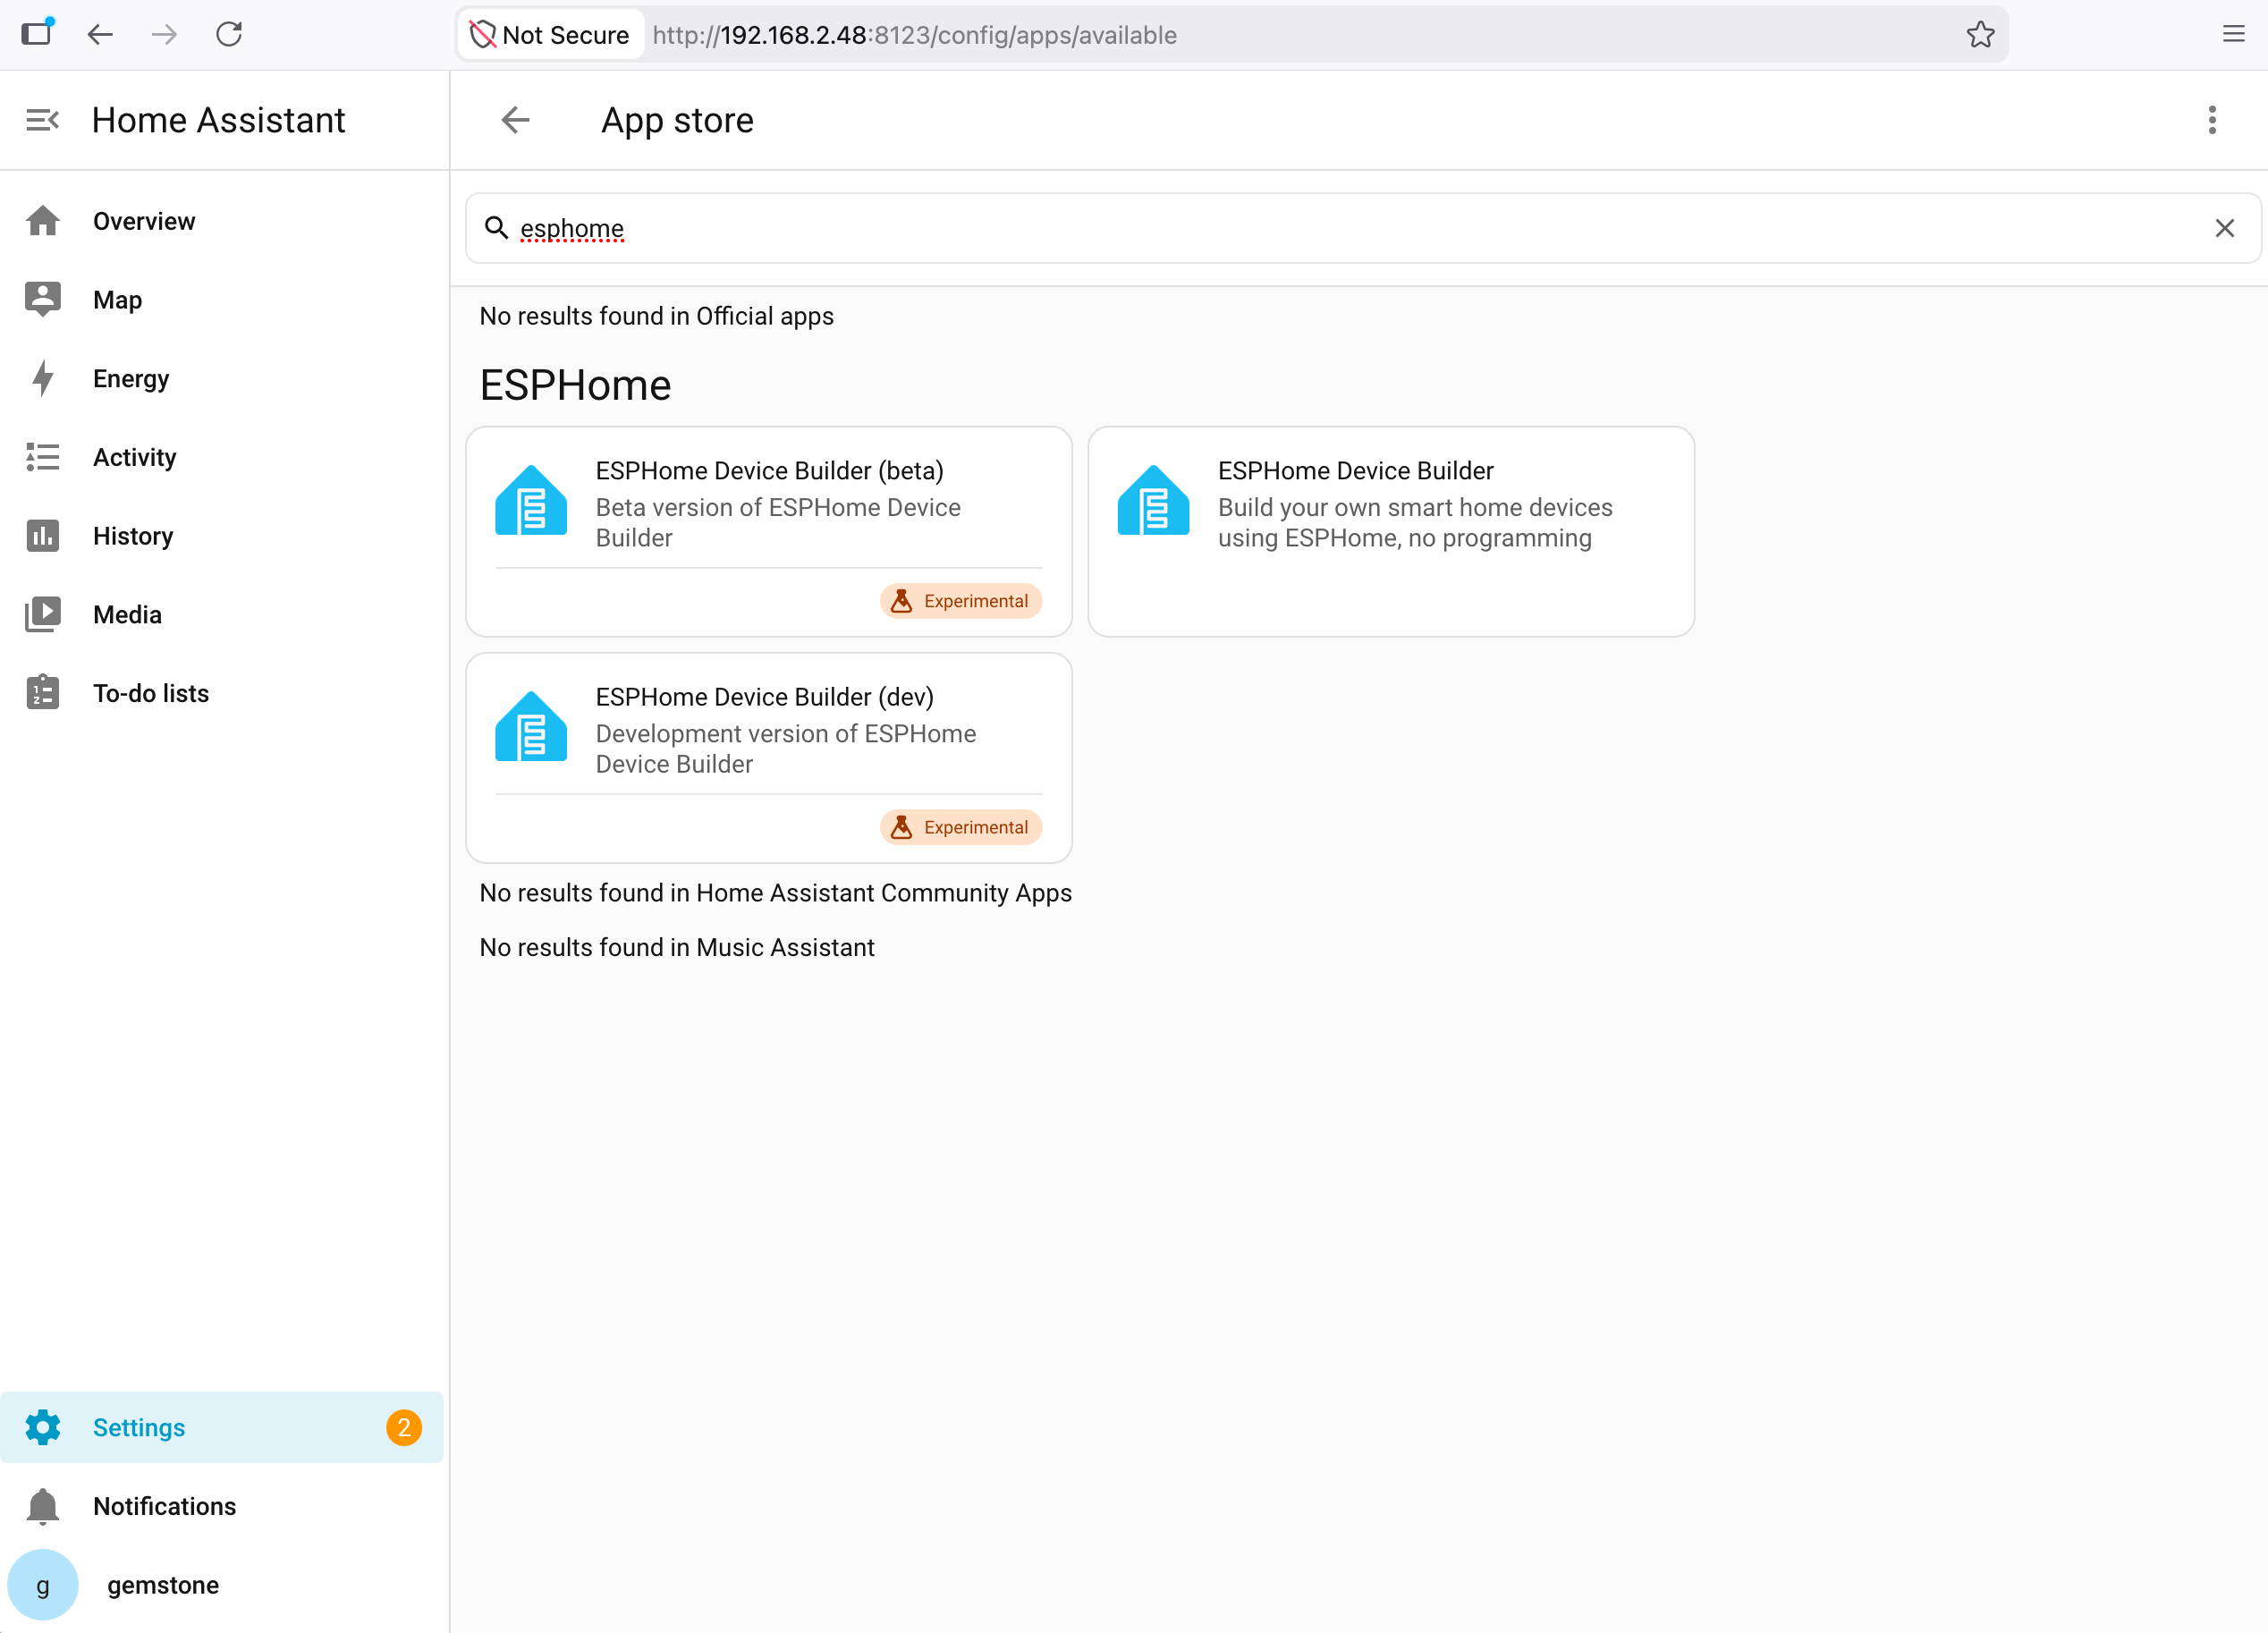 Click on the ESPHome option displayed in the search results.
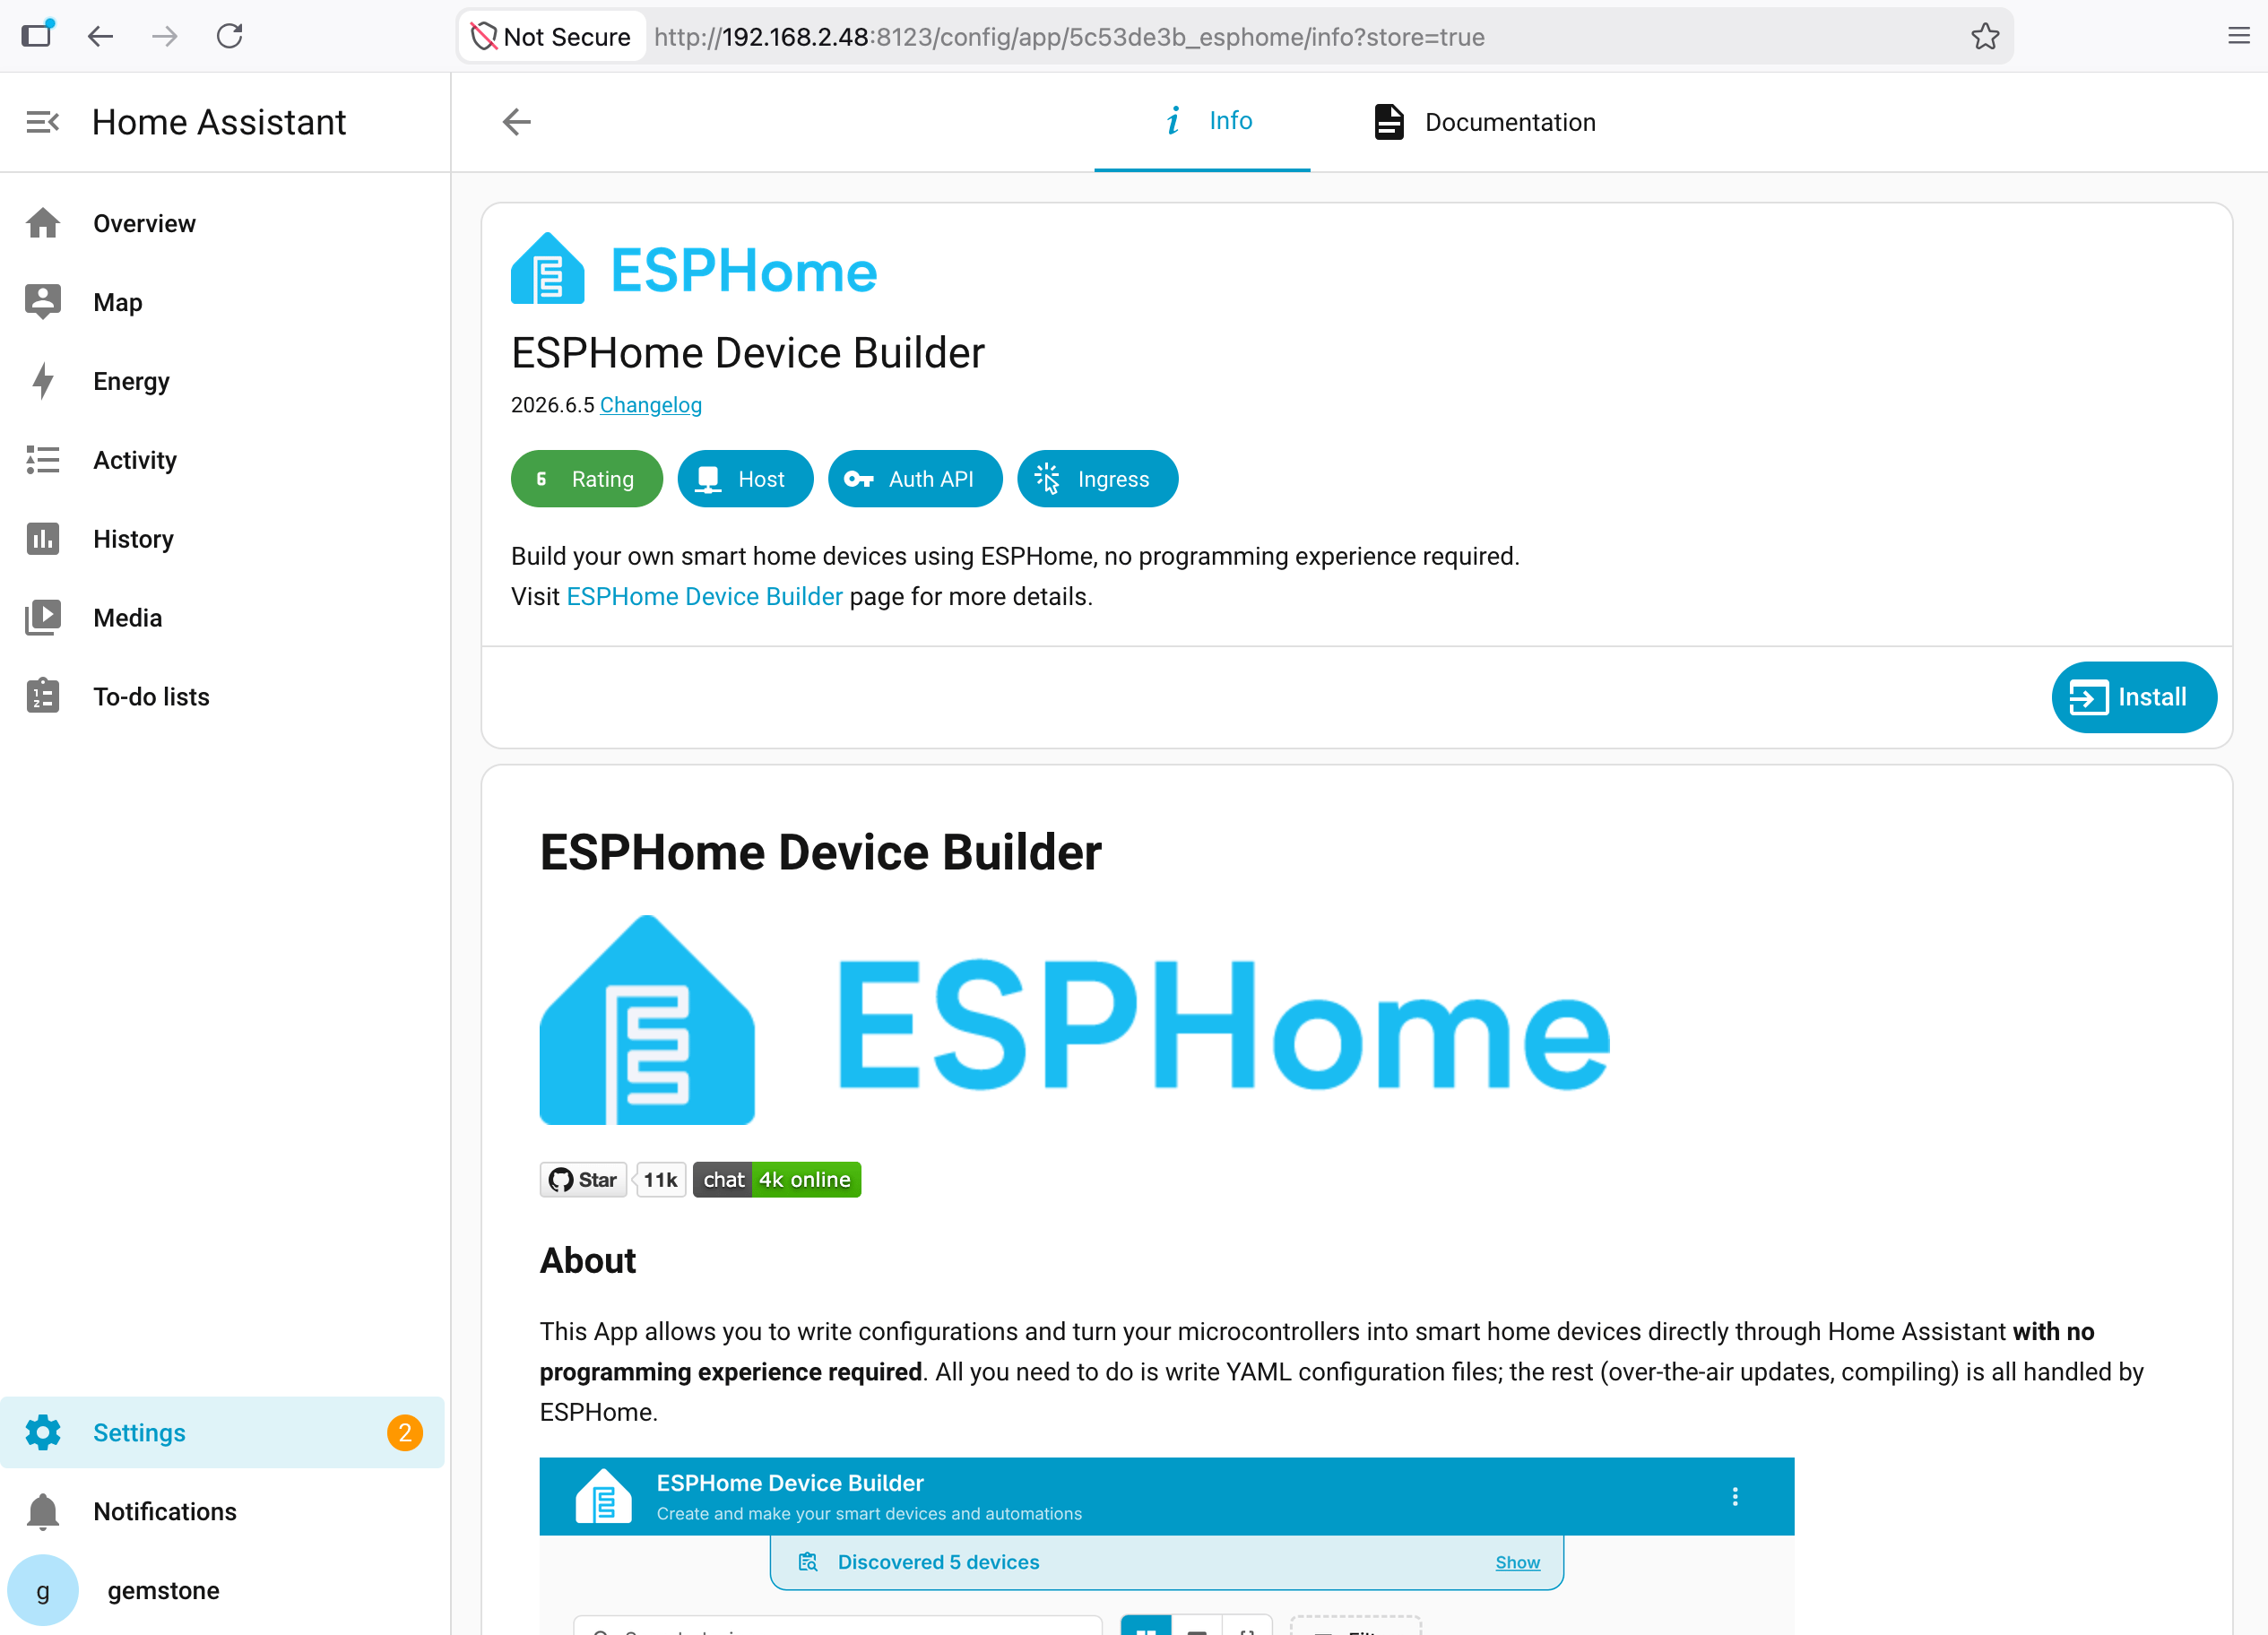 In the opened menu, click on the Install option and wait for the installation to complete.
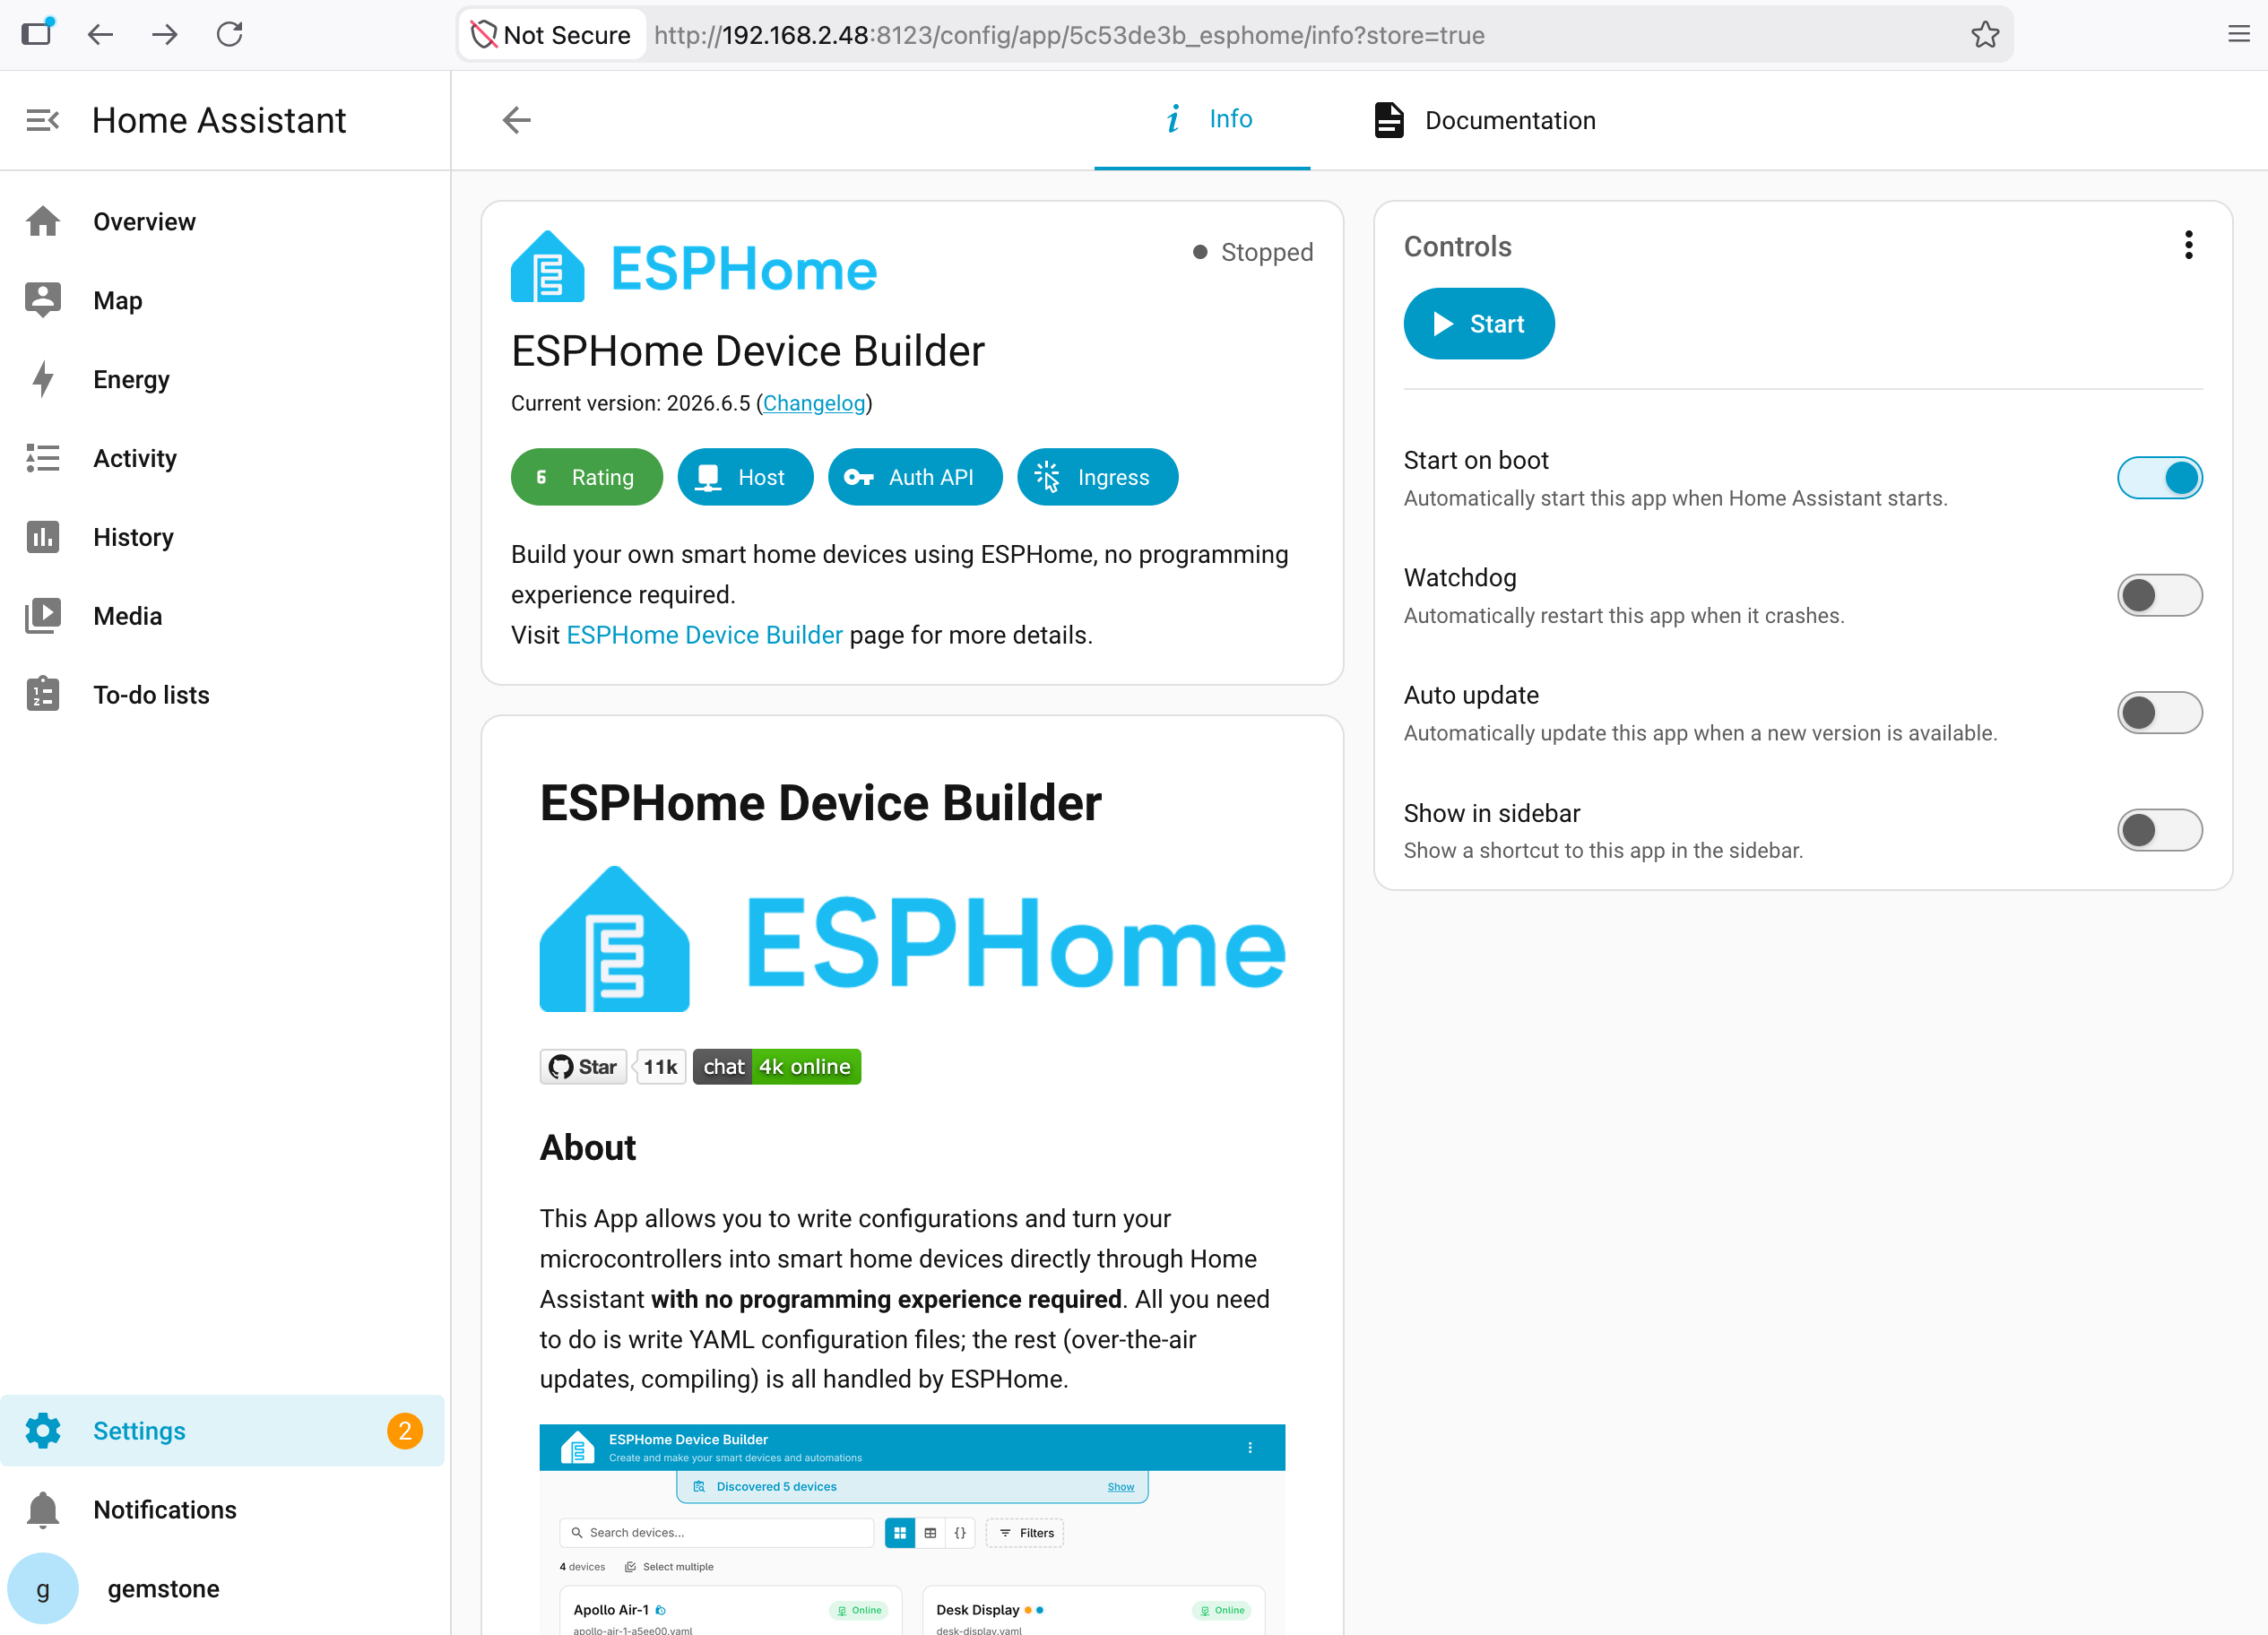 After the installation is complete, click on the Start button in the displayed menu.
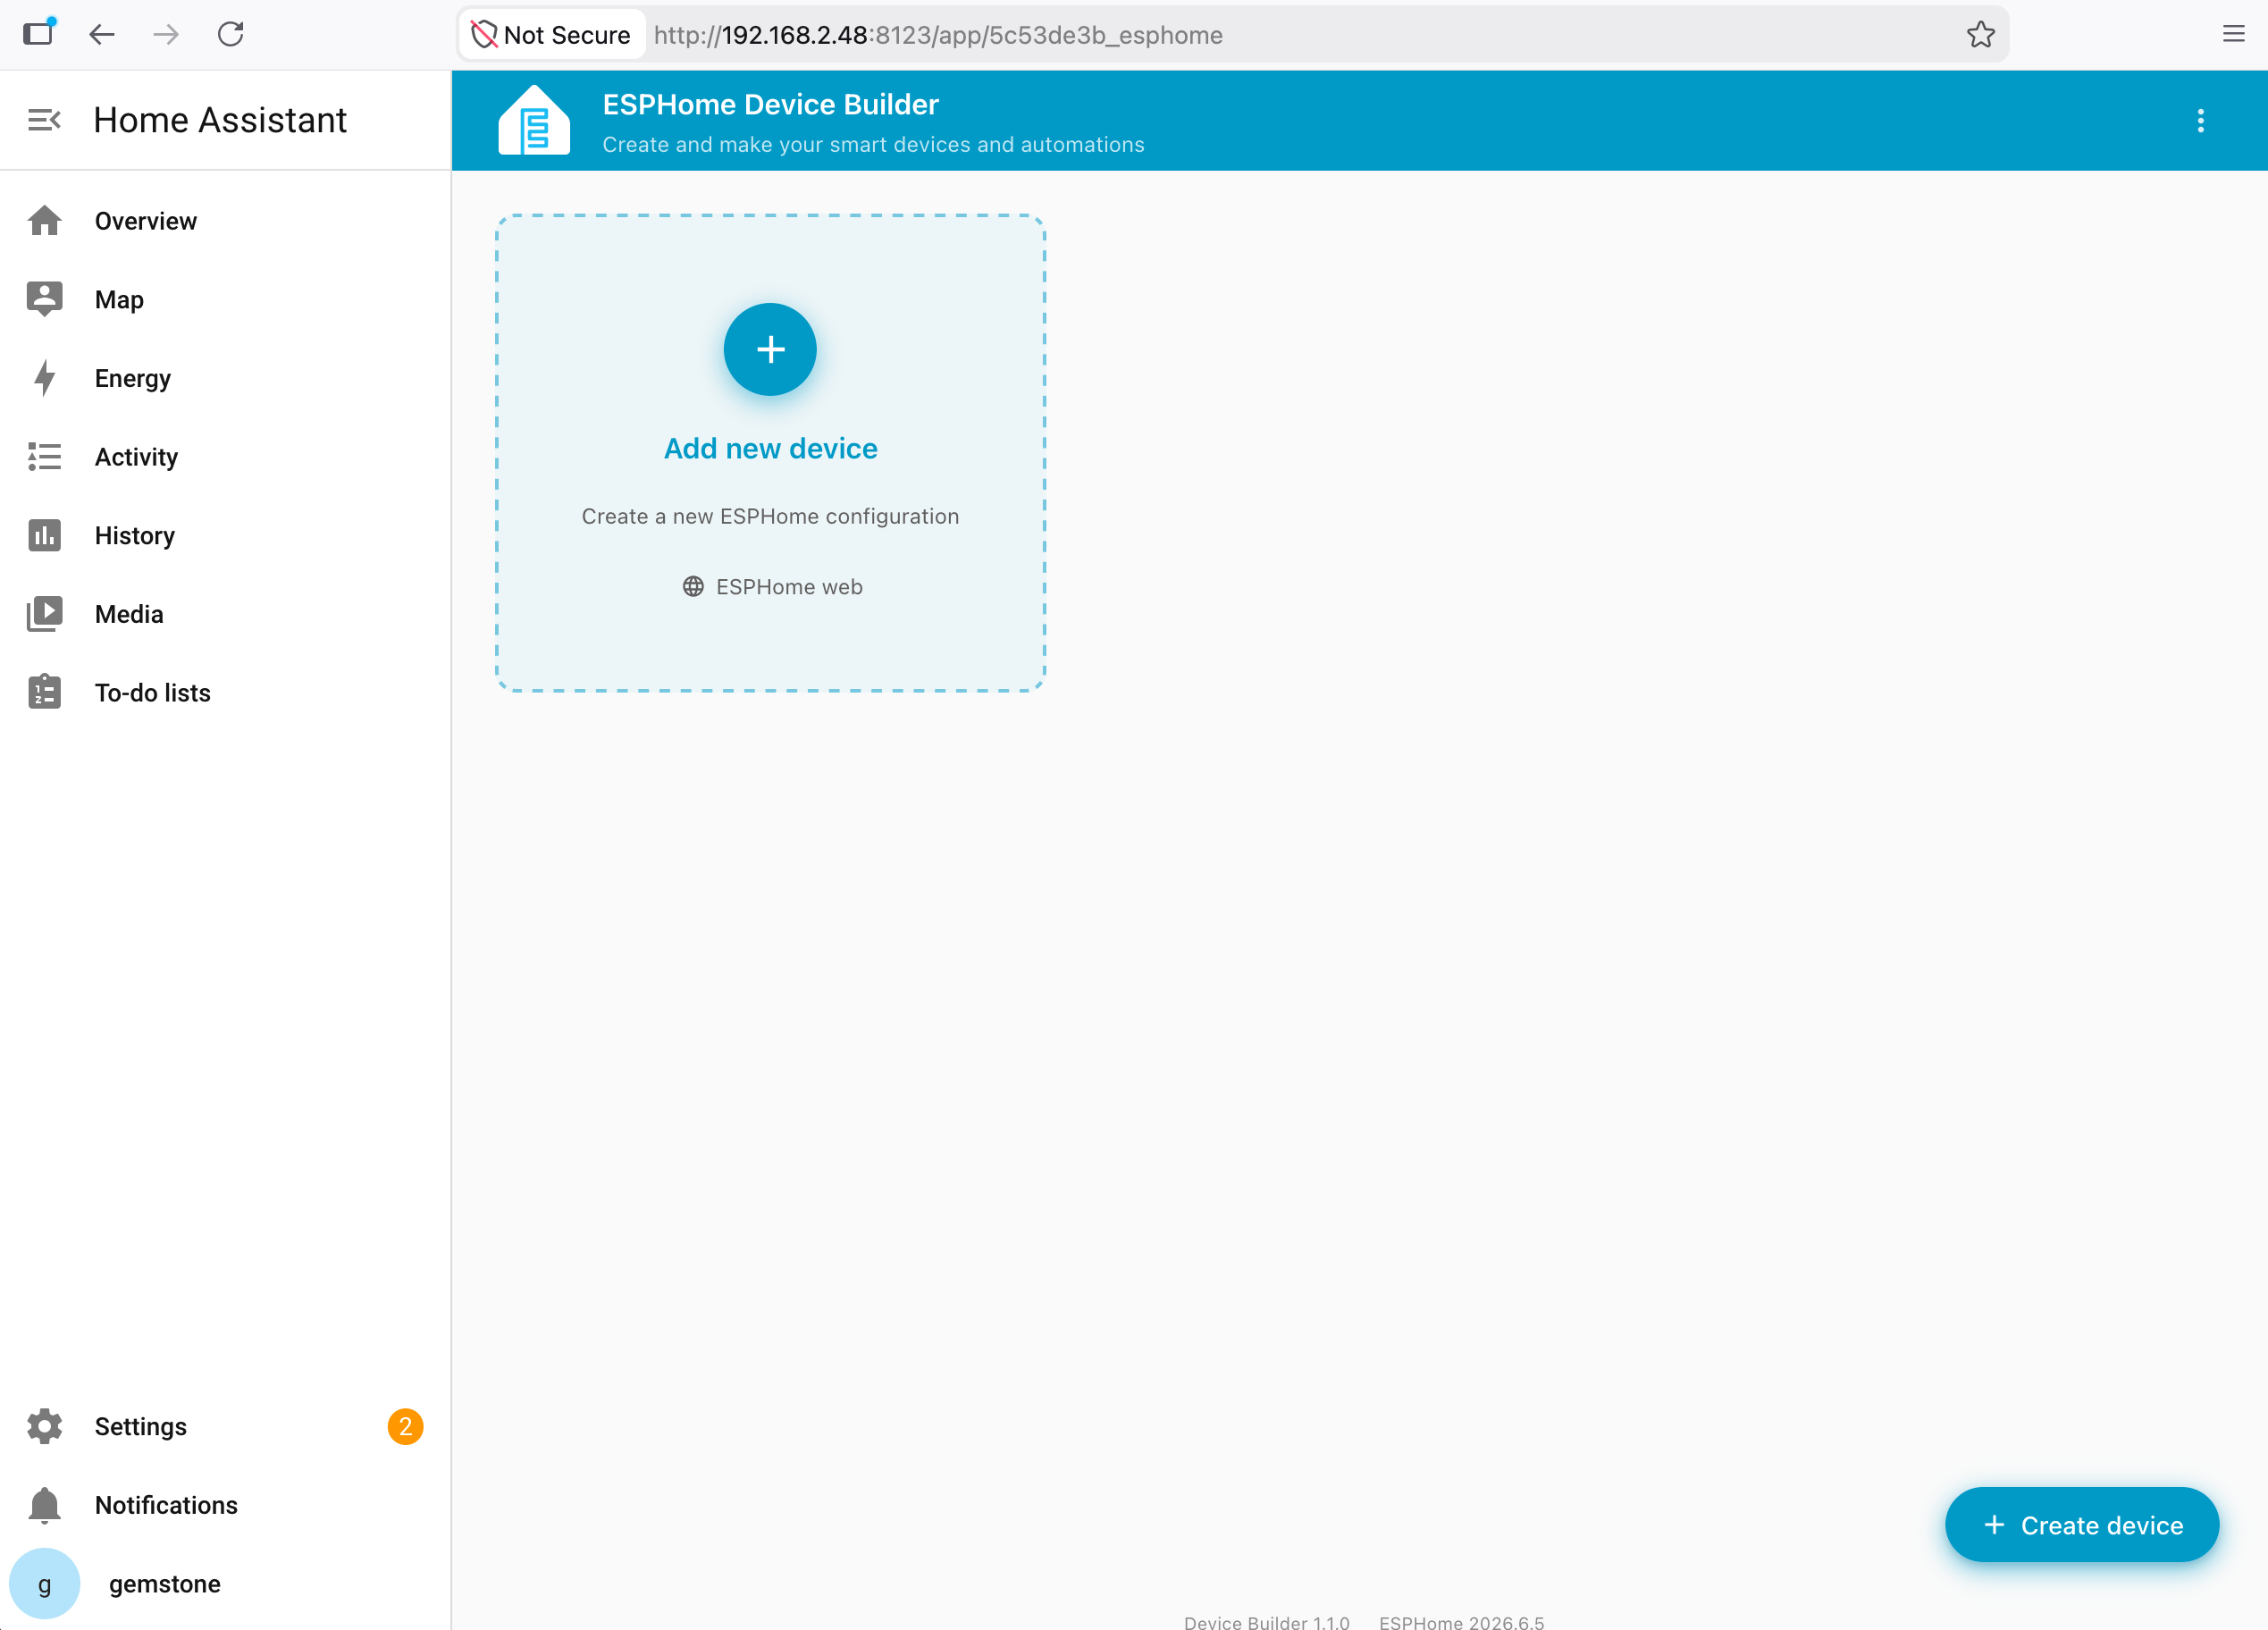
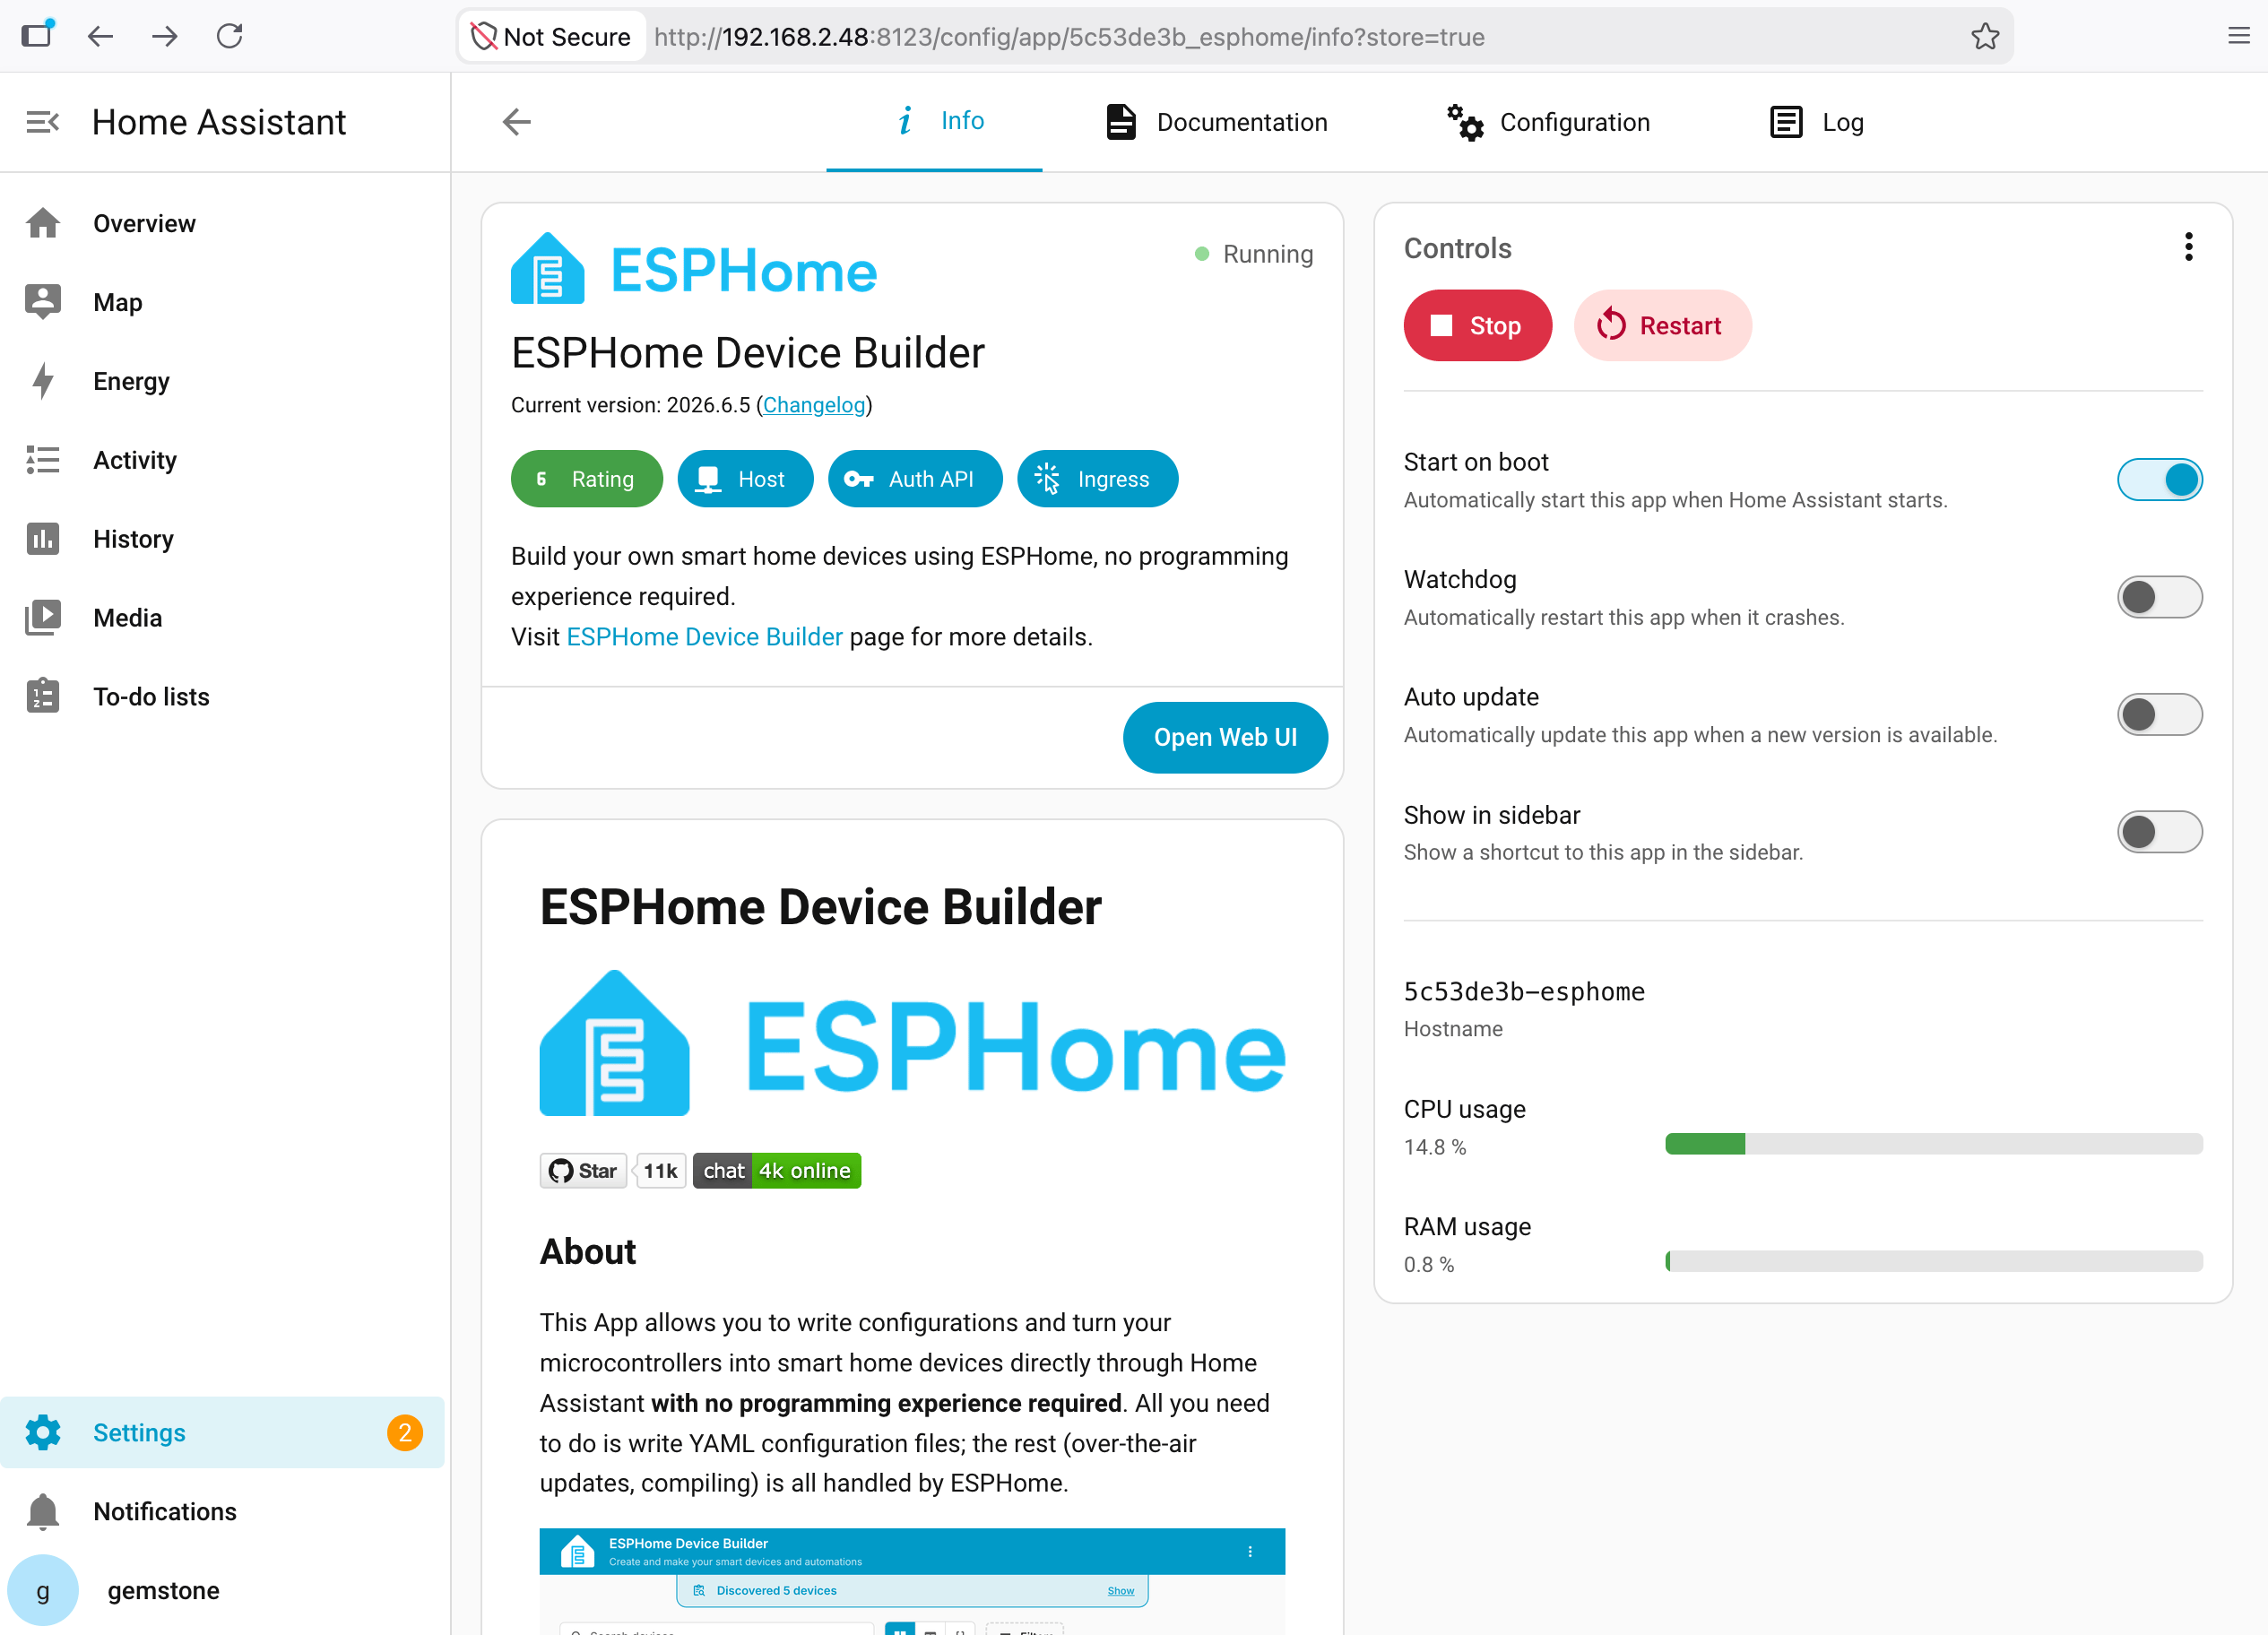 Click on the "Open Web UI" button.
 ### 4.2 Configuring ESPHome for Deneyap Kart
In the opened menu, click on the "Create Device" option.
### 4.2 Configuring ESPHome for Deneyap Kart
In the opened menu, click on the "Create Device" option.
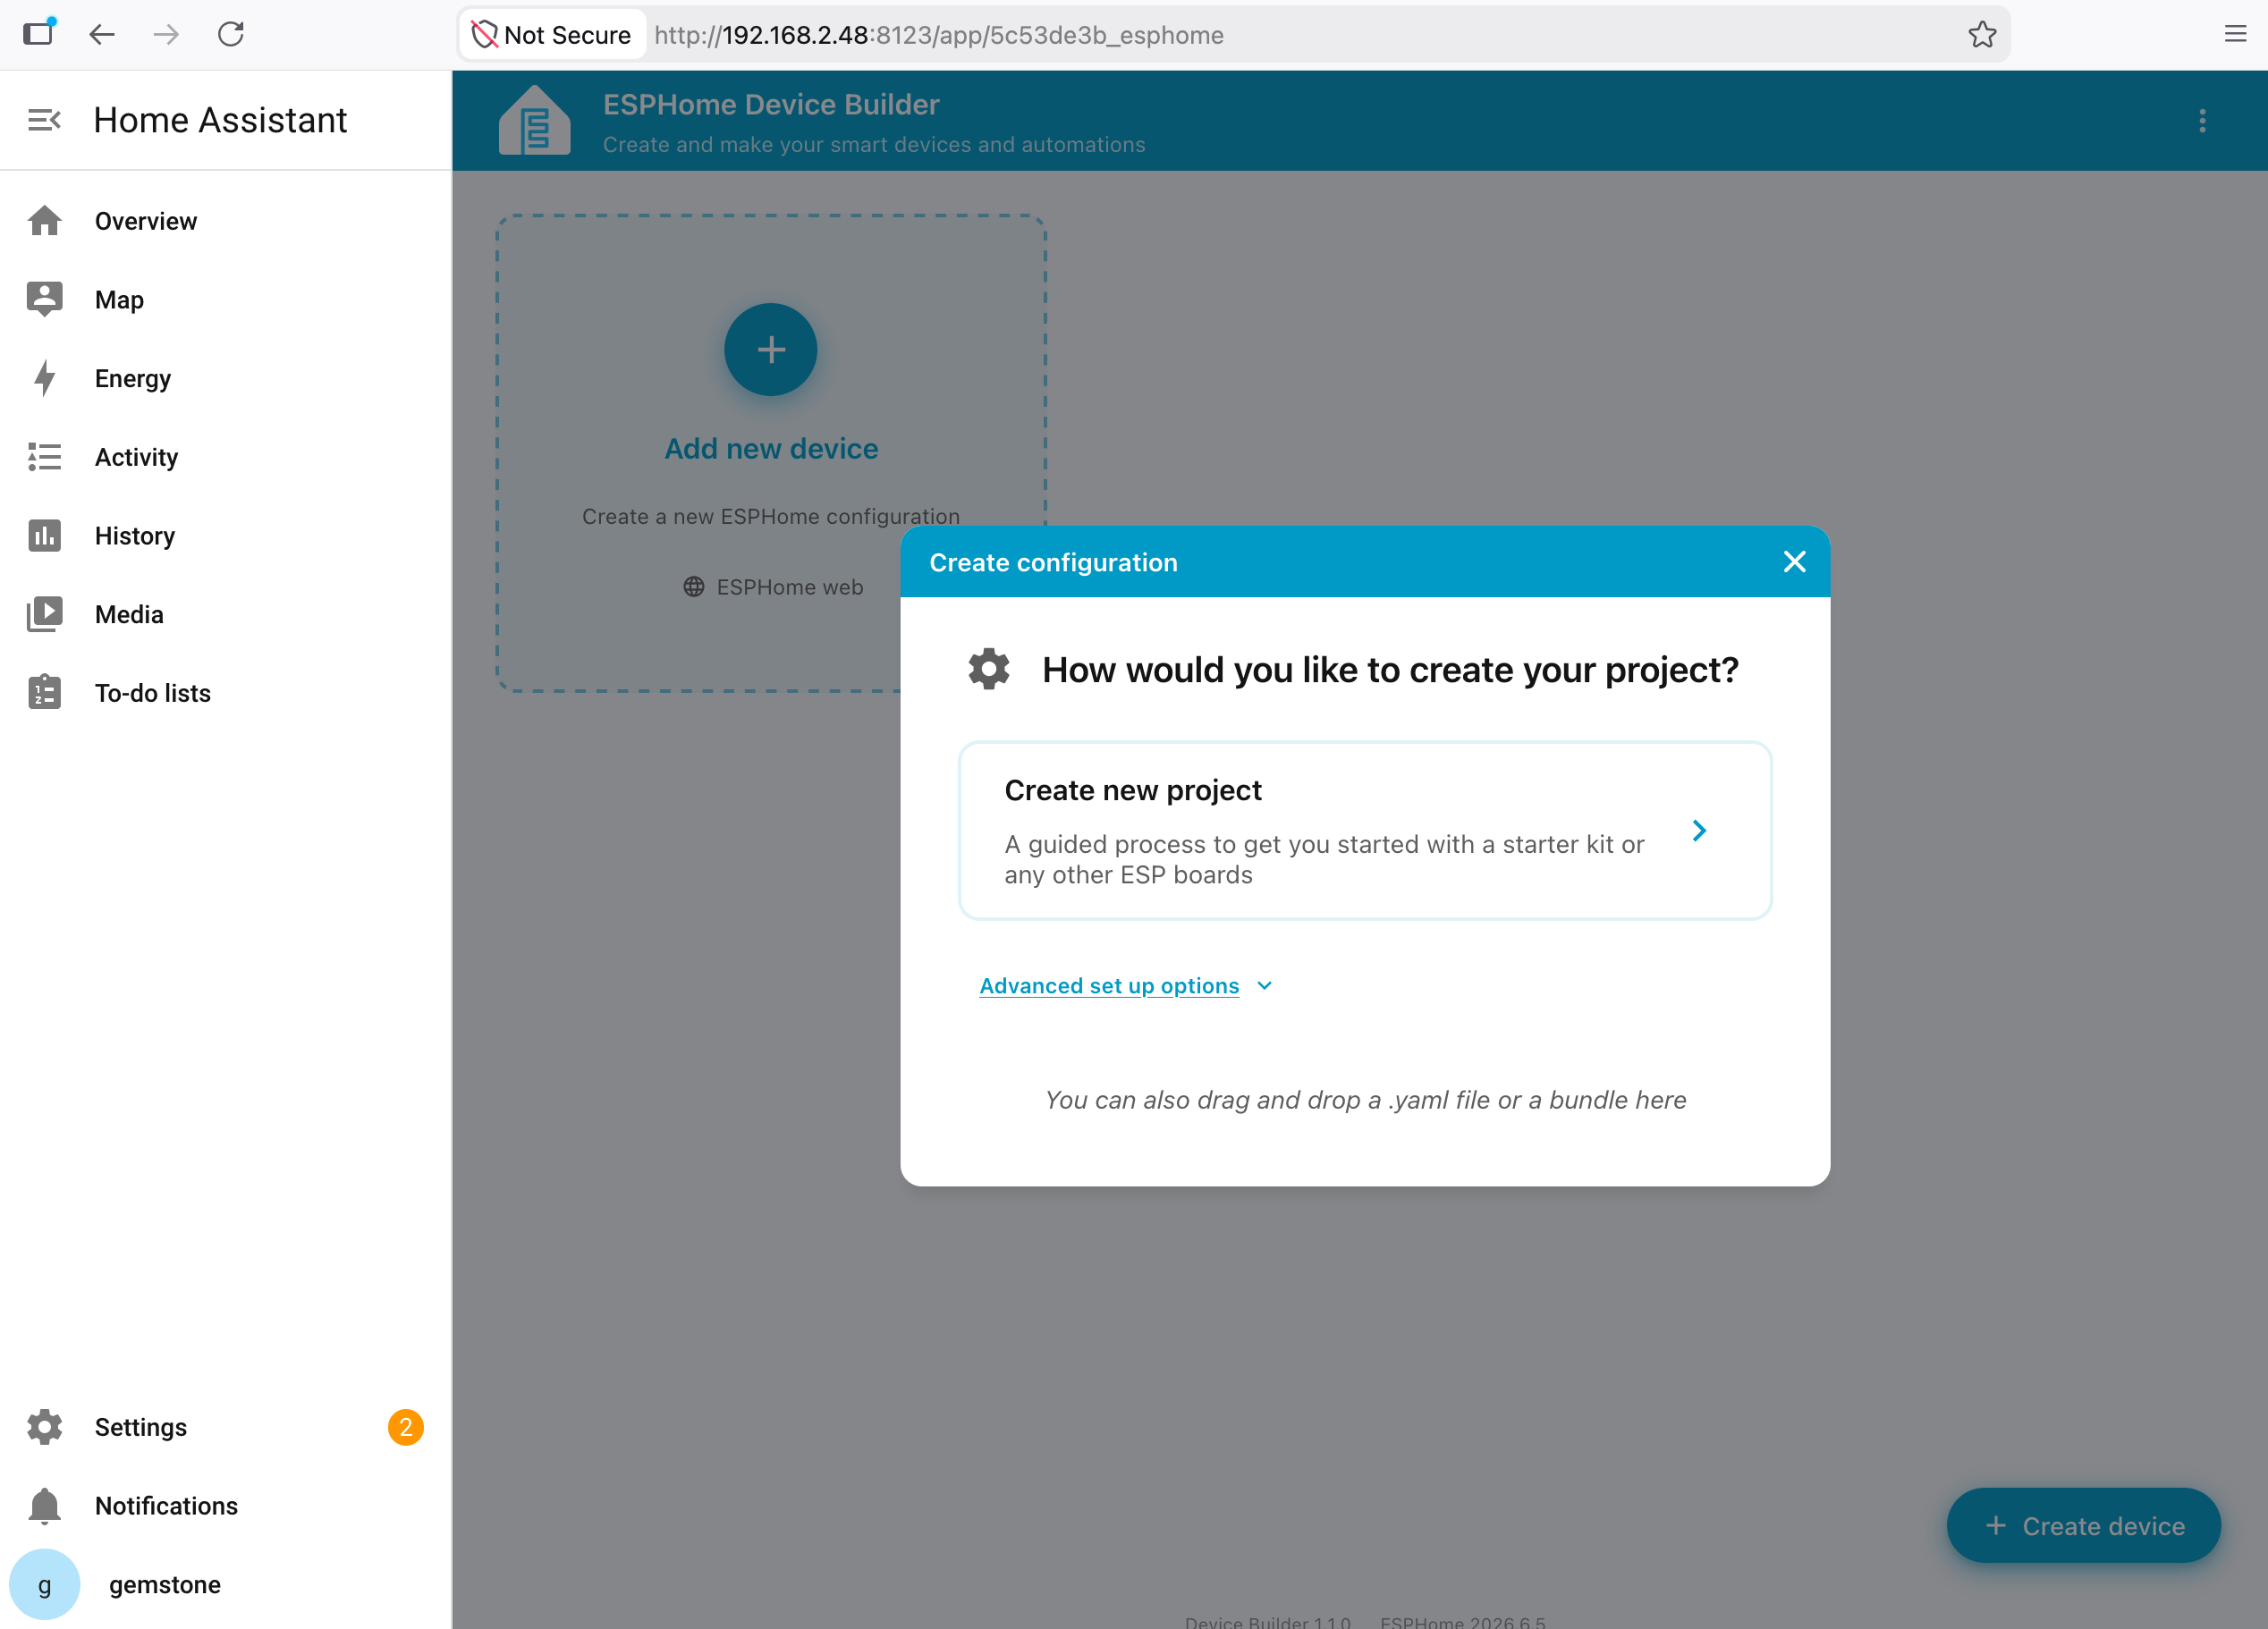 Click the "Create new project" button to continue.
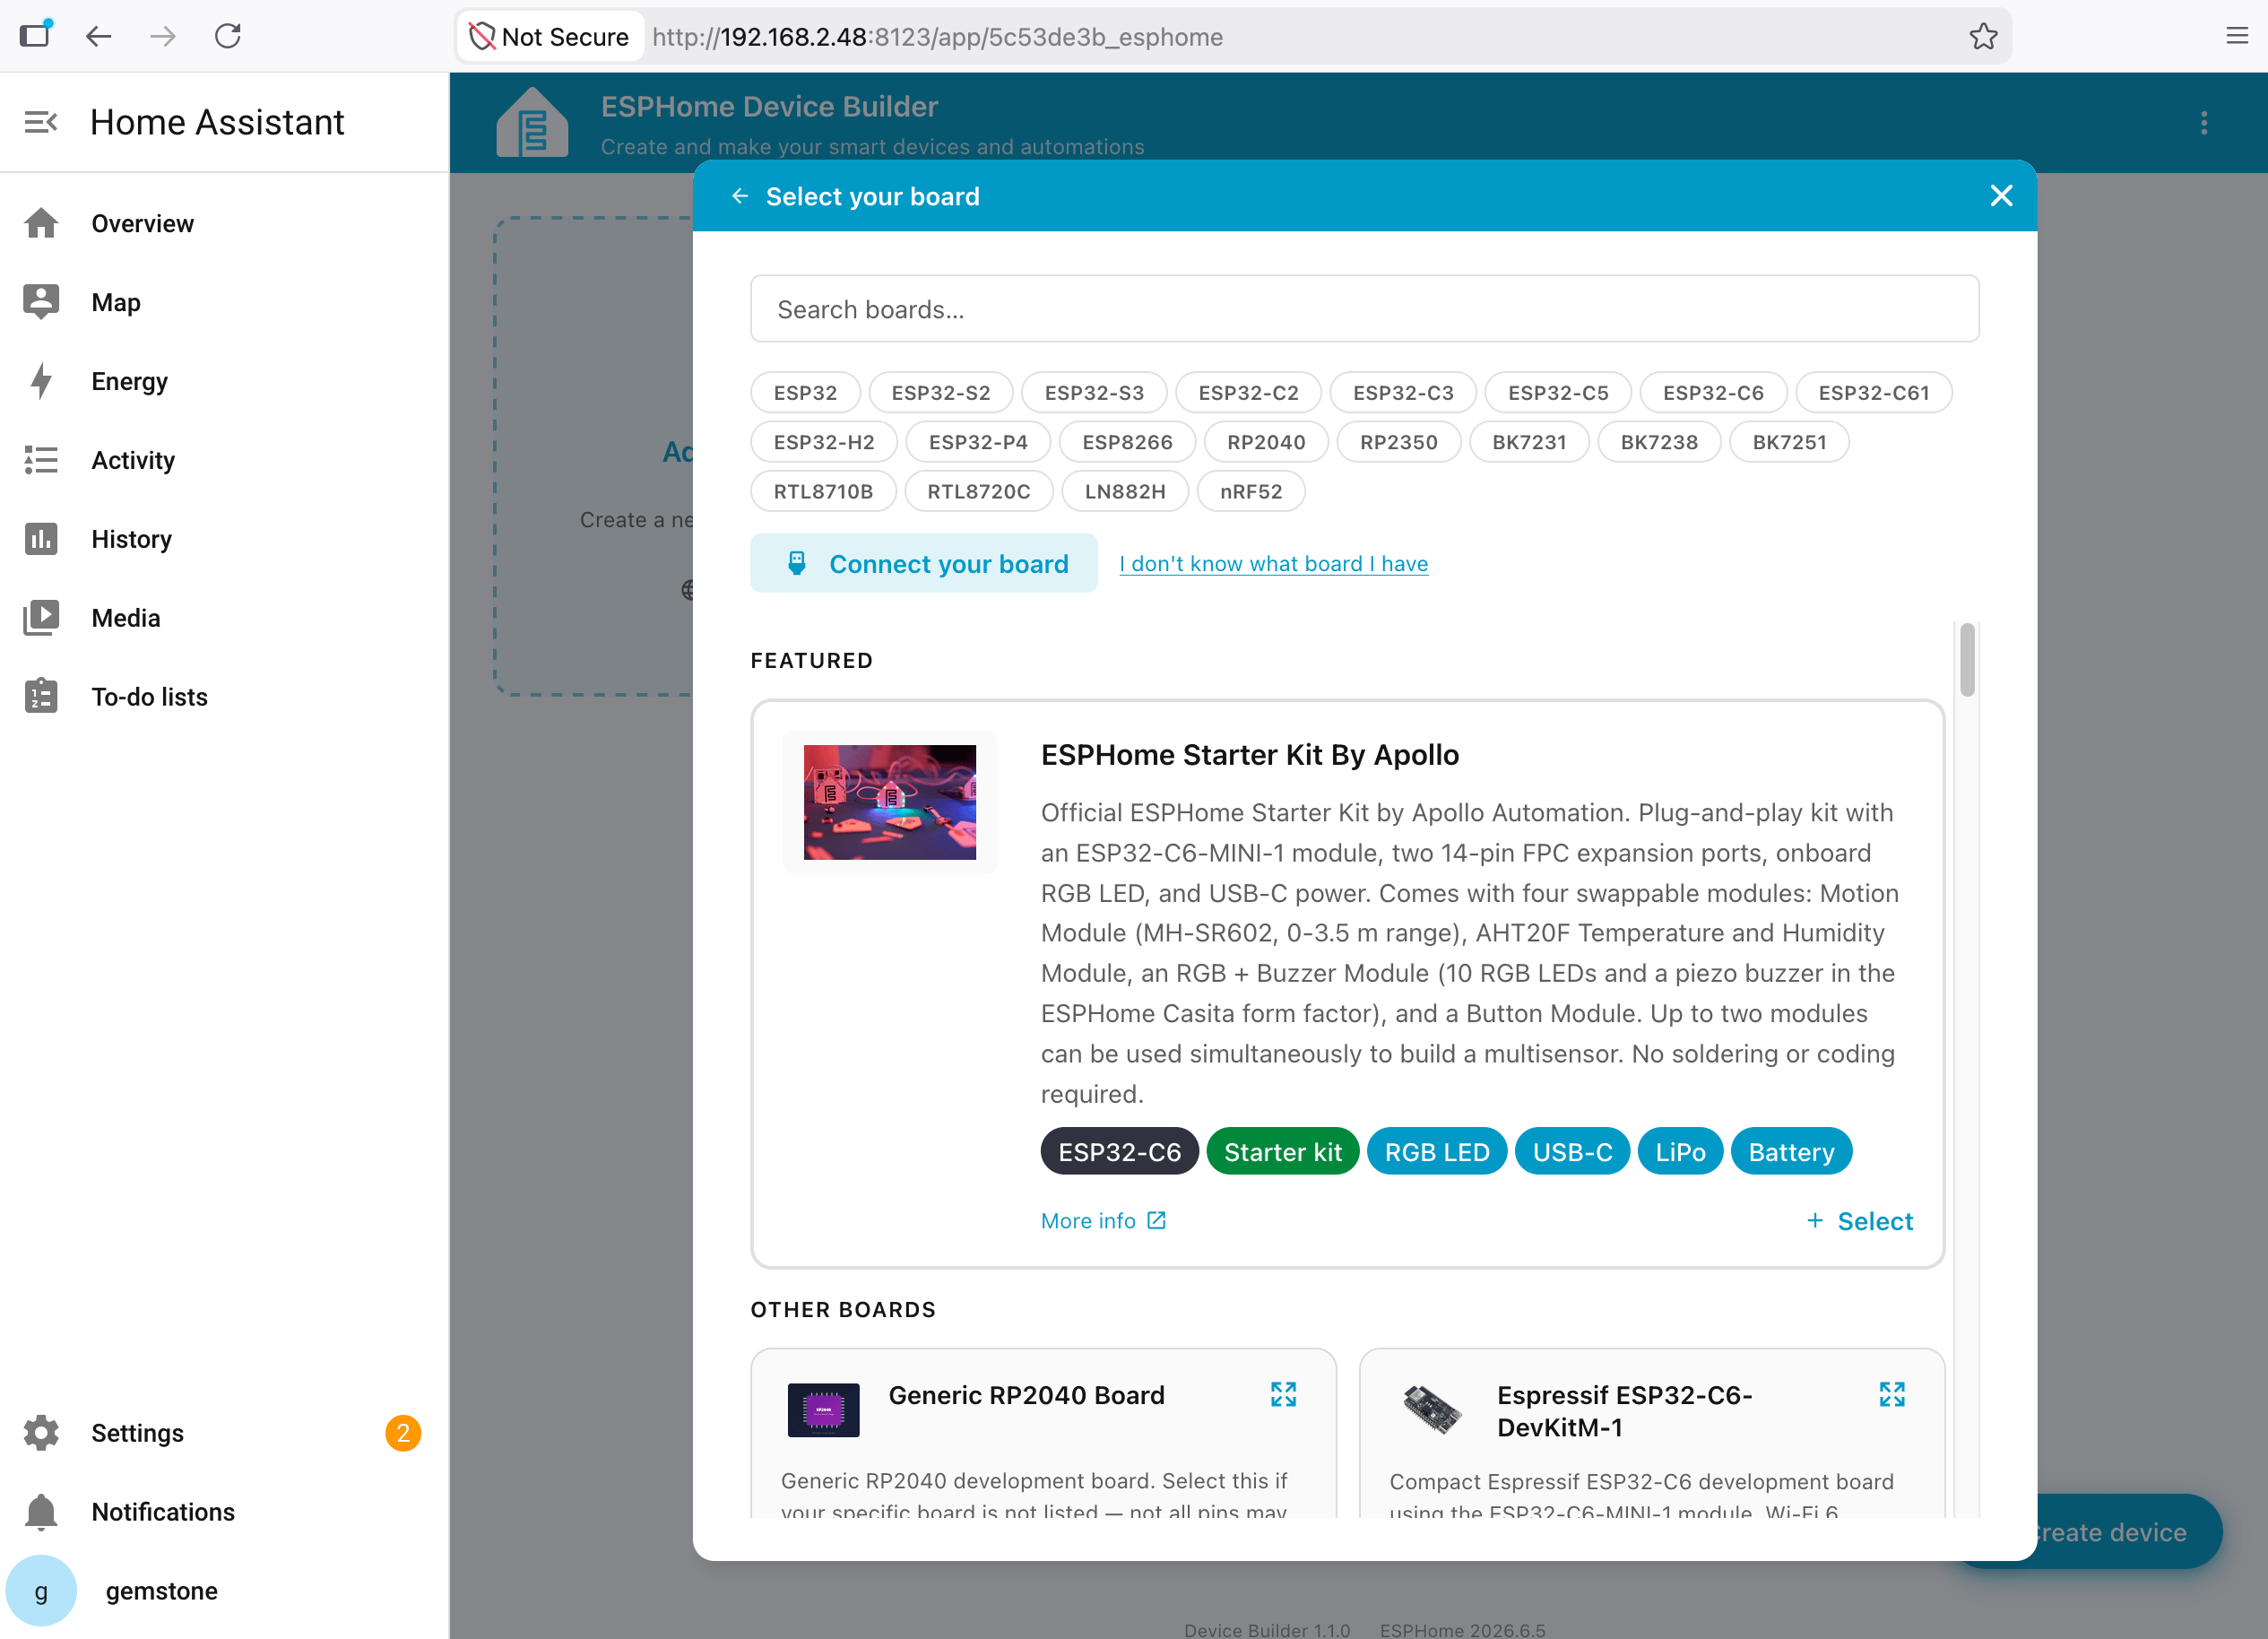 On the opened page, search according to the MCU model you will use.
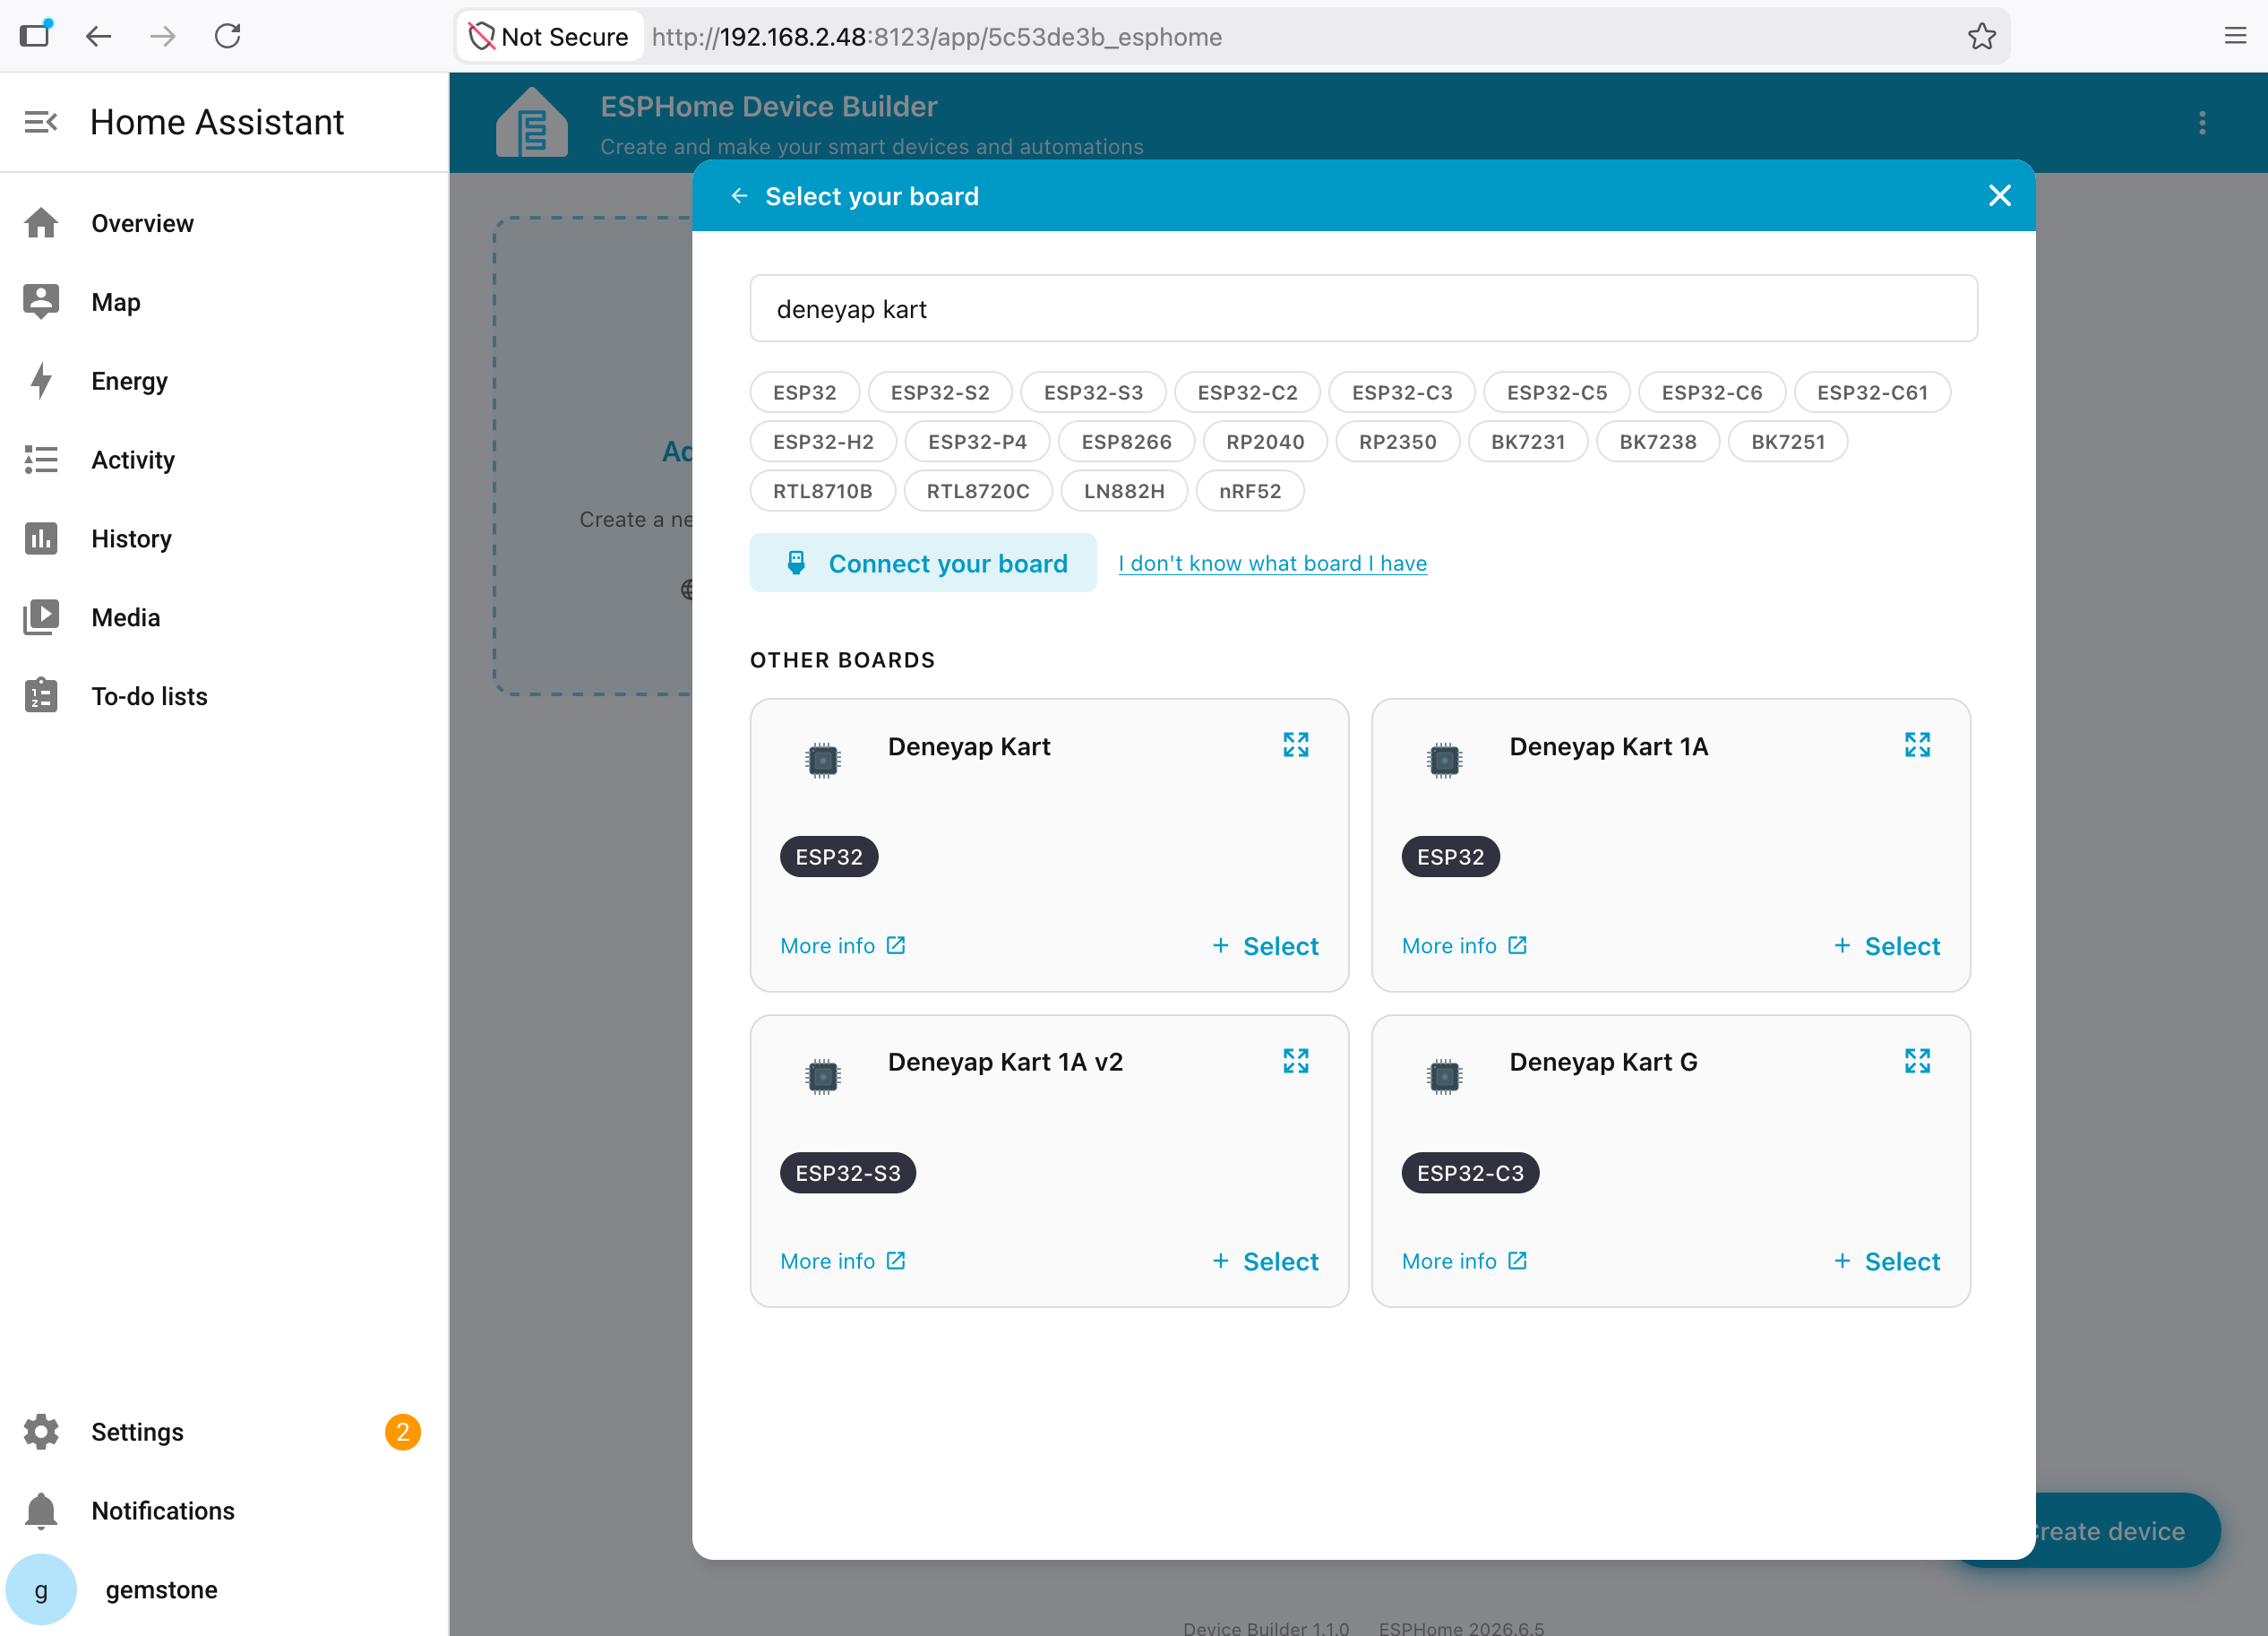 At this step, select the appropriate model.
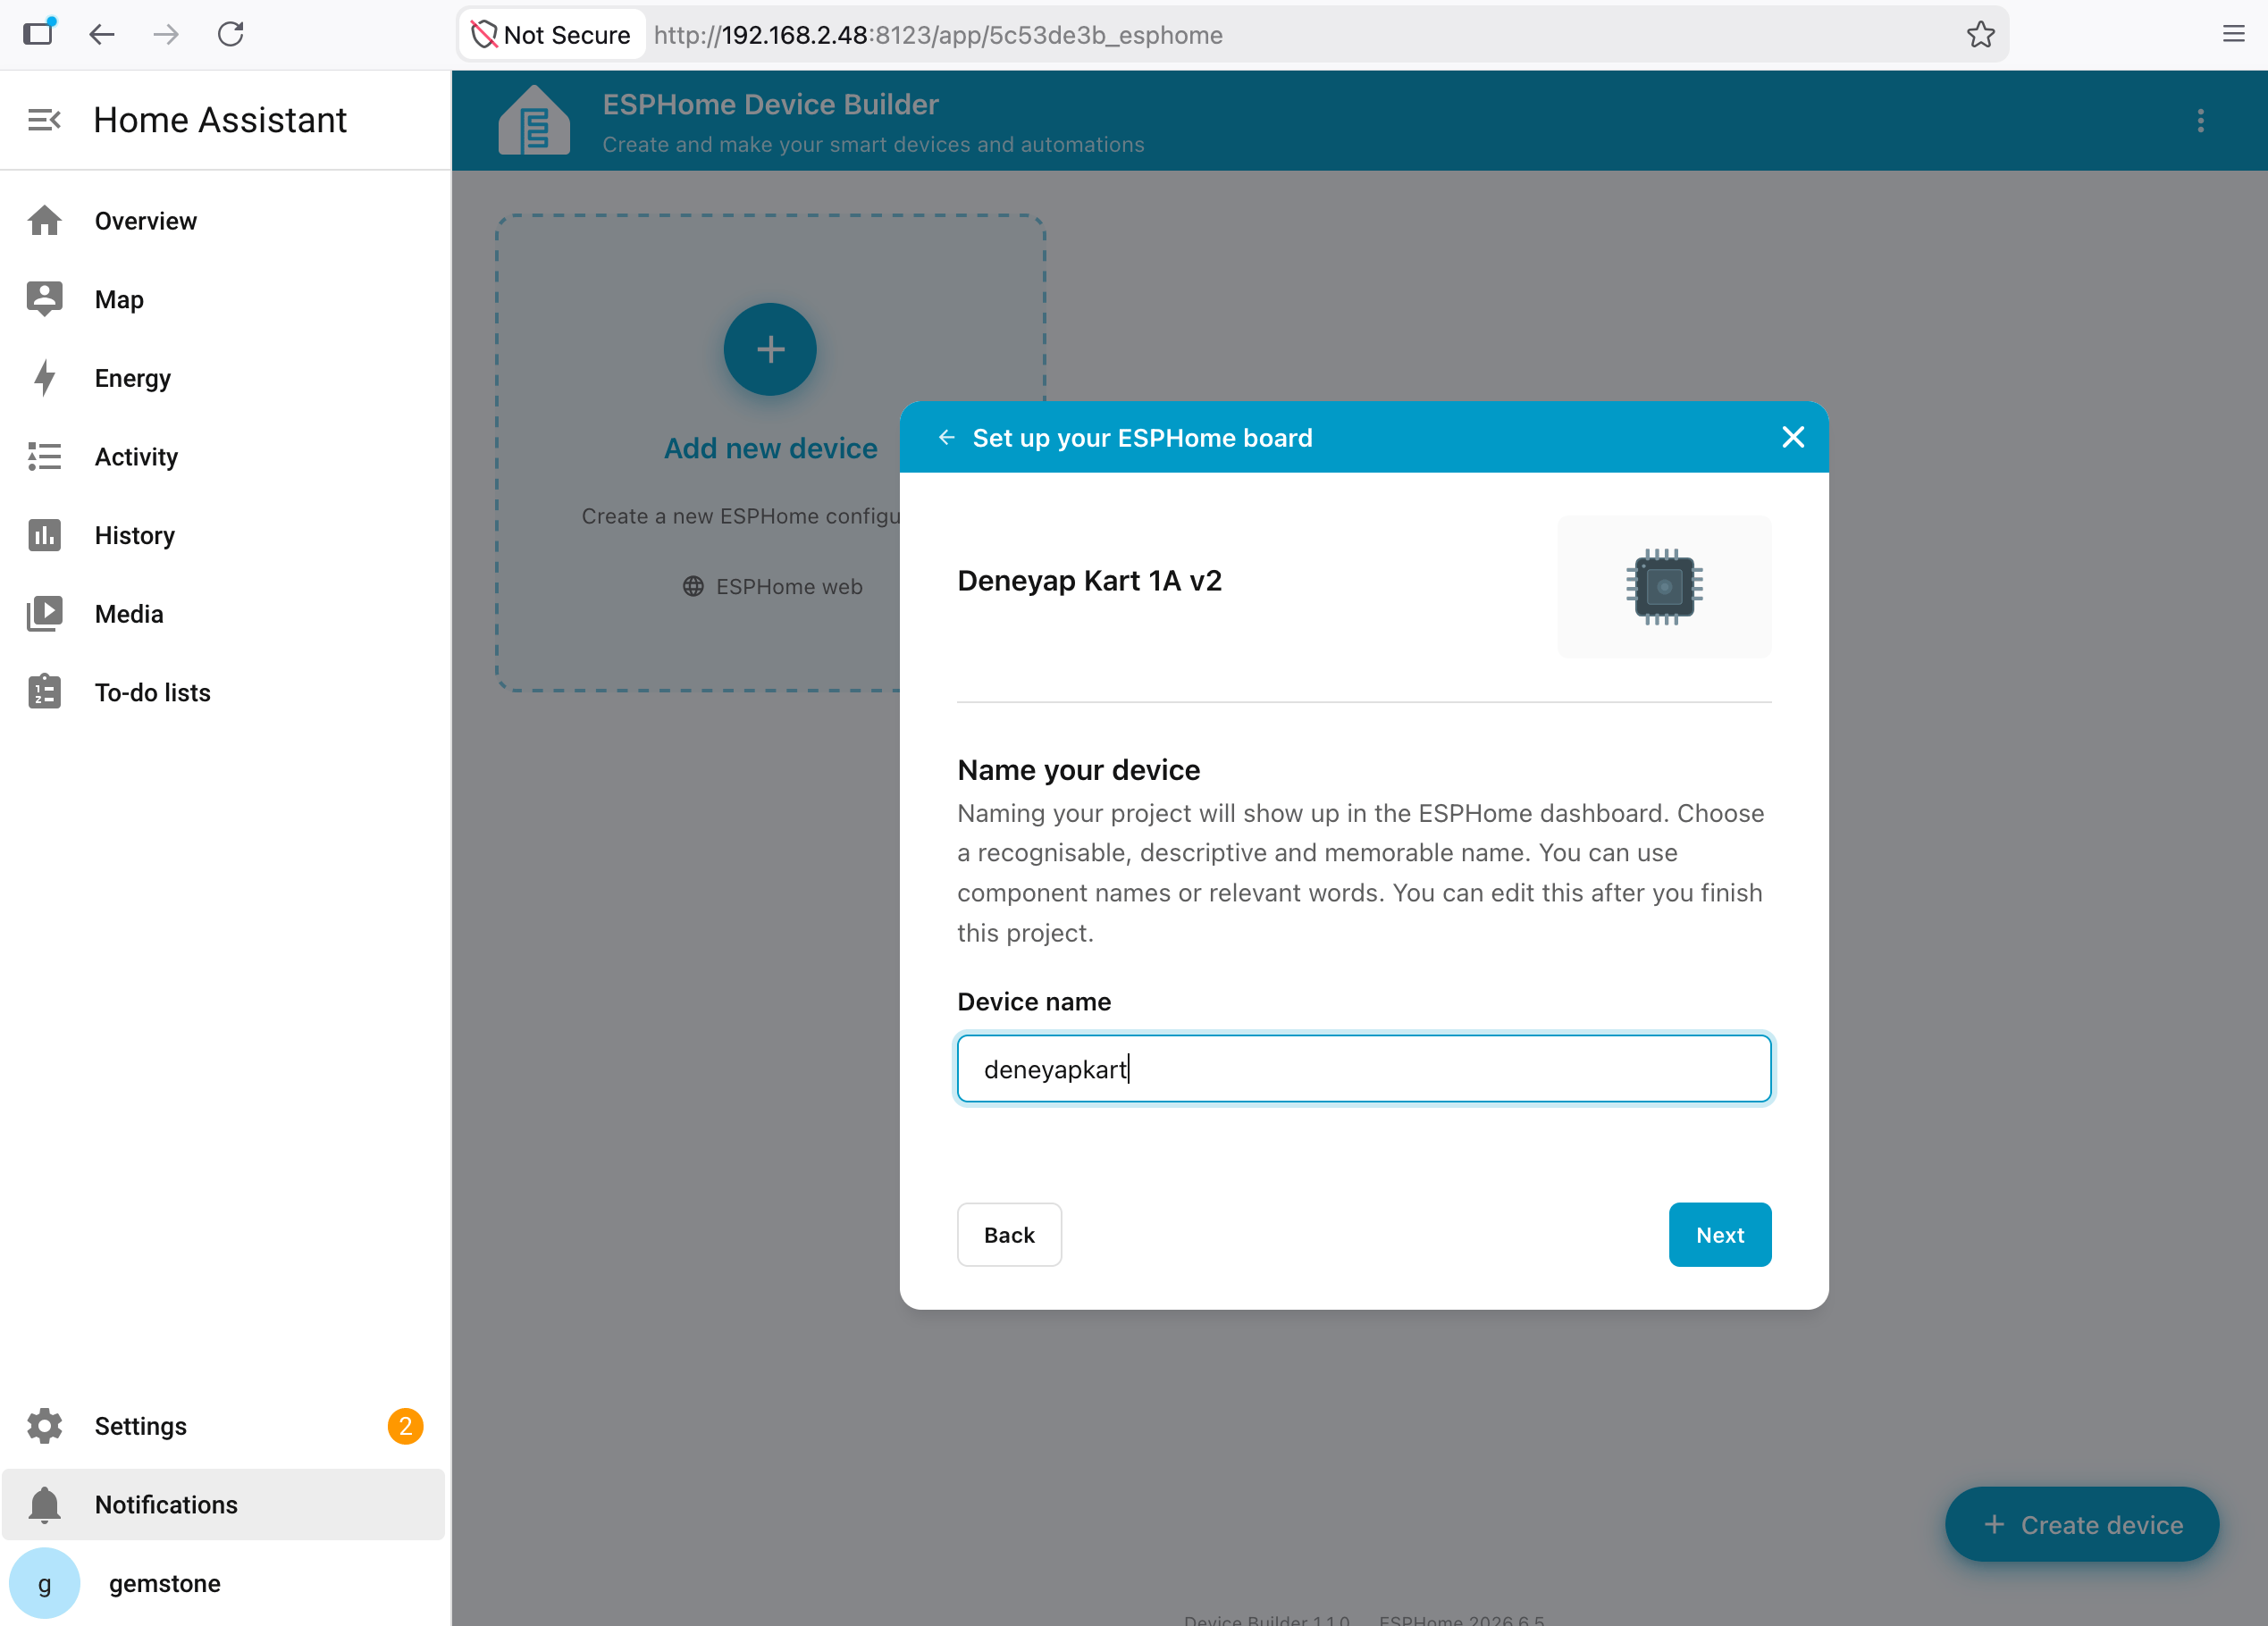 At this step, you need to assign a name to the board.
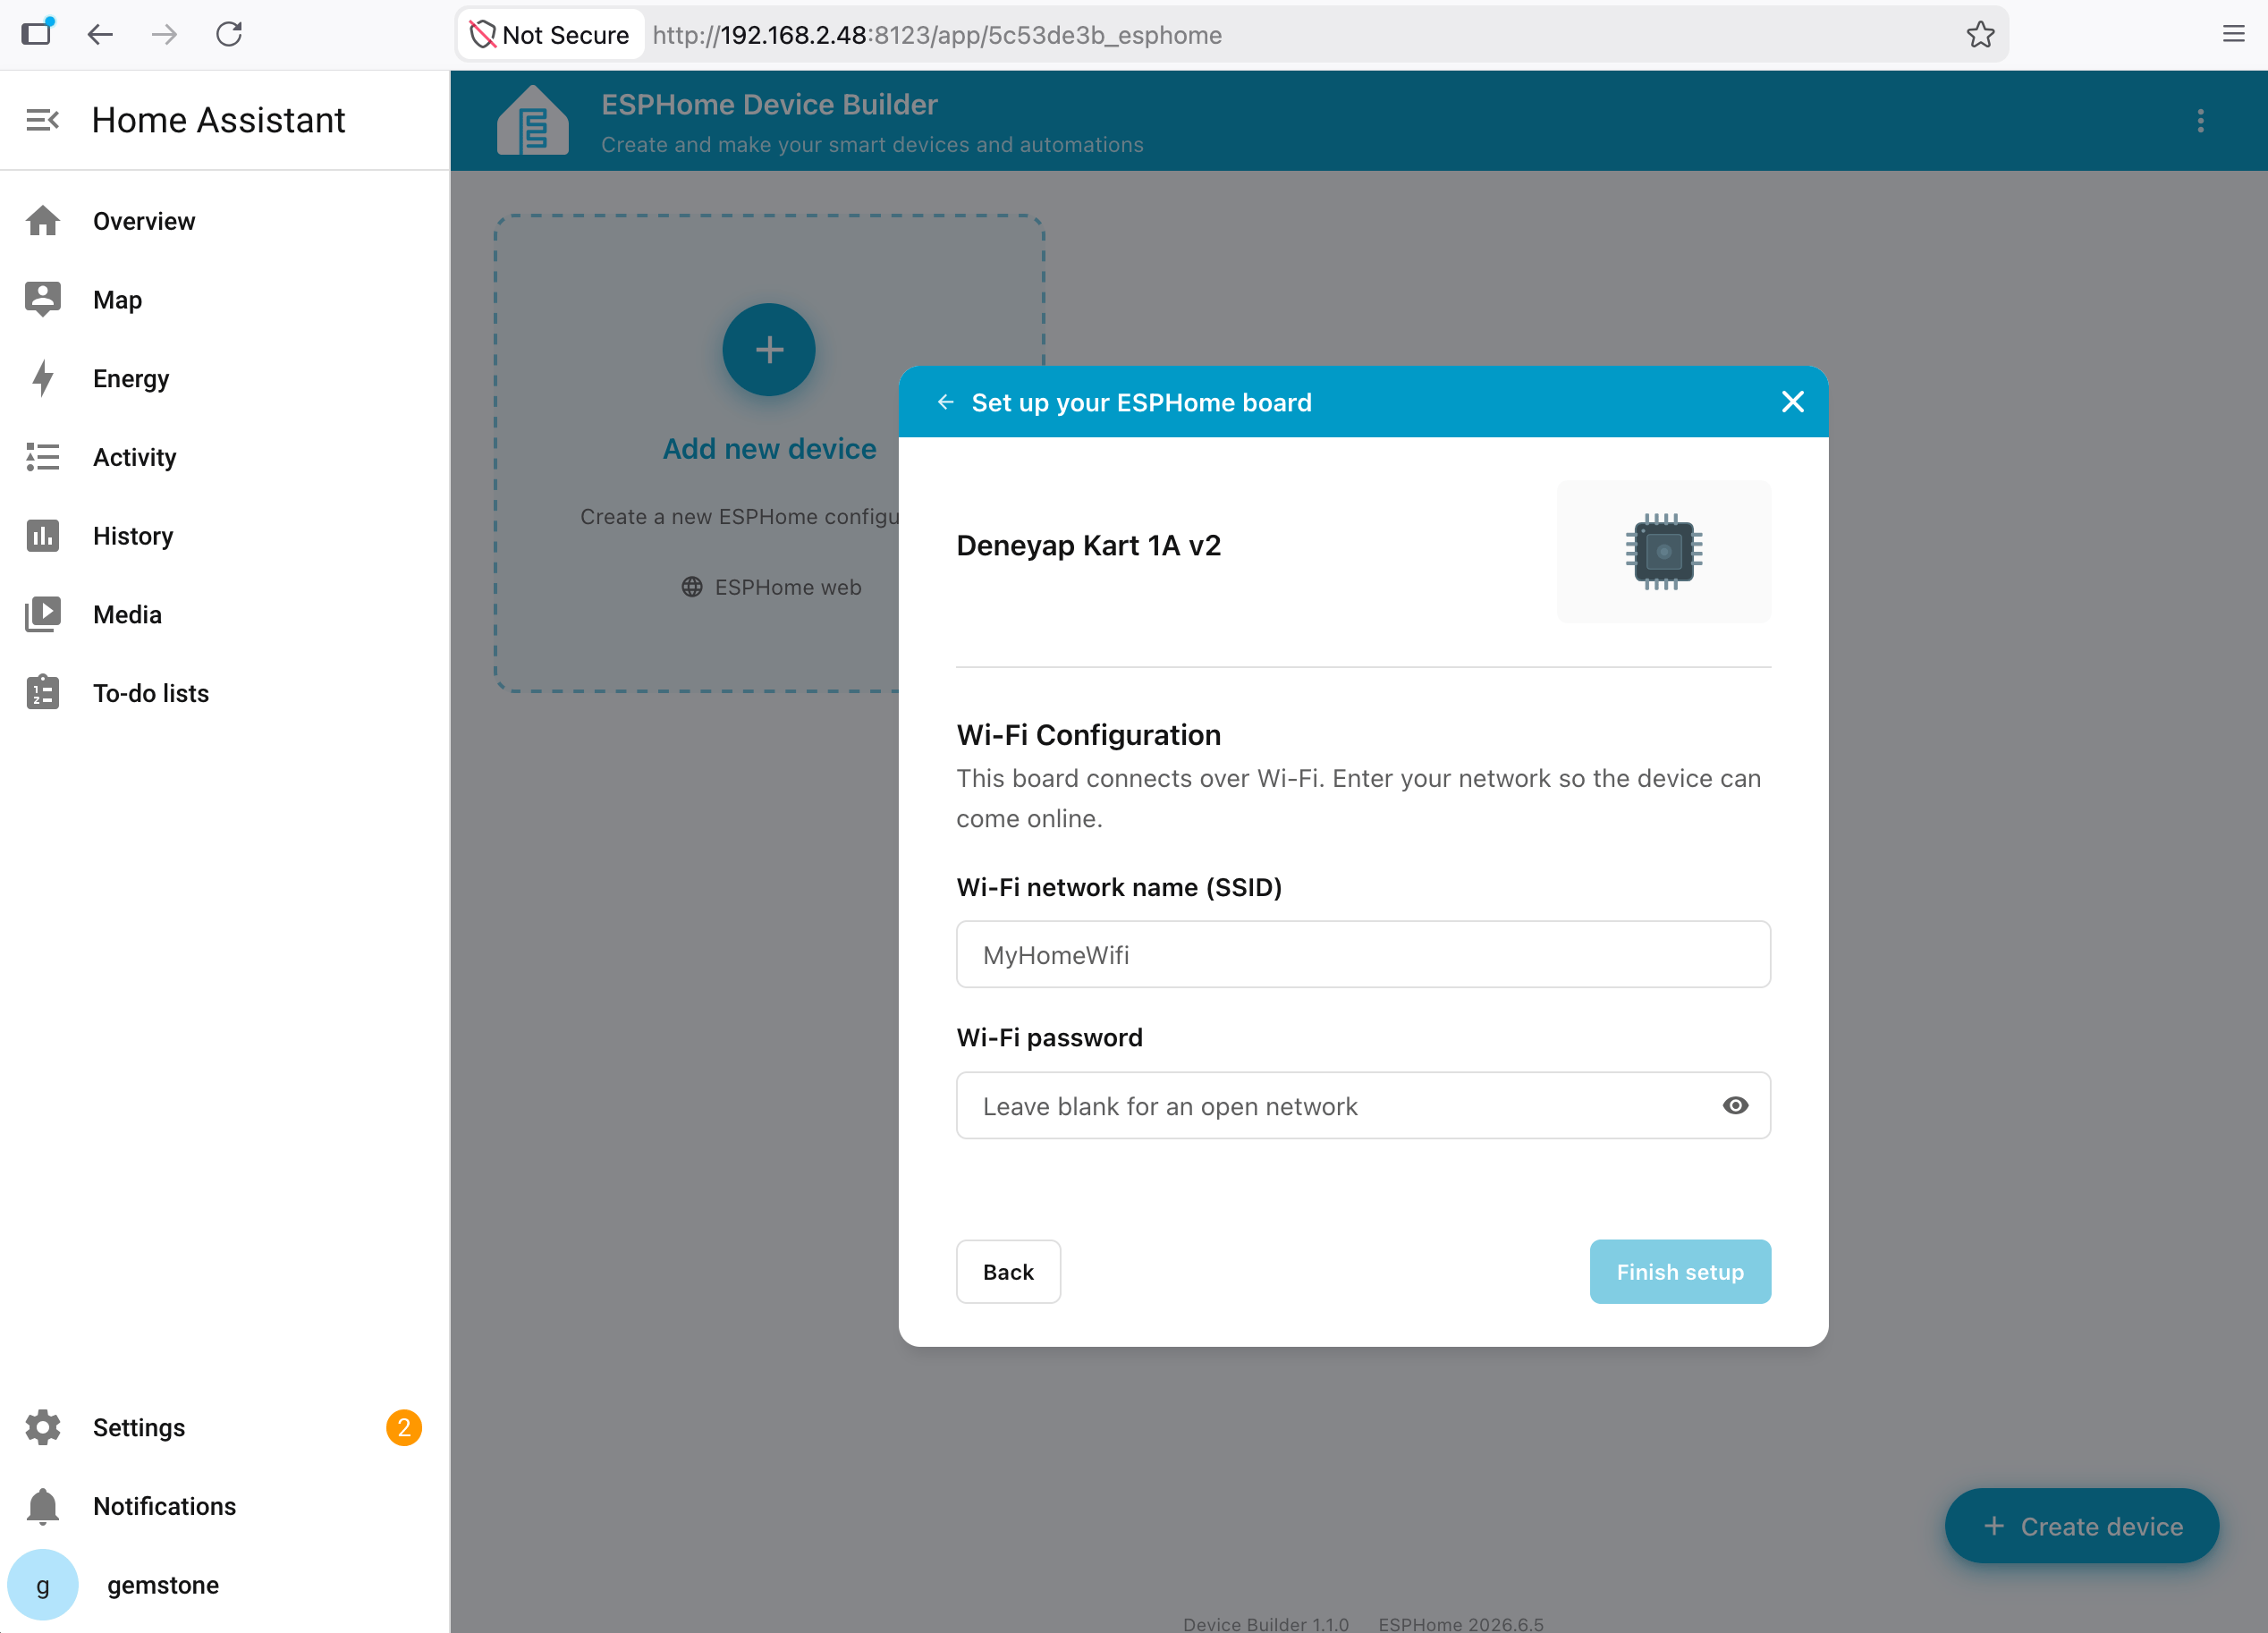 At this step, enter your modem's SSID and password in the "Network Name" and "Password" fields.
```yaml theme={"system"}
substitutions:
LED_PIN: GPIO48 # Onboard RGB LED
BUTTON_PIN: GPIO0 # Boot Button
# Pin Mappings
D0: GPIO1
D1: GPIO2
D4: GPIO42
D8: GPIO38
D9: GPIO48
D12: GPIO10
D13: GPIO3
D14: GPIO8
# I2C
SDA_PIN: GPIO47
SCL_PIN: GPIO21
```
Then, copy the **pin definitions** made in this section to the bottom of the YAML file.
At this step, enter your modem's SSID and password in the "Network Name" and "Password" fields.
```yaml theme={"system"}
substitutions:
LED_PIN: GPIO48 # Onboard RGB LED
BUTTON_PIN: GPIO0 # Boot Button
# Pin Mappings
D0: GPIO1
D1: GPIO2
D4: GPIO42
D8: GPIO38
D9: GPIO48
D12: GPIO10
D13: GPIO3
D14: GPIO8
# I2C
SDA_PIN: GPIO47
SCL_PIN: GPIO21
```
Then, copy the **pin definitions** made in this section to the bottom of the YAML file.
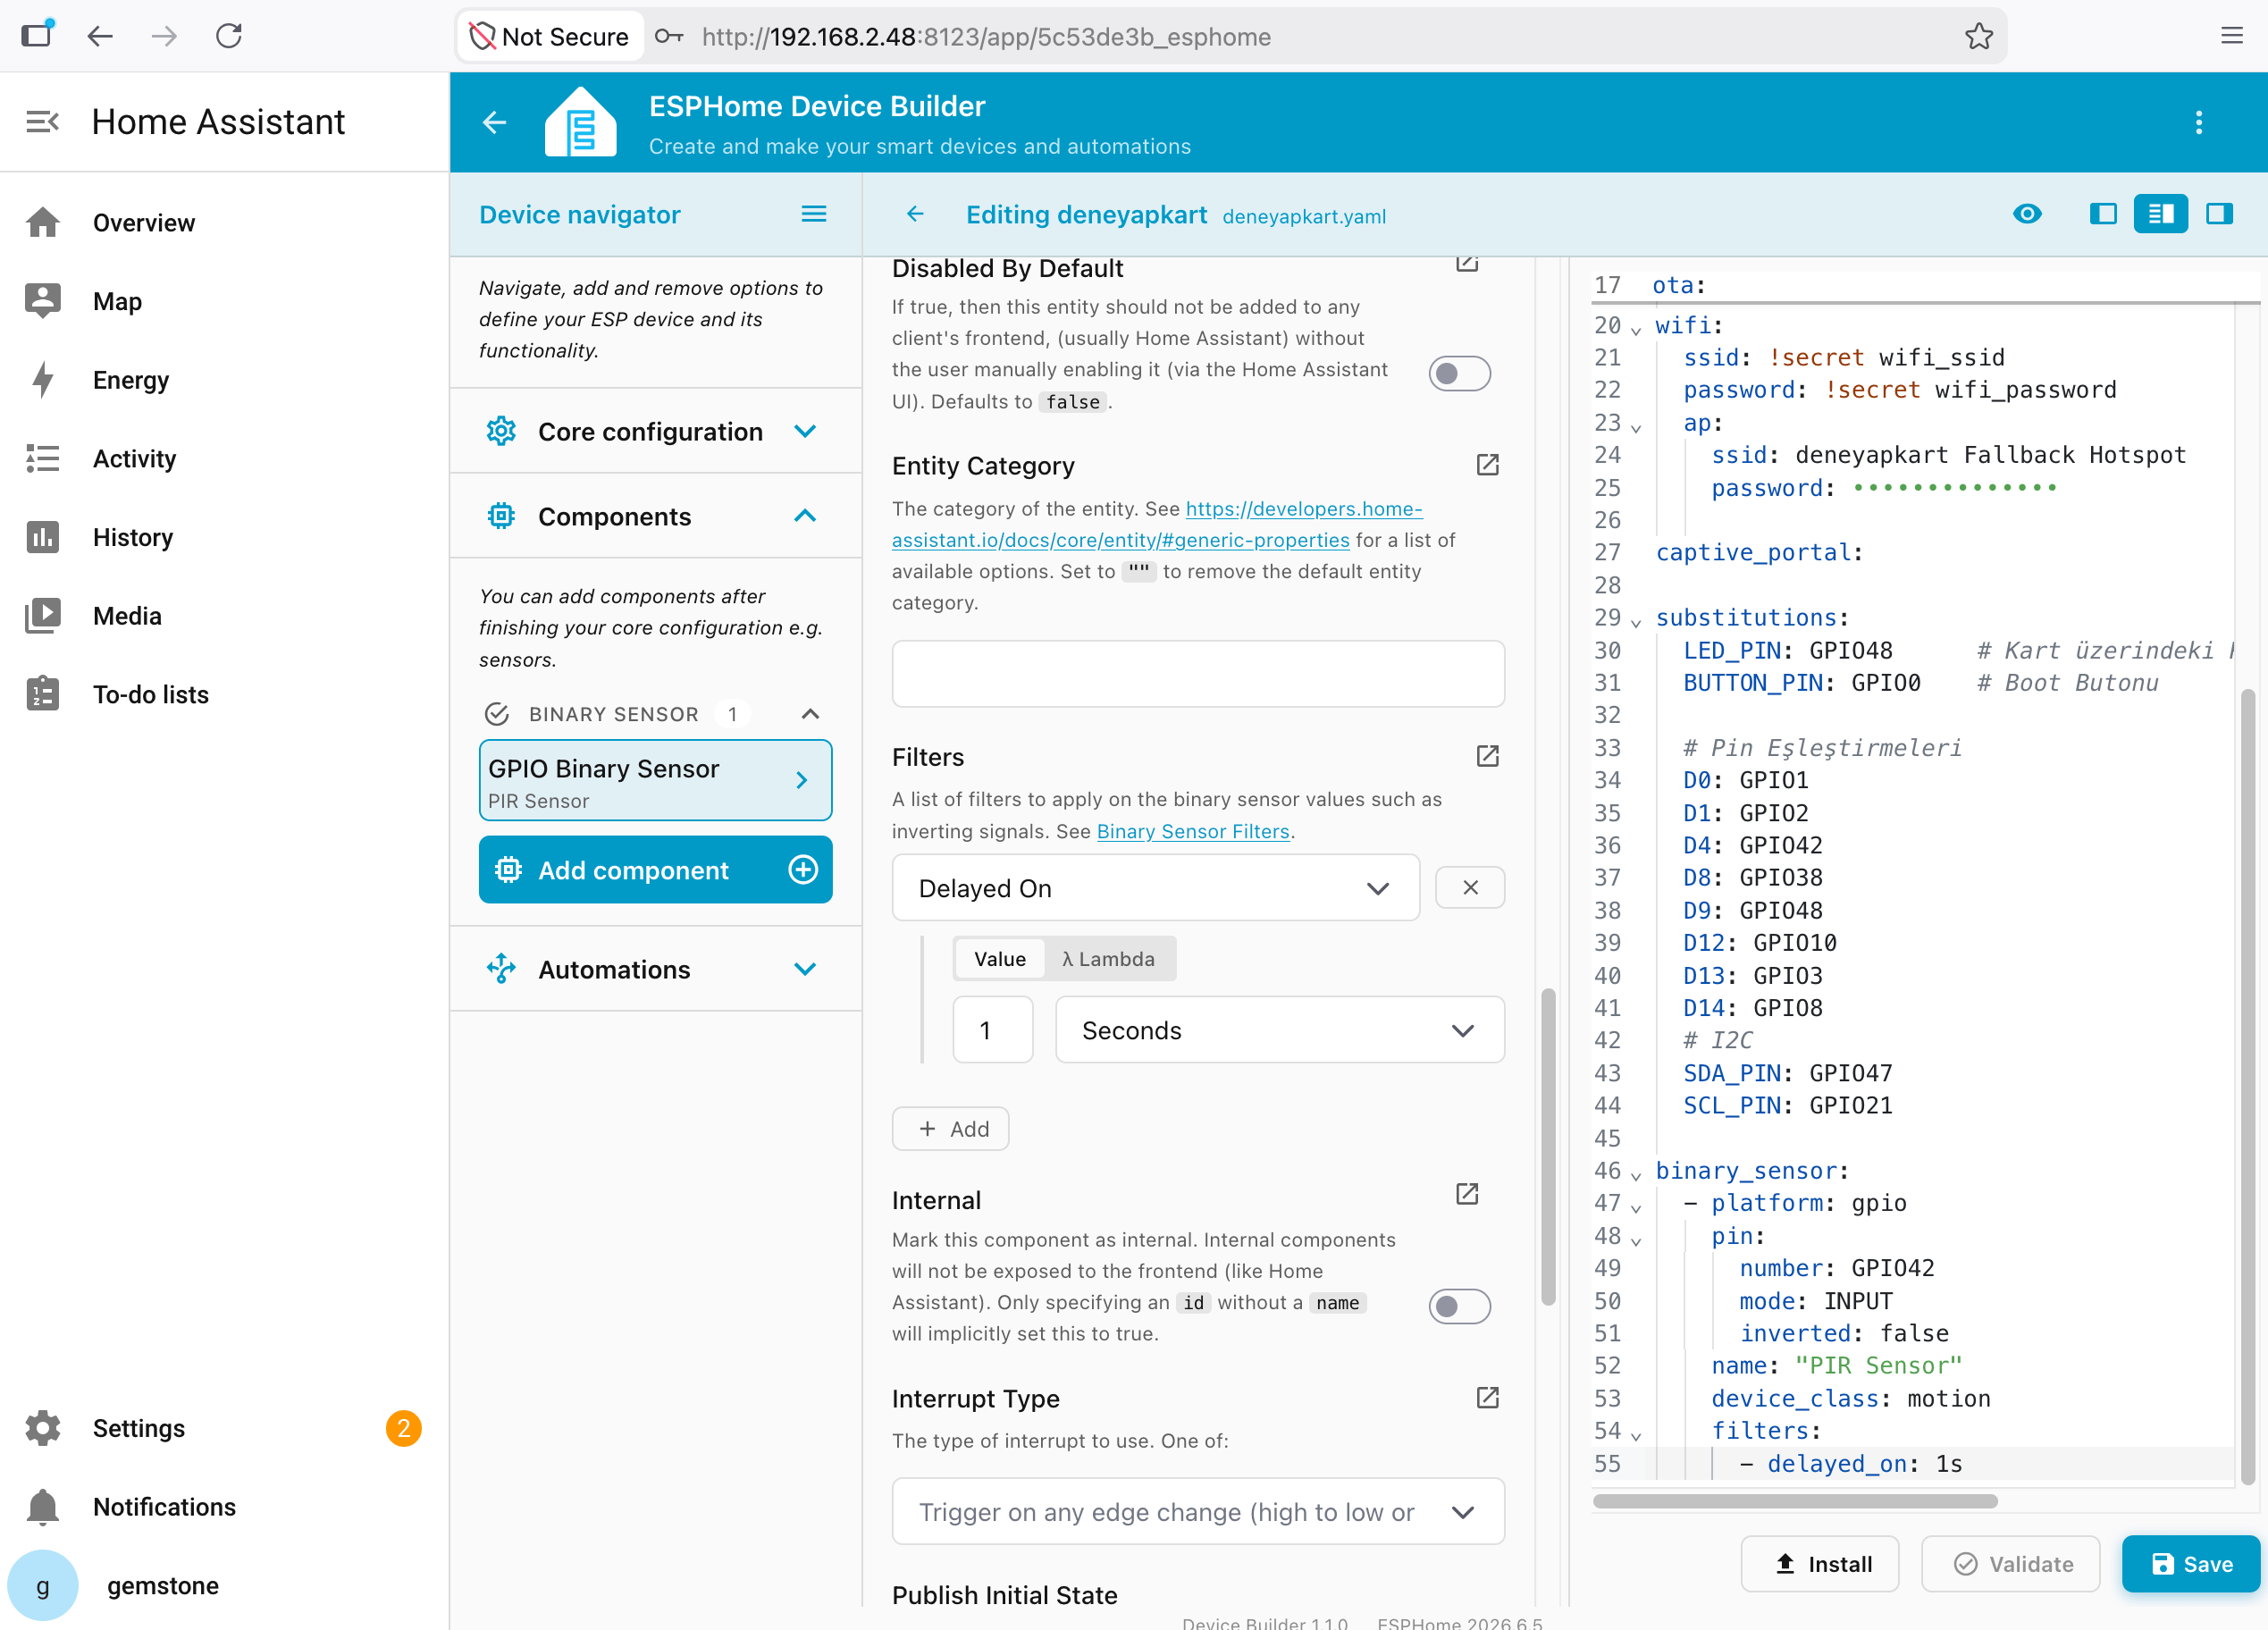 Since a motion sensor will be connected in this example, paste the following definitions at the bottom of the YAML file as shown above.
```yaml theme={"system"}
binary_sensor:
- platform: gpio
pin:
number: GPIO42
mode: INPUT
inverted: false
name: "PIR Sensor"
device_class: motion
filters:
- delayed_on: 1s
```
The motion sensor is connected to the **D4 pin (GPIO42)**. If you connected it to a different pin, you need to update the **`number`** field accordingly.
For the required pin assignments, you can refer to the [Deneyap Kart Pin Guide](https://docs.deneyapkart.org/en/Development_Boards) page.
Click the "Install" button in the bottom right corner. This step completes the configuration.
### 4.3 Uploading Software to Deneyap Kart for ESPHome
Since a motion sensor will be connected in this example, paste the following definitions at the bottom of the YAML file as shown above.
```yaml theme={"system"}
binary_sensor:
- platform: gpio
pin:
number: GPIO42
mode: INPUT
inverted: false
name: "PIR Sensor"
device_class: motion
filters:
- delayed_on: 1s
```
The motion sensor is connected to the **D4 pin (GPIO42)**. If you connected it to a different pin, you need to update the **`number`** field accordingly.
For the required pin assignments, you can refer to the [Deneyap Kart Pin Guide](https://docs.deneyapkart.org/en/Development_Boards) page.
Click the "Install" button in the bottom right corner. This step completes the configuration.
### 4.3 Uploading Software to Deneyap Kart for ESPHome
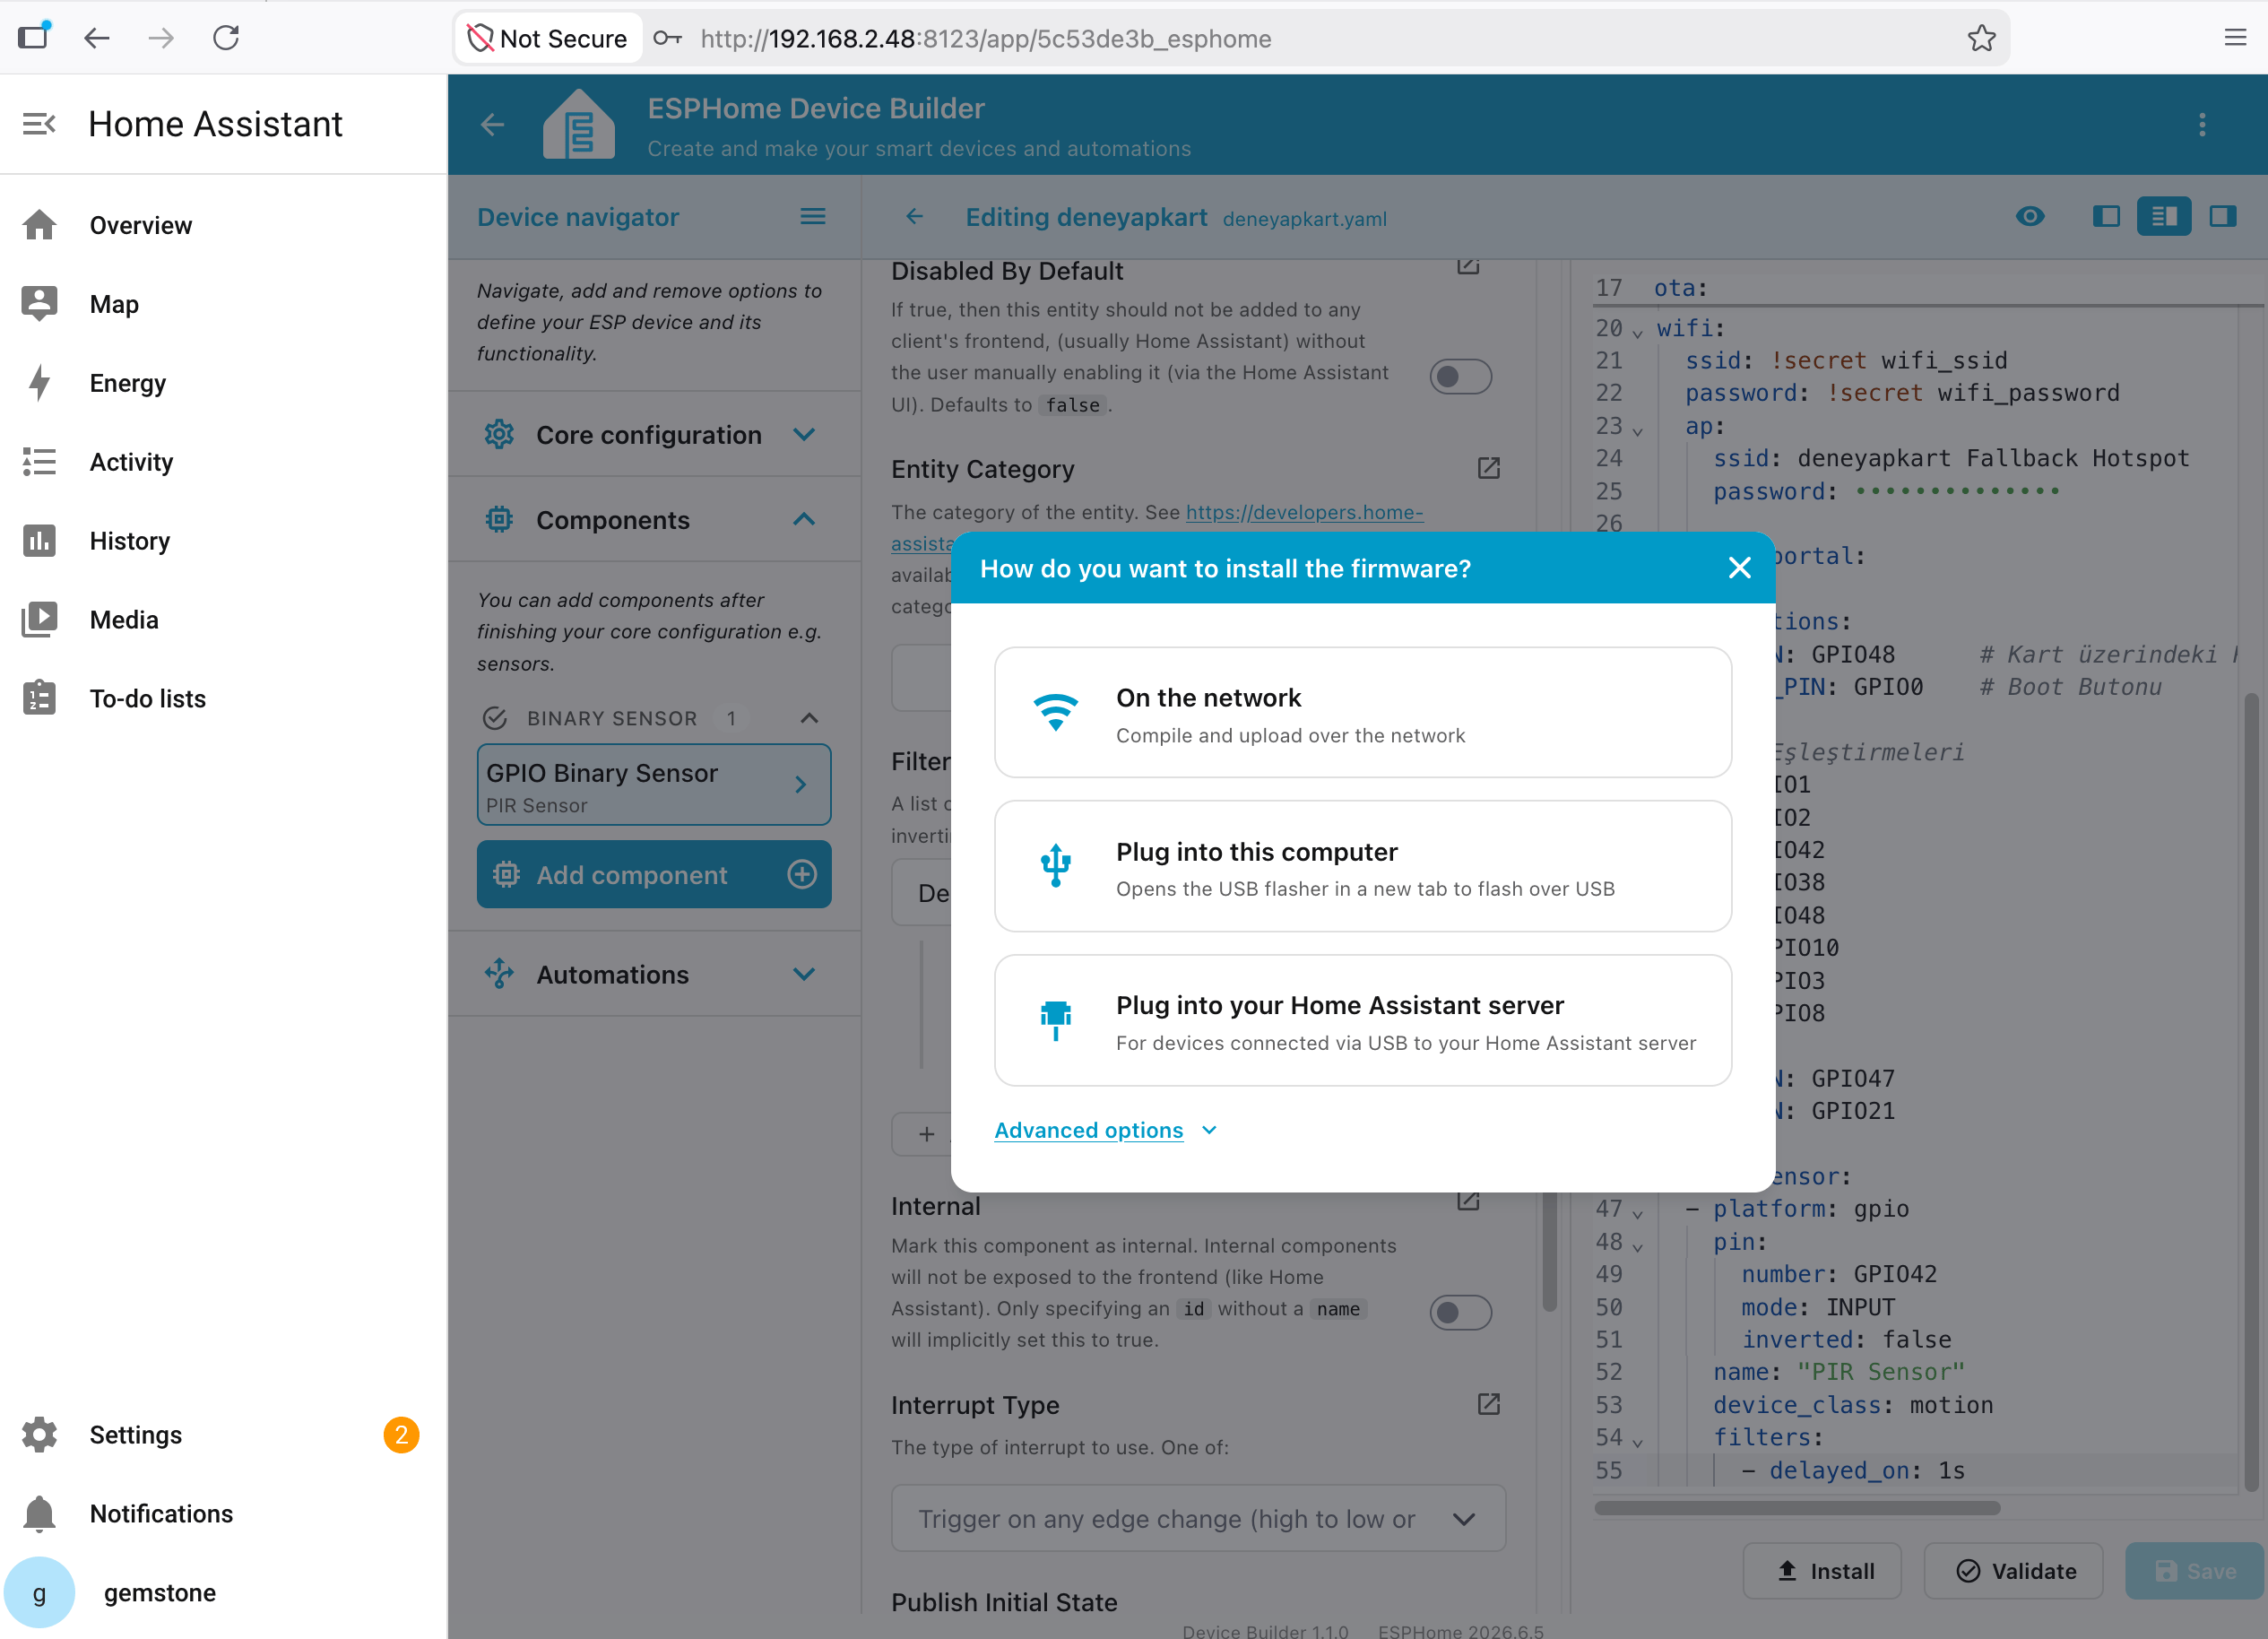 First, connect the **Deneyap Kart** to any USB port of your **T3 Gemstone O1** development board.
Various upload options will be displayed in the opened menu, but for the initial upload, you should select **"Plug into the computer running ESPHome Device Builder"**.
For subsequent uploads, you can perform wireless uploads.
First, connect the **Deneyap Kart** to any USB port of your **T3 Gemstone O1** development board.
Various upload options will be displayed in the opened menu, but for the initial upload, you should select **"Plug into the computer running ESPHome Device Builder"**.
For subsequent uploads, you can perform wireless uploads.
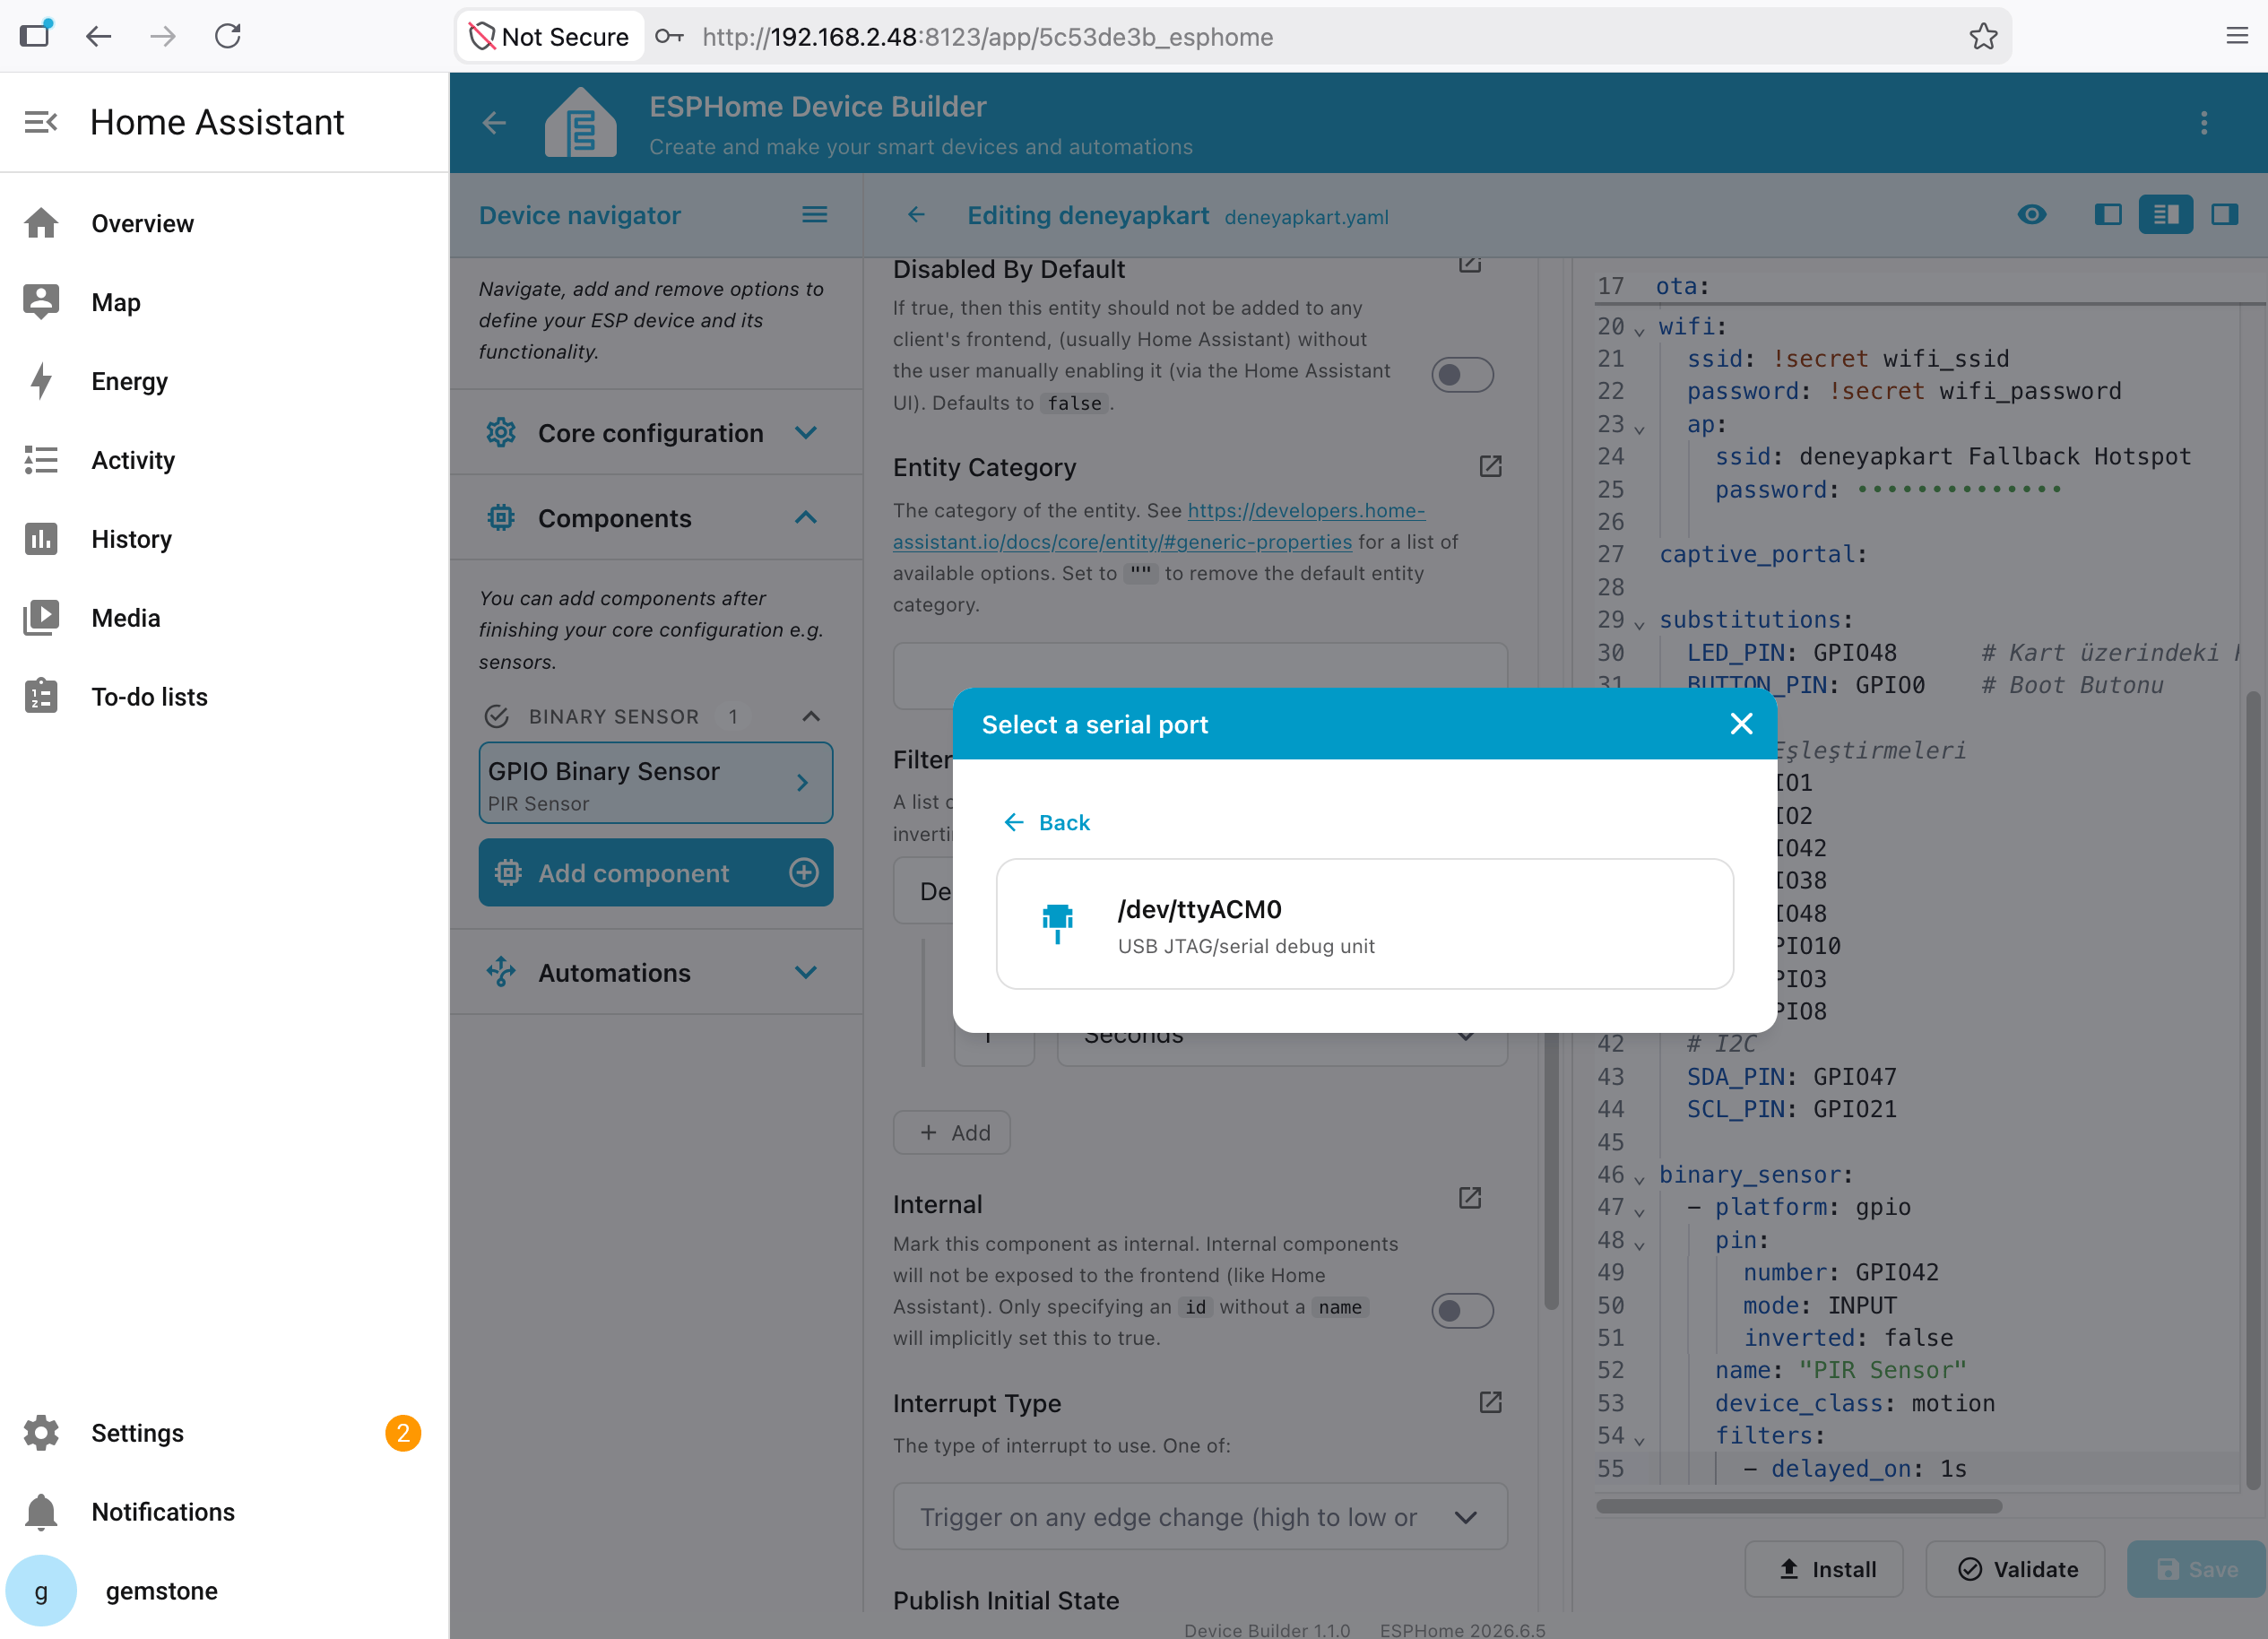 In the **Port selection** section, select the appropriate option from the list. If multiple ports are visible, the port that disappears and reappears when you unplug and replug the Deneyap Kart is the correct port.
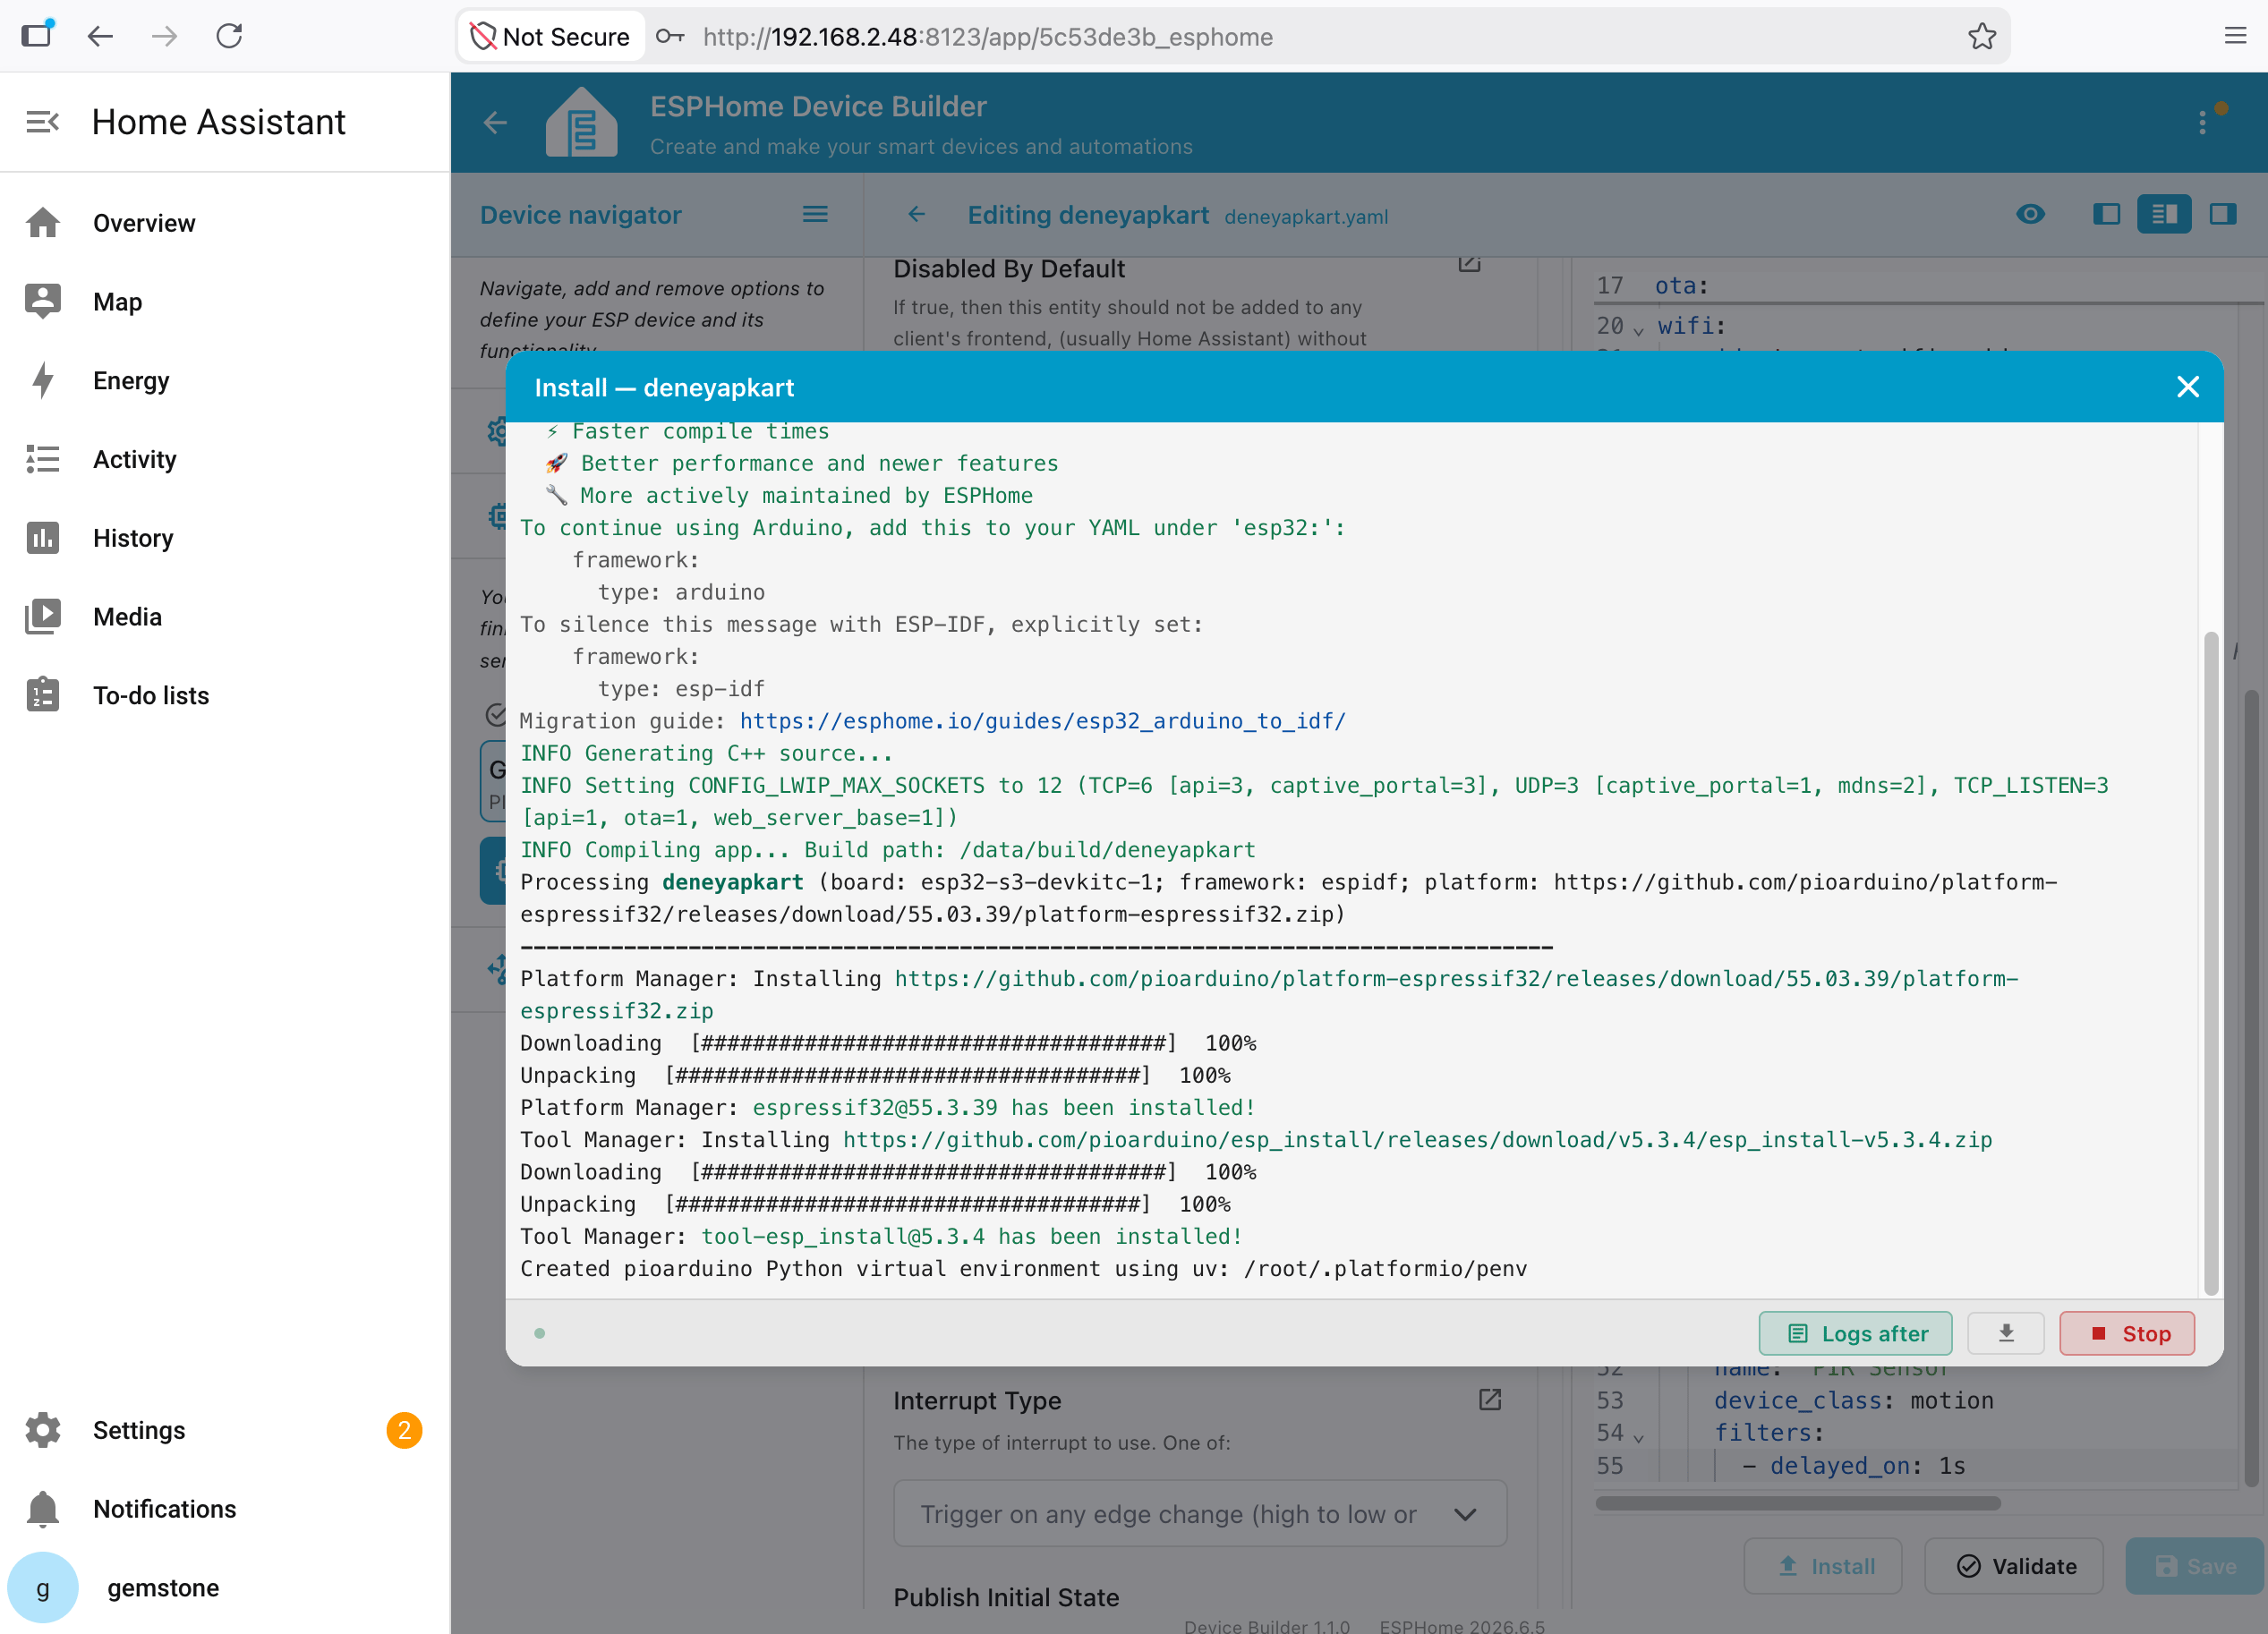 Start the upload process. The first upload may take some time, so patience is recommended.
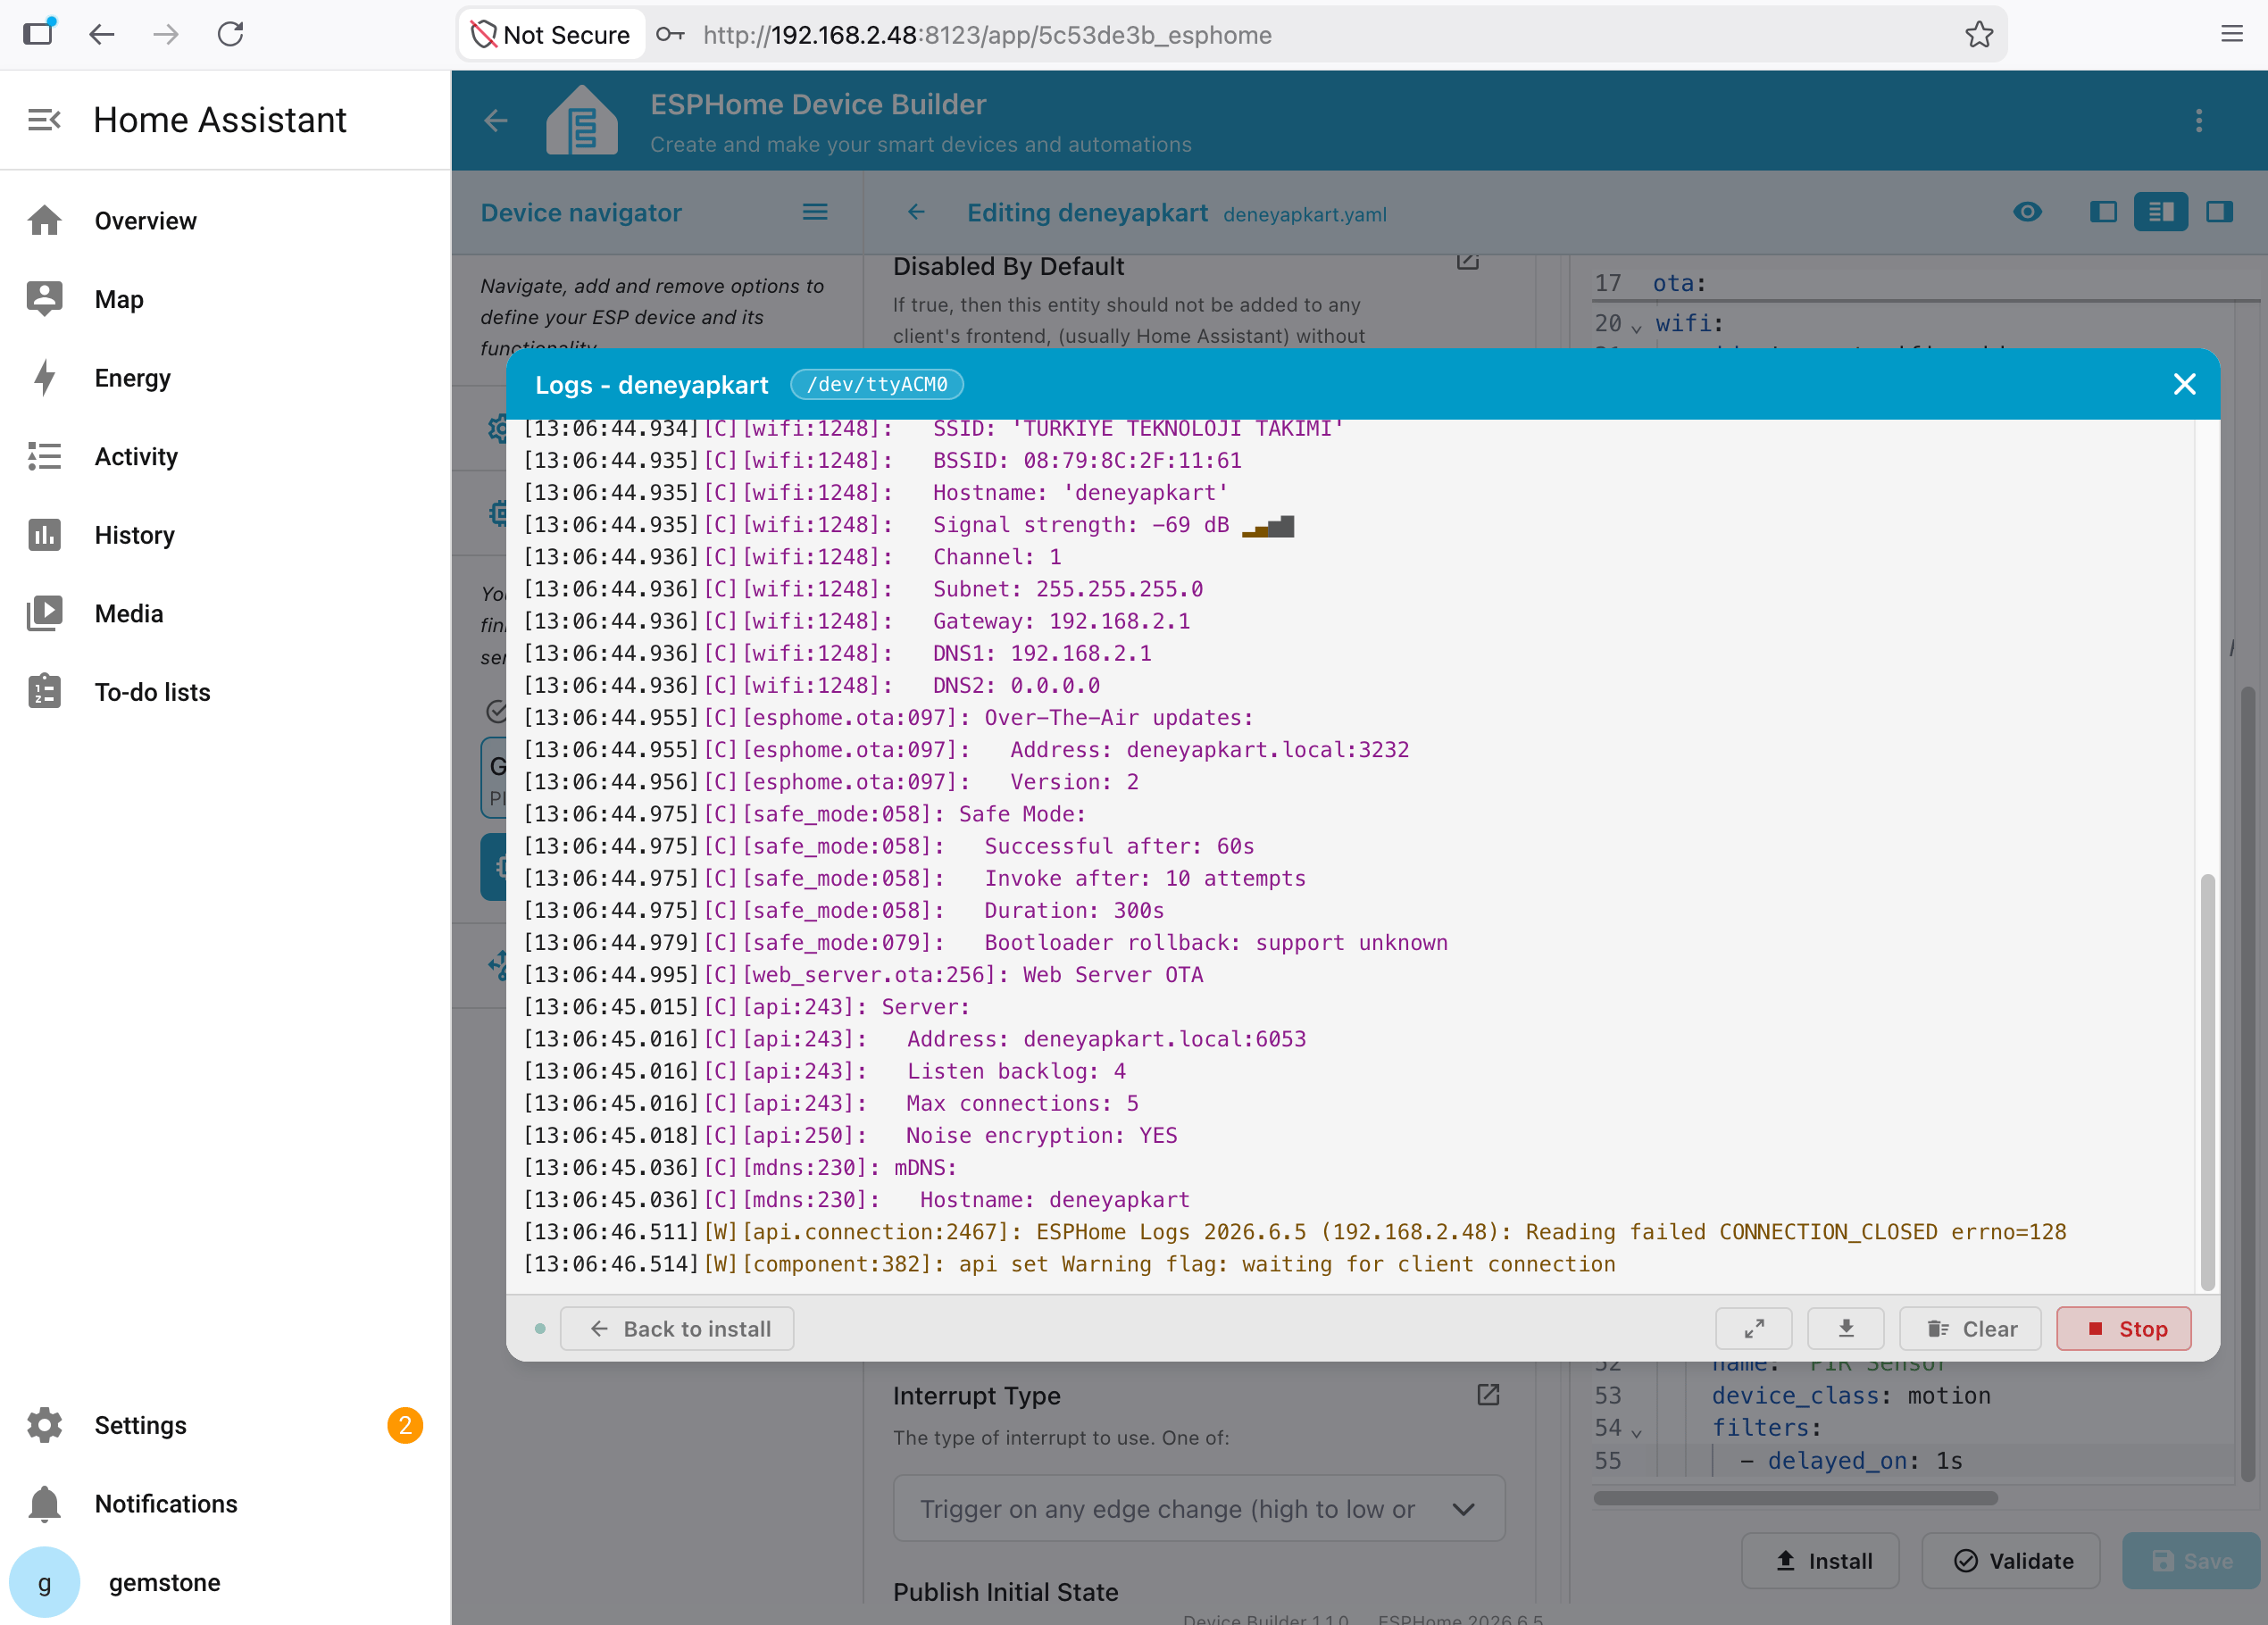 After the upload is complete, go to the ESPHome main screen and click on the "Logs" section.
In the opened menu, the "Wirelessly" option is now available.
After the upload is complete, go to the ESPHome main screen and click on the "Logs" section.
In the opened menu, the "Wirelessly" option is now available.
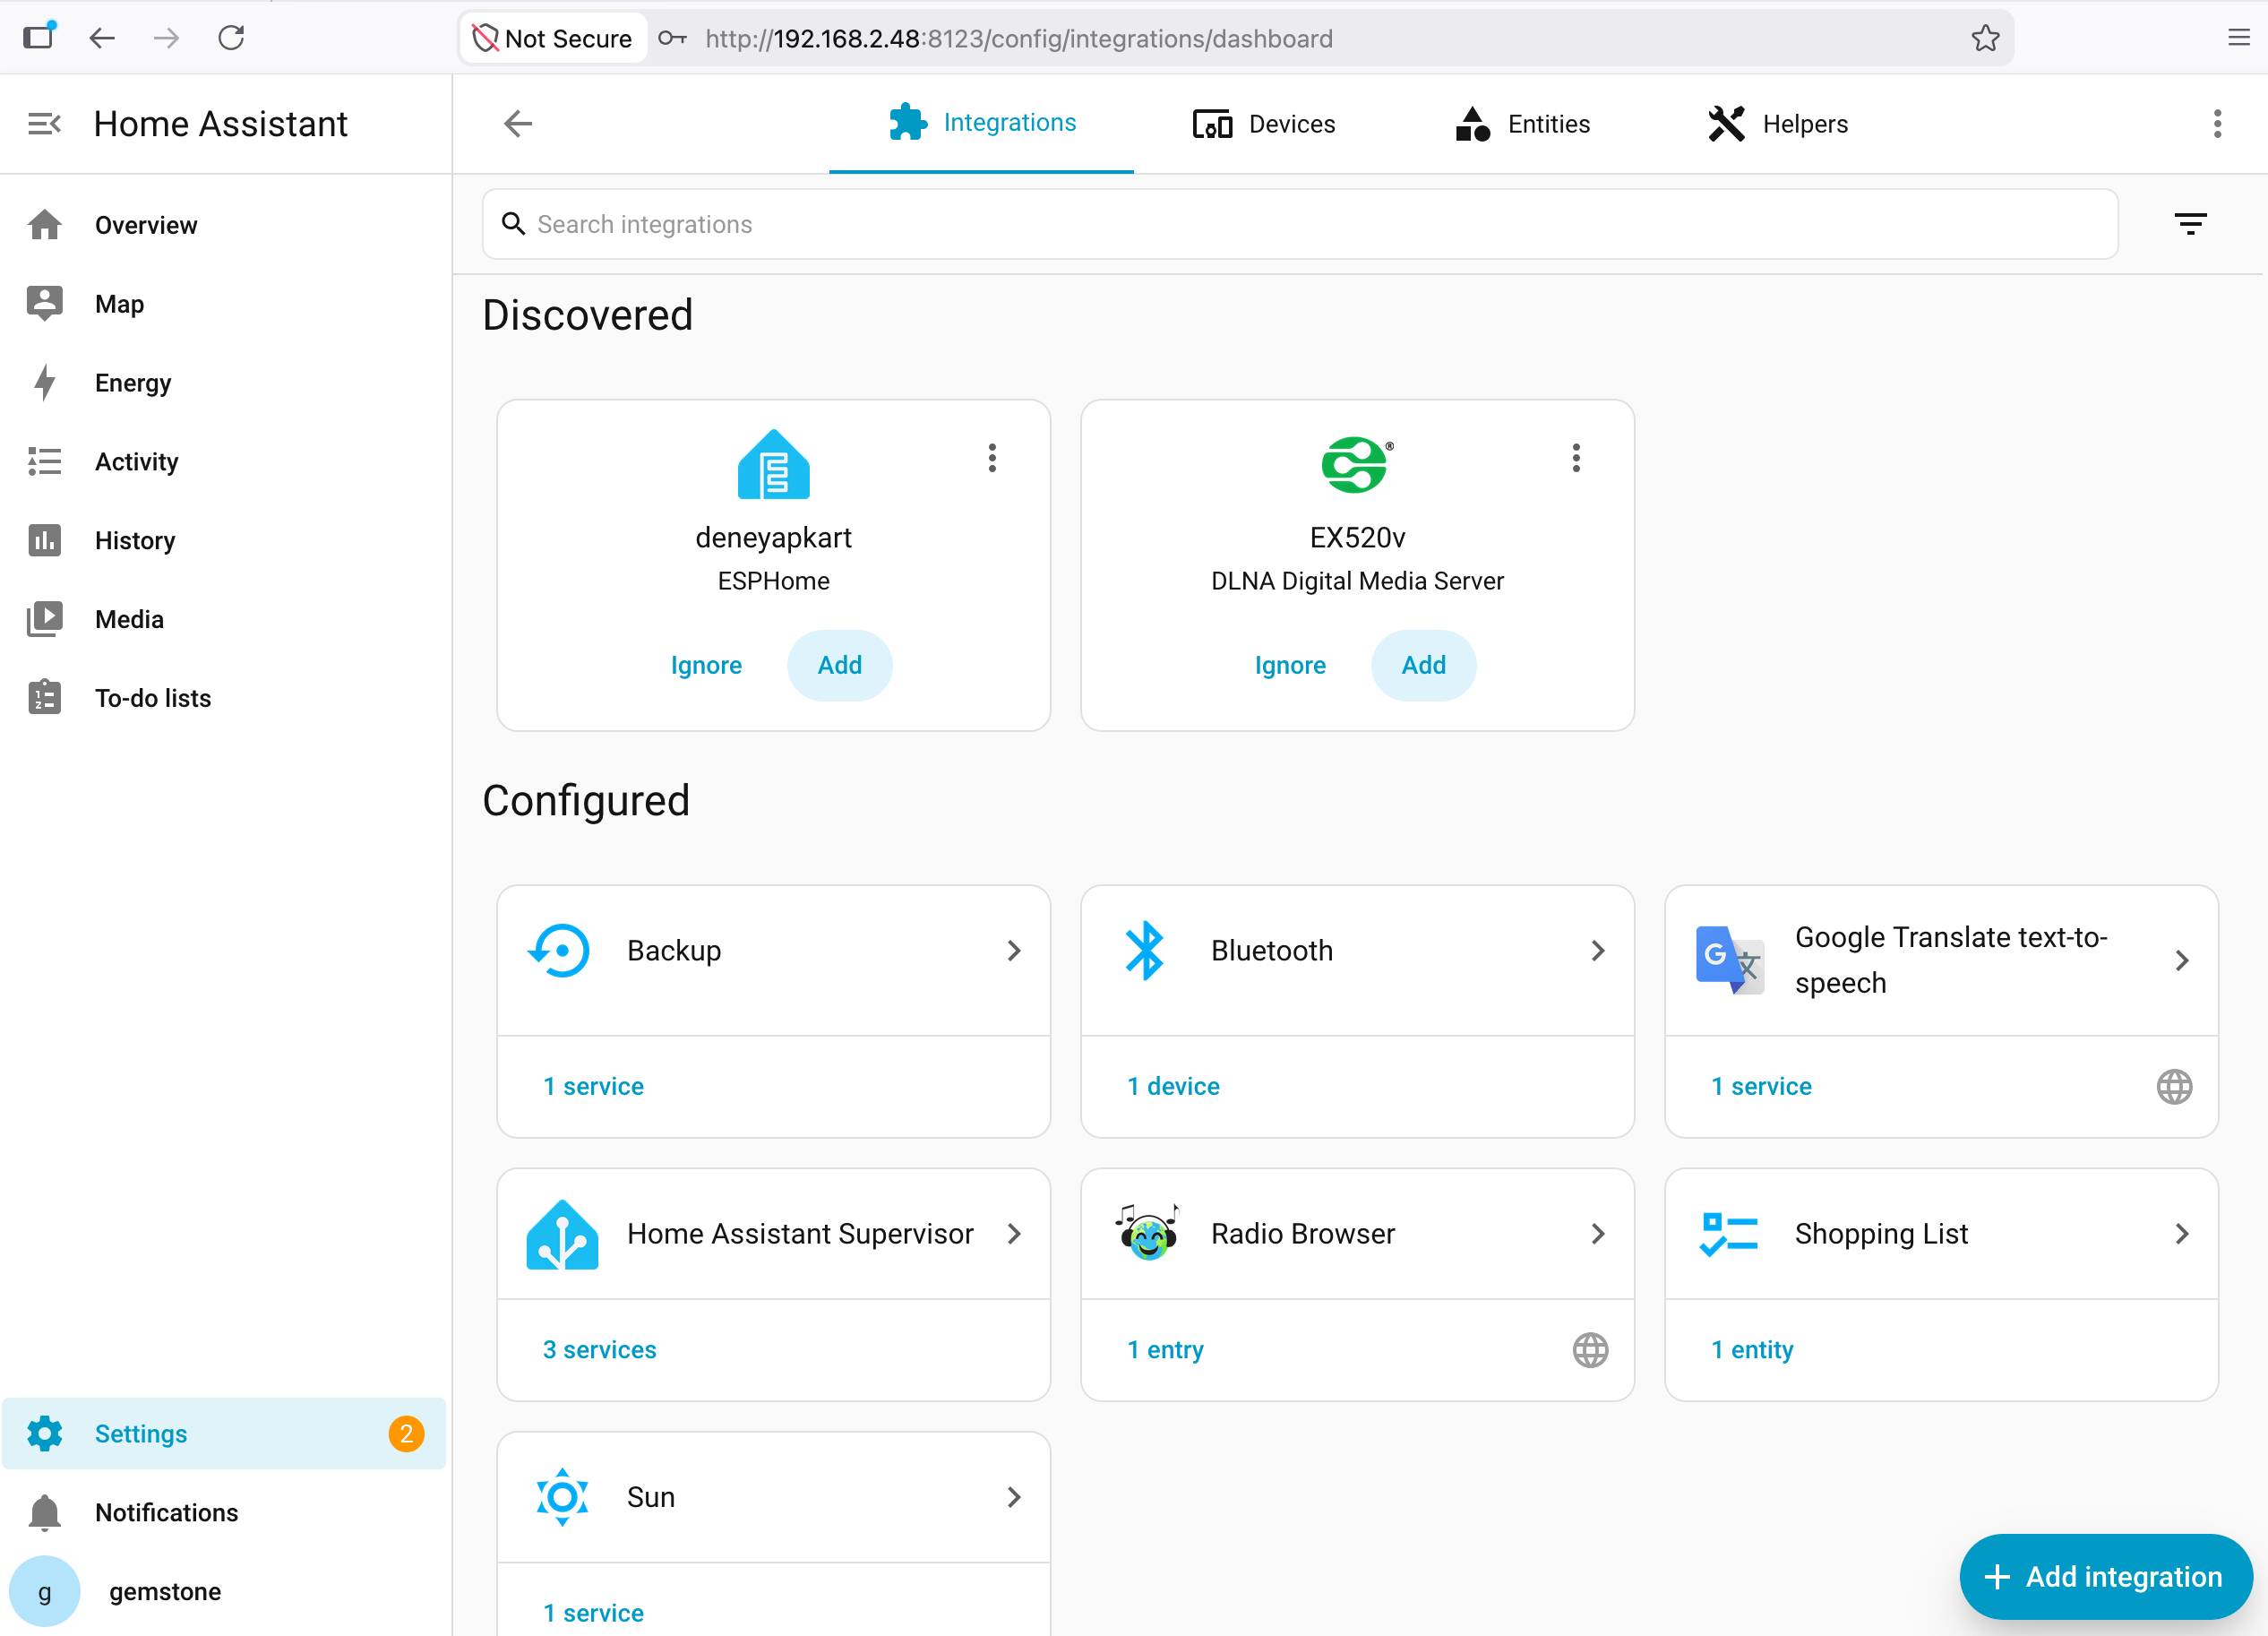 On **Home Assistant**, go to **Settings > Devices & Services > Add Integration** and click the "Add" button on the ESPHome device found there.
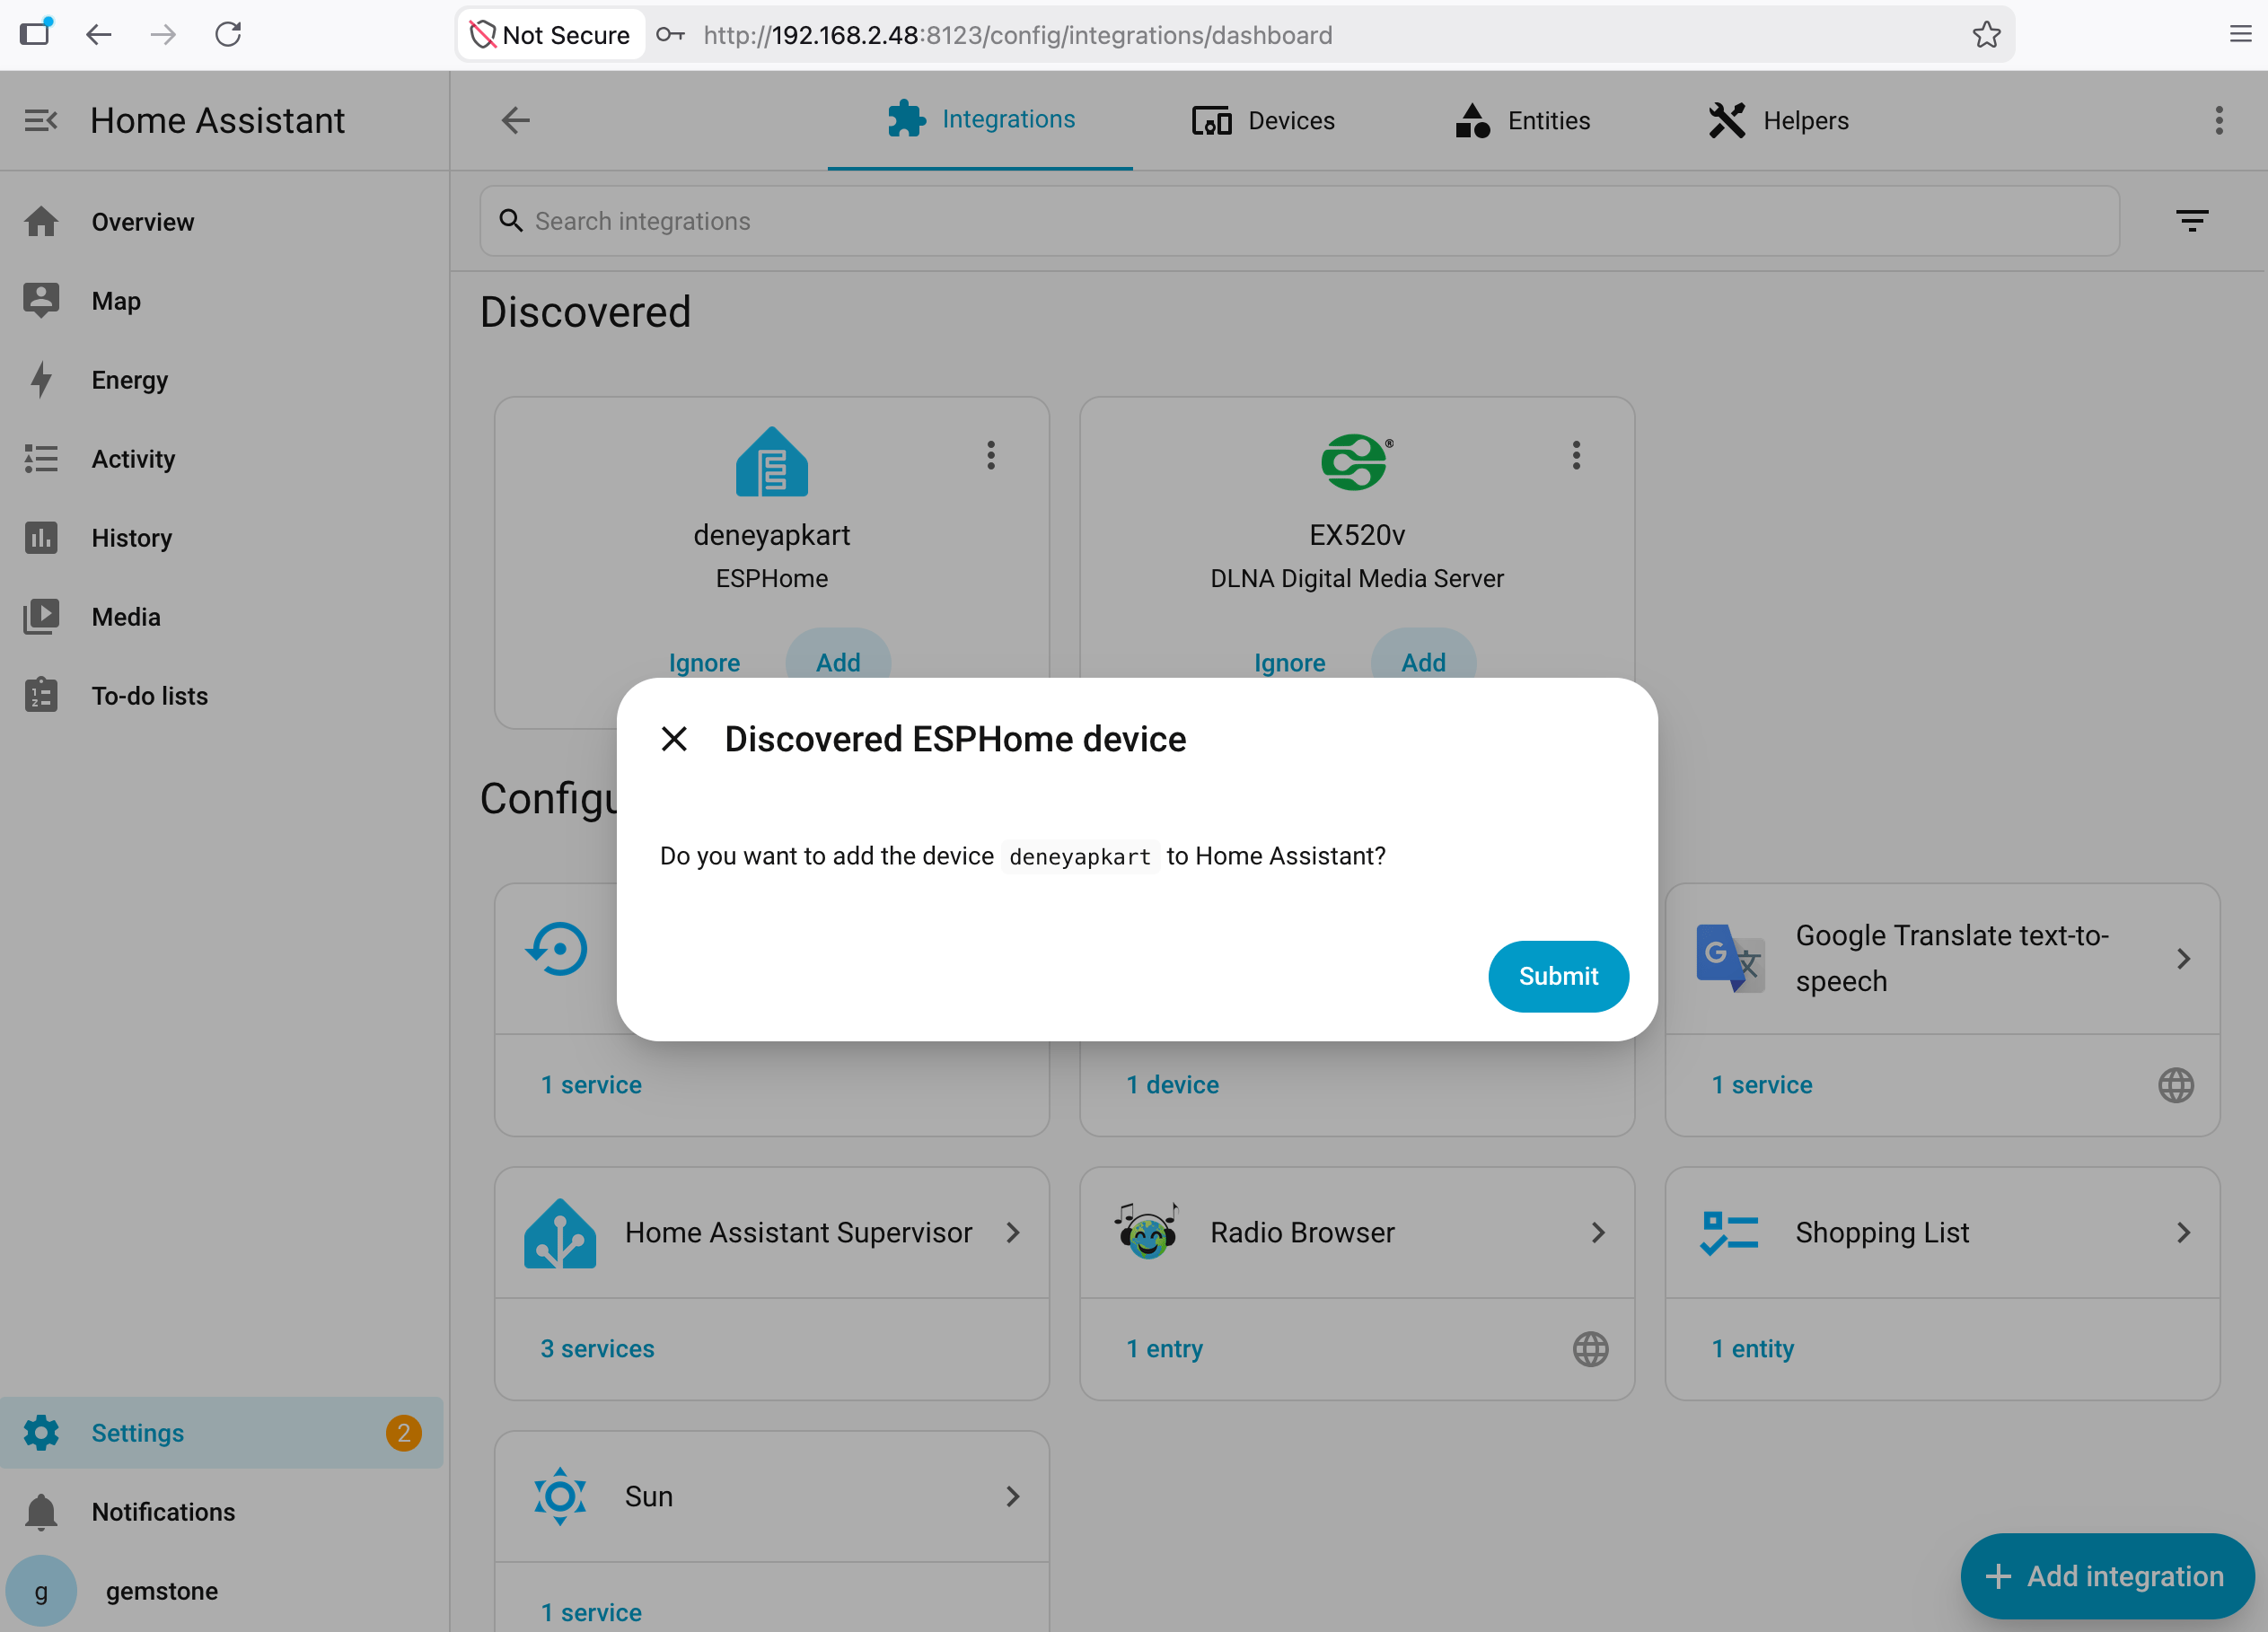 At this stage, click the **Send** button that appears.
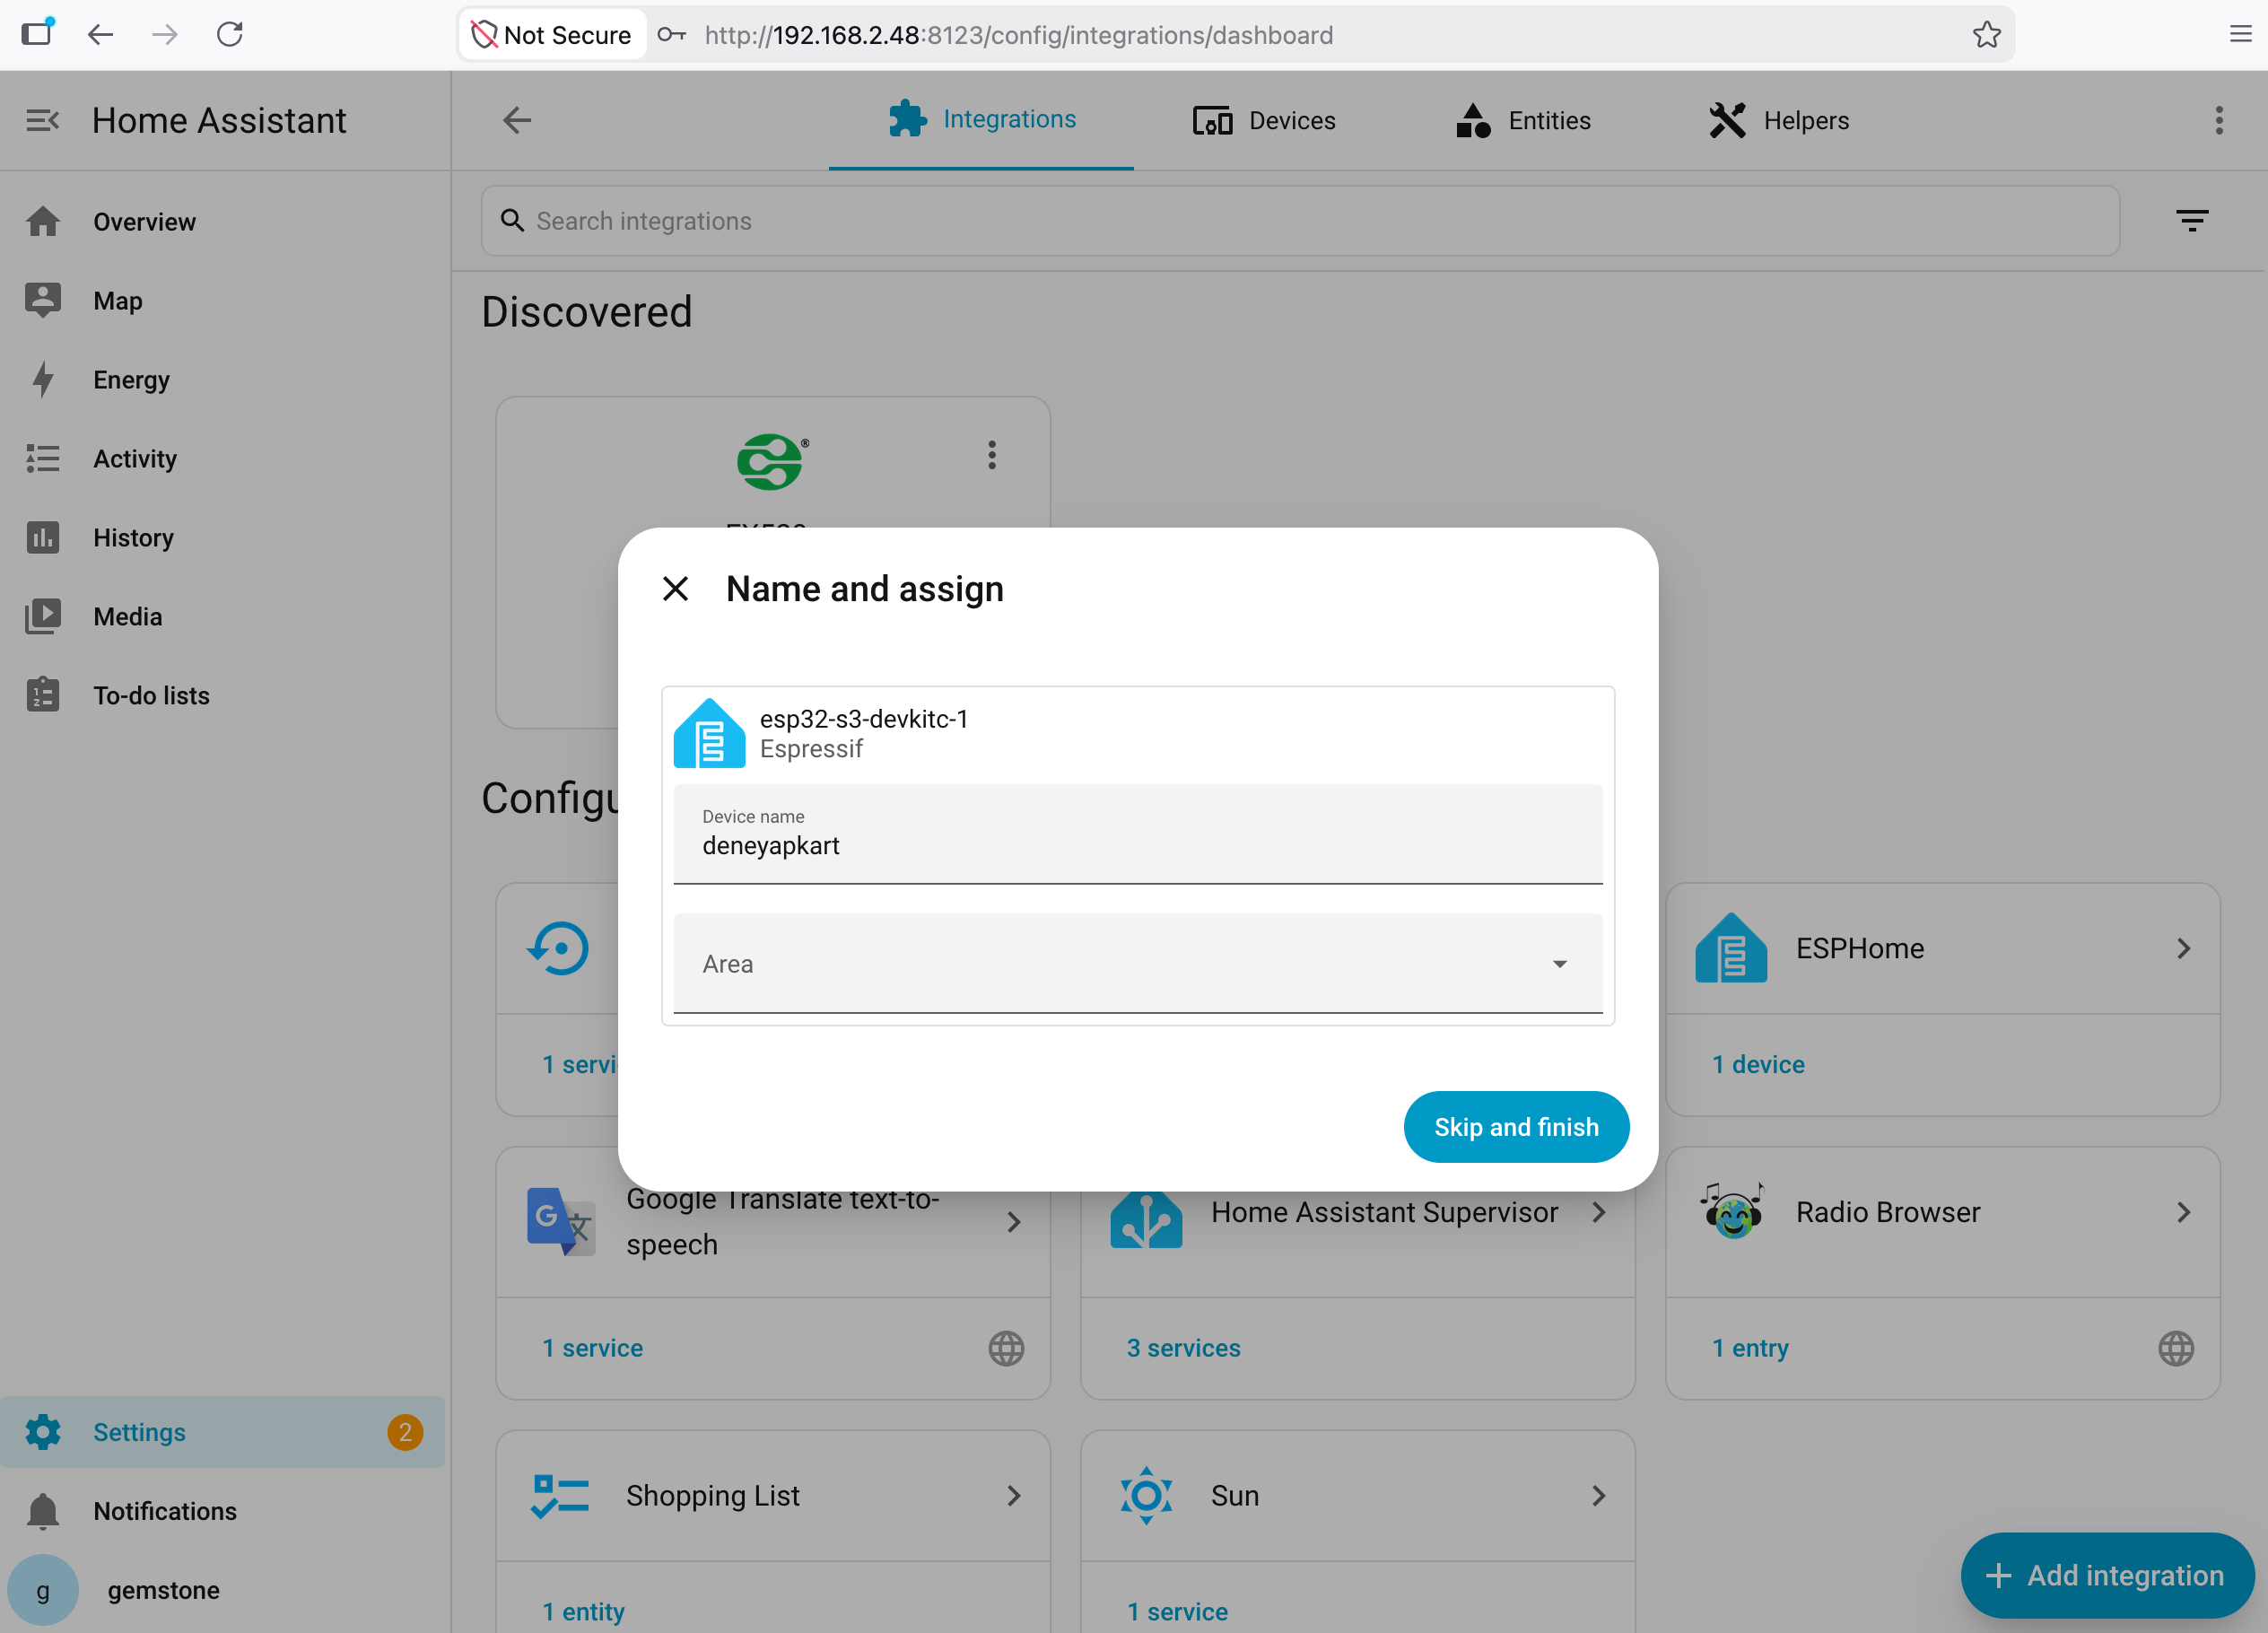 At this step, give the board a name for Home Assistant. Then click the **Skip and Finish** button to continue.
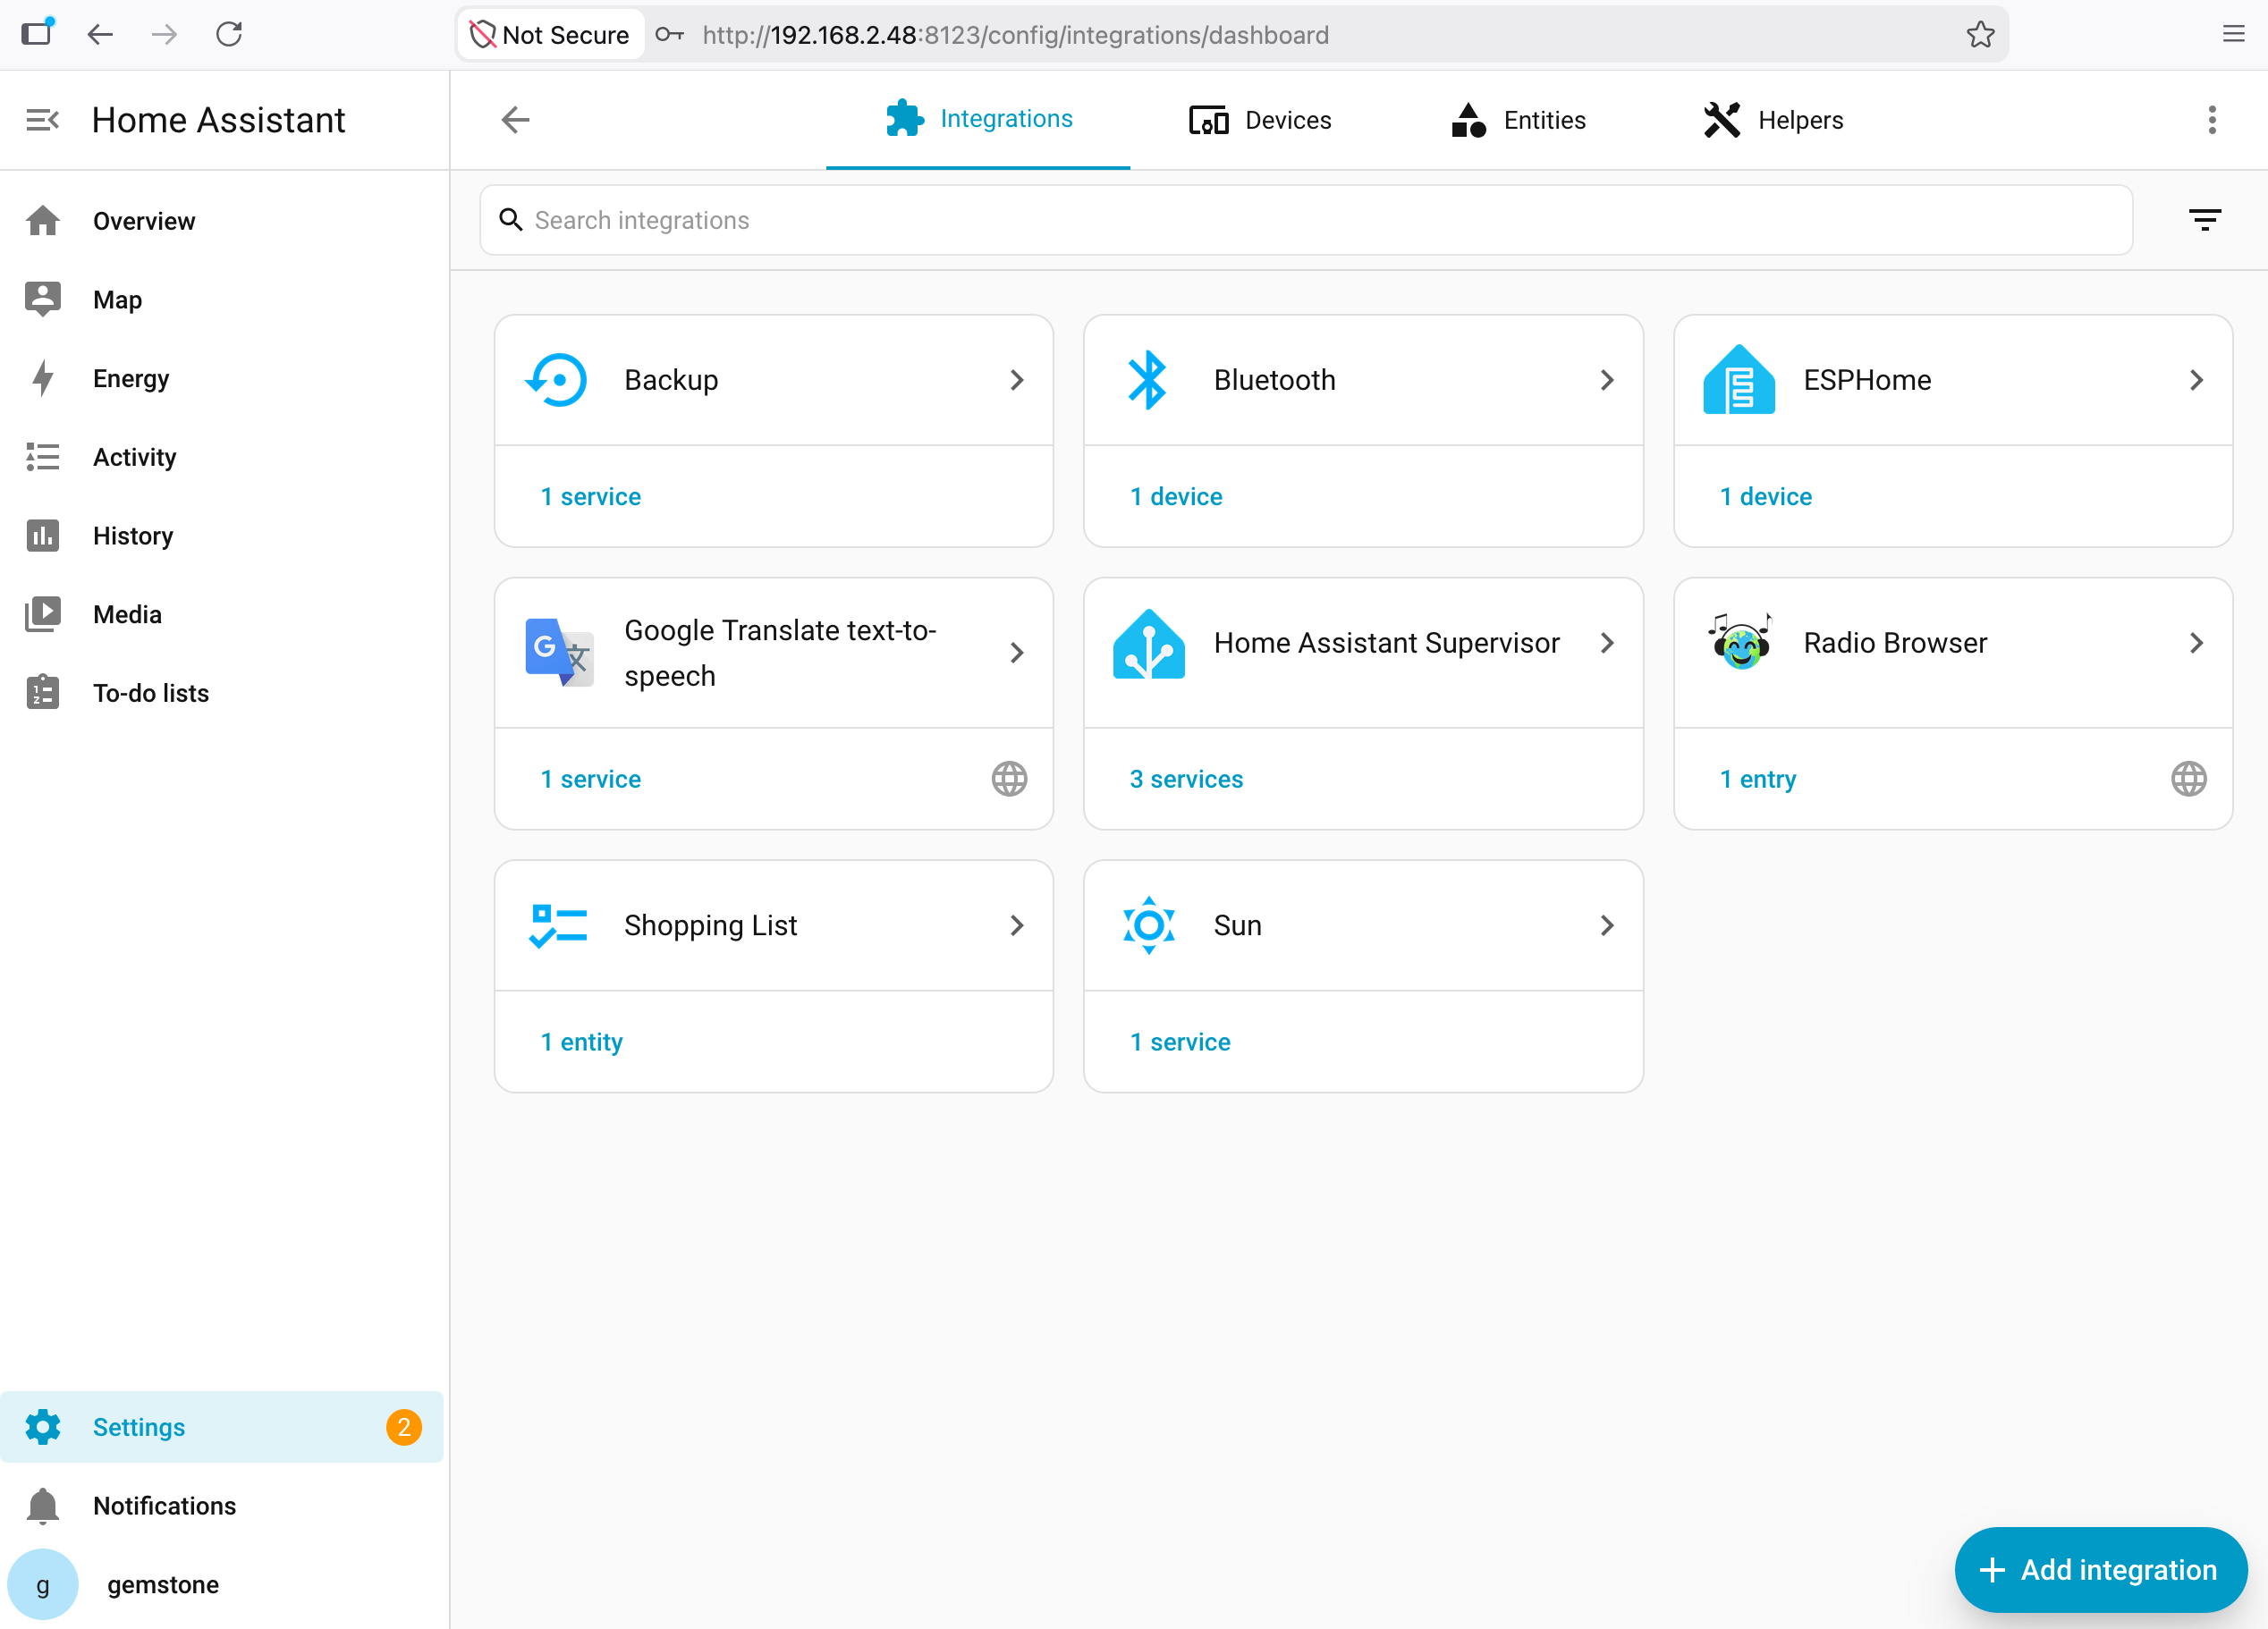 Click on the **"1 device"** option under **ESPHome**.
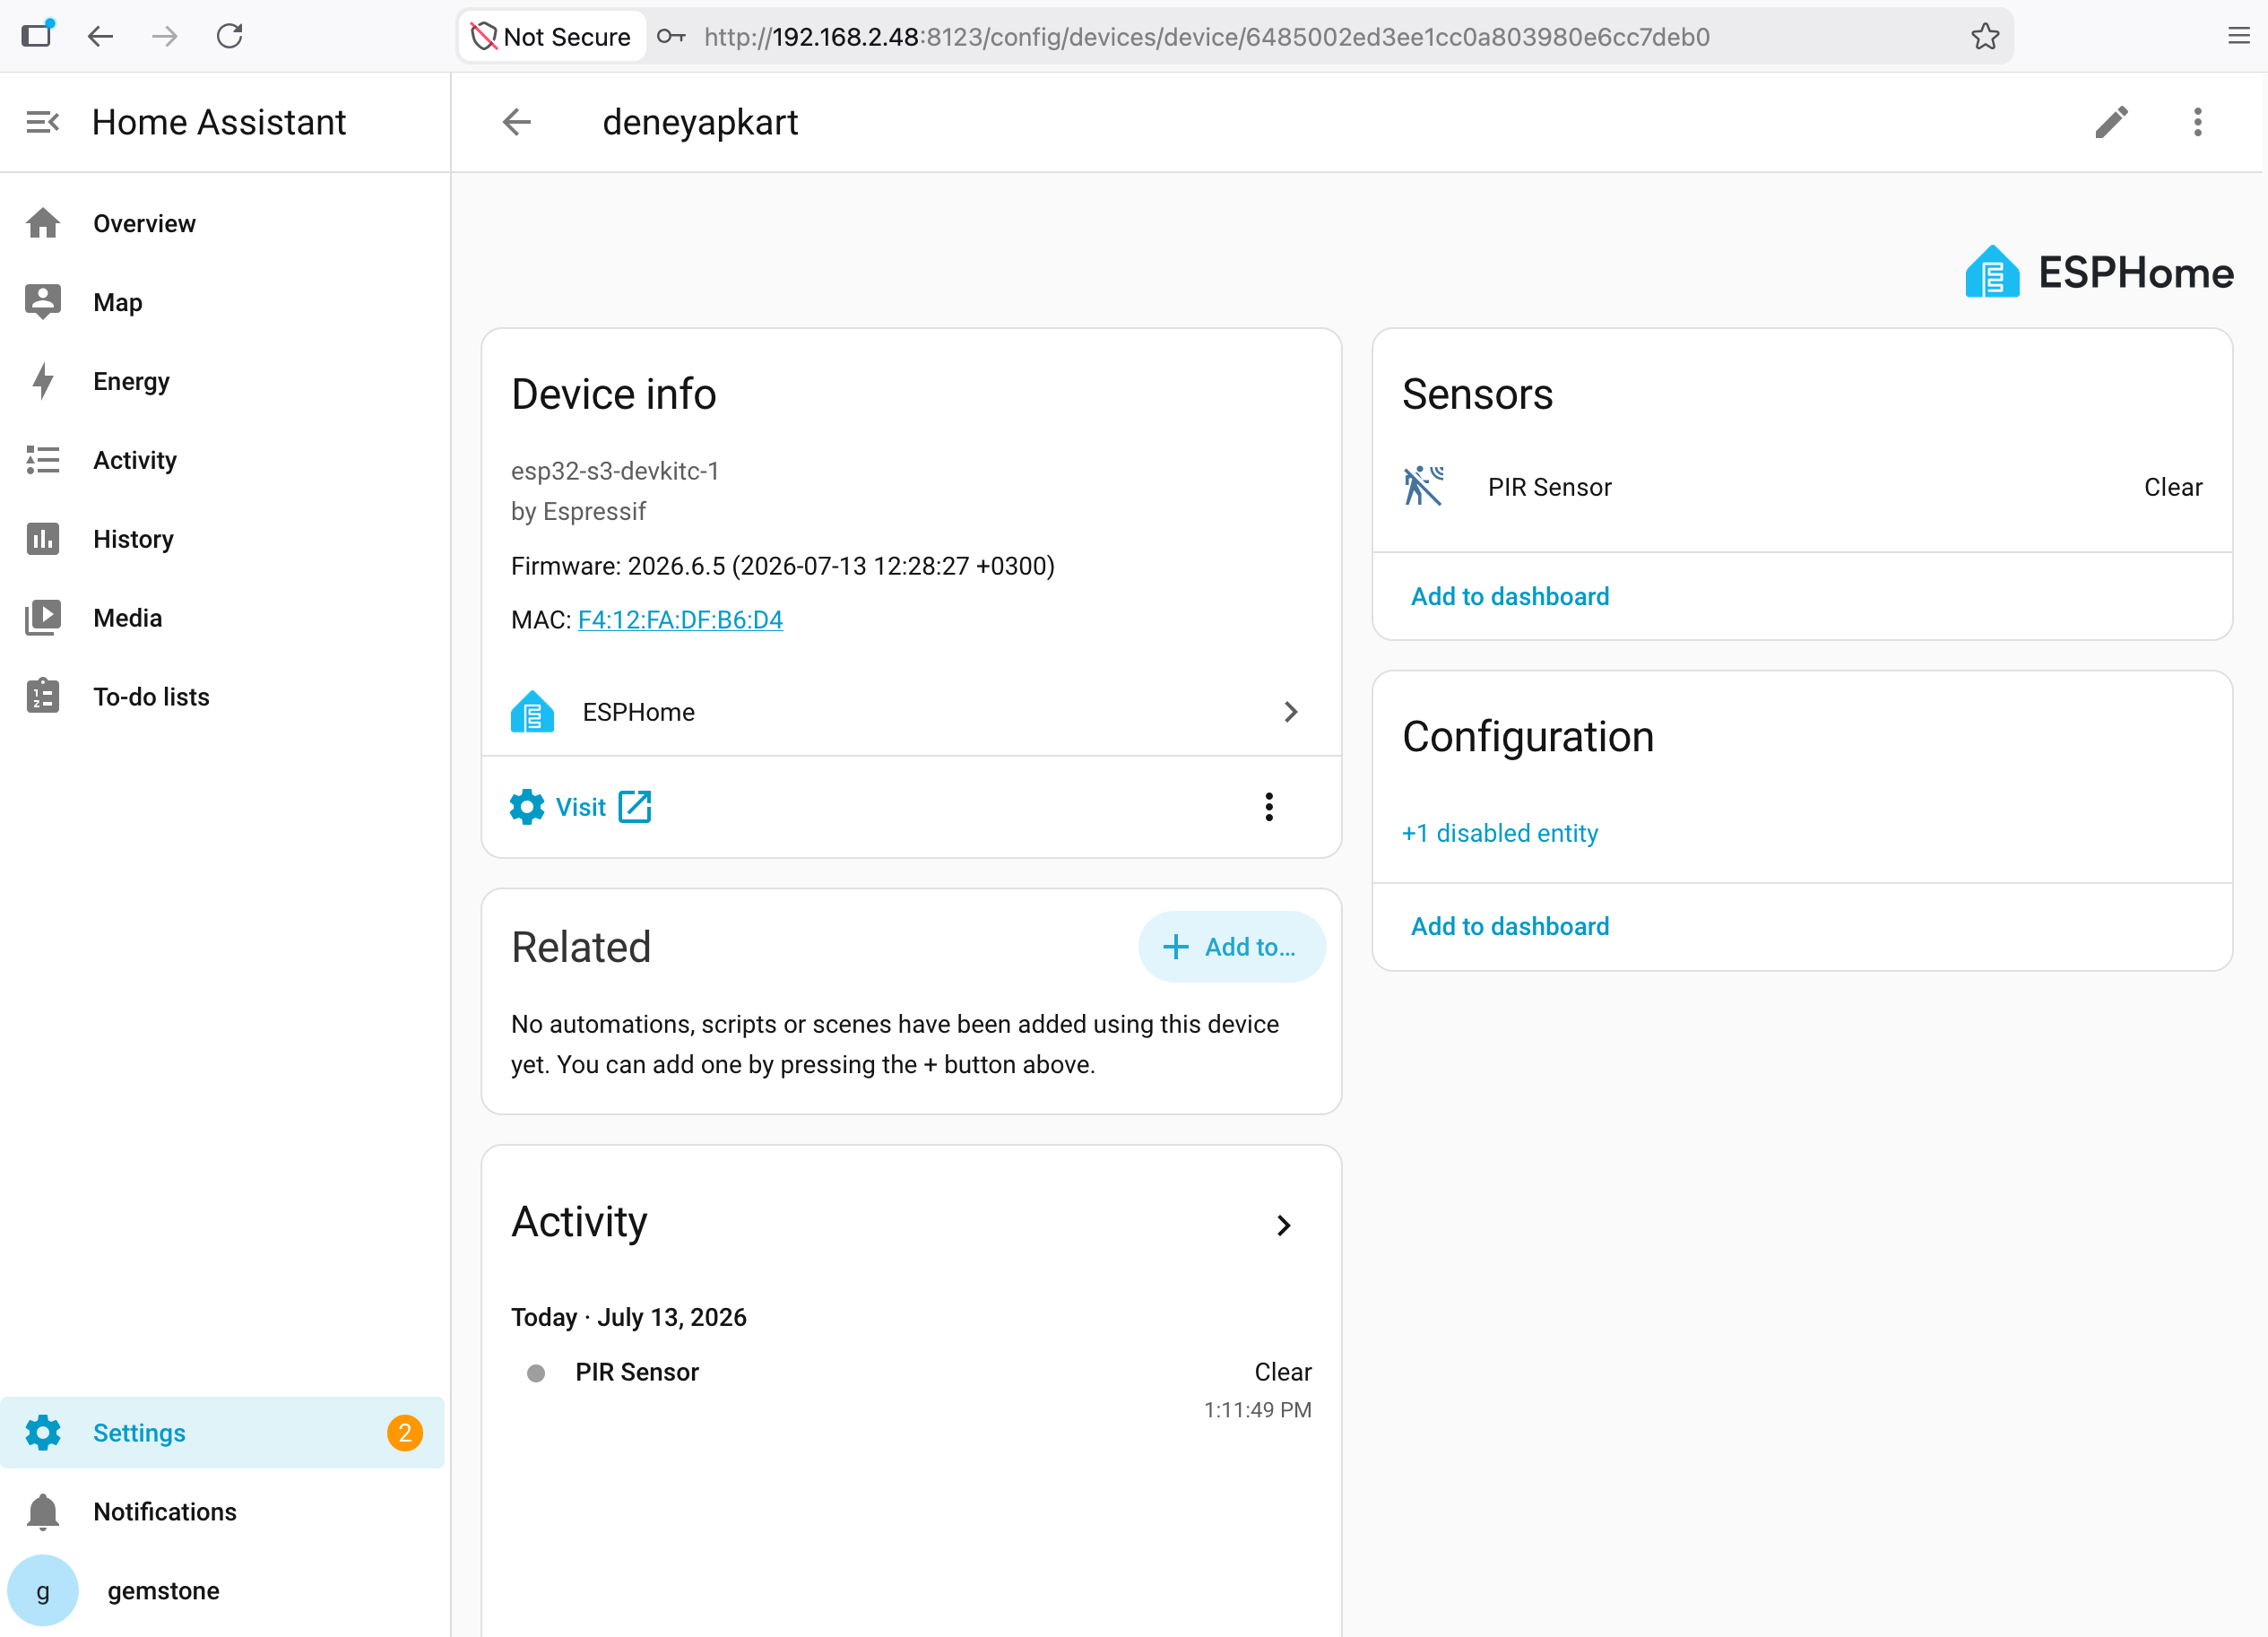 Congratulations! A motion sensor has been successfully integrated into the **Home Assistant** platform. The status of the added sensor can be viewed in real-time.
## 5. Frequently Asked Questions
**I get an "Unsupported System" warning after installation, why?**
> This warning may appear when using an operating system other than Home Assistant OS or when there are other manually running services on the system (such as Nextcloud or Tailscale). It is not an obstacle to the stable operation of the smart home system; it is only for informational purposes.
**When will the Add-on store appear?**
> If you access the interface immediately after installation, the Add-ons menu may not be visible. The "Settings -> Add-ons" tab will automatically become active after the system completes the necessary configurations in the background (usually within 5-10 minutes).
Congratulations! A motion sensor has been successfully integrated into the **Home Assistant** platform. The status of the added sensor can be viewed in real-time.
## 5. Frequently Asked Questions
**I get an "Unsupported System" warning after installation, why?**
> This warning may appear when using an operating system other than Home Assistant OS or when there are other manually running services on the system (such as Nextcloud or Tailscale). It is not an obstacle to the stable operation of the smart home system; it is only for informational purposes.
**When will the Add-on store appear?**
> If you access the interface immediately after installation, the Add-ons menu may not be visible. The "Settings -> Add-ons" tab will automatically become active after the system completes the necessary configurations in the background (usually within 5-10 minutes).