Next button, the OS Customisation menu appears. This menu contains three tabs: General, Services,
and Options.
General Tab
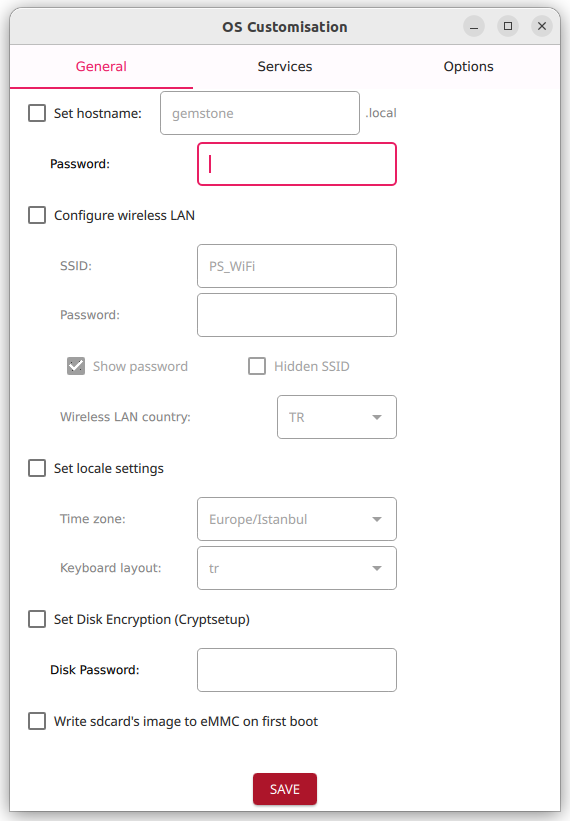
Hostname and Password Field
- The setting is activated by checking the box.
- The
Set Hostnamefield is used to set the board’s name. The default name isgemstone. - The
Passwordfield sets the password for the default user (gemstone). There is no default value; entering a password is mandatory.
Configure Wireless LAN Field
- The setting is activated by checking the box.
- Enter the network name (SSID) in the
SSIDfield. - Enter the network password in the
Passwordfield. - If the network is hidden, check the
Hidden SSIDbox. - Select the country code for your location in the
Wireless LAN countryfield.
Set Locale Settings Field
- The setting is activated by checking the box.
- Click the
Time Zonebox and select your time zone from the dropdown menu. - Click the
Keyboard layoutbox and select your preferred keyboard layout from the dropdown menu.
Set Disk Encryption (Cryptsetup)
- The setting is activated by checking the box. Encrypts the disk to prevent the system from booting without entering the password.
- Enter the password in the
Disk Passwordfield.
Write SD Card’s Image to eMMC on First Boot
- The setting is activated by checking the box. Writes the image from the SD card to the onboard storage (eMMC) during the first boot, allowing the board to boot from the onboard storage.
Services Tab
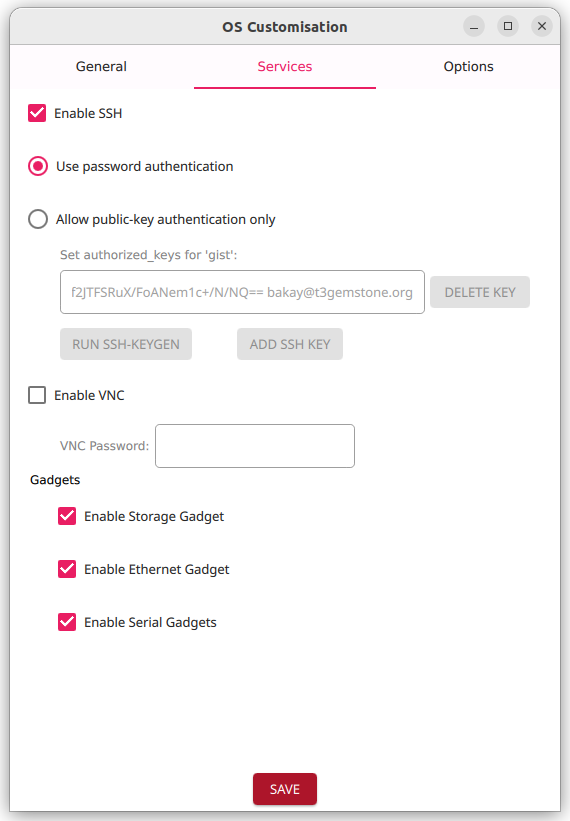
Enable SSH Field
- The setting is activated by checking the box. Allows terminal connections to the board over the network.
- When enabled, the default option
Use password authenticationis selected, allowing anyone with the password to connect. IfAllow public-key authentication onlyis selected, only devices with the provided key can connect.
Enable VNC Field
- The setting is activated by checking the box. Allows connecting to the board’s desktop GUI using only a browser.

- When enabled, a password must be entered in the
Passwordfield. No default password is assigned.
The password must be a maximum of 8 characters. Longer passwords will be truncated after the 8th character.
Gadgets Field
- The T3-GEM-O1 board can provide virtual Ethernet, serial port, and storage device connections via its Type-C port. Check the box to enable these features:
Enable Storage Gadget: Activates the virtual storage device.Enable Ethernet Gadget: Activates the virtual Ethernet device.Enable Serial Gadget: Activates the virtual serial port device.
Options Tab
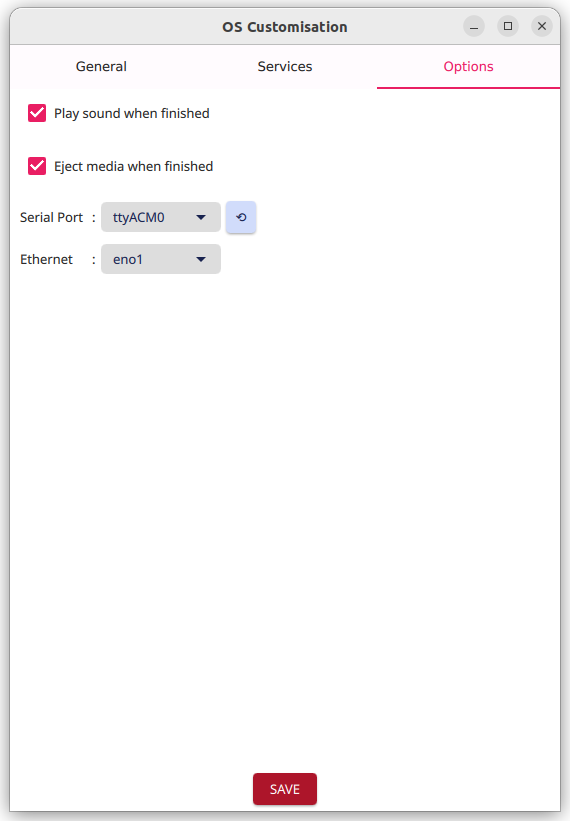
-
Play Sound when finished: When checked, a notification sound plays upon completion of the writing process. -
Eject media when finished: When checked and writing to an SD card, the SD card is safely ejected automatically upon completion. This has no effect when writing to onboard storage (eMMC). -
Serial Port: If writing to the board’s eMMC, select the serial port connected to the board. This has no effect when writing to an SD card. -
Ethernet: If writing to the board’s eMMC, select the Ethernet port connected to the board. This has no effect when writing to an SD card.
Using the Host Computer’s Internet via the Board
If theEnable Ethernet Gadget option is checked in the Gadgets section, this allows you to make an Ethernet
connection to your board via USB. After flashing the image, you can access the board from the host computer’s
terminal using the command ssh gemstone@192.168.7.2. However, if you haven’t configured the Wi-Fi settings on
your board, your board will not have internet access. To use your host computer’s internet through the board,
you can follow the steps below:
- Make sure your board is powered on and has been flashed with the image using the gadget settings.
- Ensure that your host computer is connected to the internet.
- Open the terminal and run the following command: use
ip ato find out the names of your network interface and the Ethernet interface created by your Gemstone board. Typically, the host computer’s interface name iswlp2s0, and the gadget interface name created by your Gemstone board is something likeenx02123456789a.
ssh gemstone@192.168.7.2: