1. Introduction
Today, control and security of personal data are more important than ever. You might want to manage your files, photos, calendars, notes, and even passwords in a centralized system without depending on major cloud providers like Amazon, Google, or Microsoft. To do this, you need to use a method called self-hosting, which means hosting your own server on your own devices. However, running a server at home brings technical problems such as the inability to access the server from anywhere with an internet connection and difficulties in ensuring data security. These problems are often solved with complex and costly methods. TheGemCloud project enables these problems to be solved in an easy, cost-effective, and secure manner.
2. Nextcloud Installation
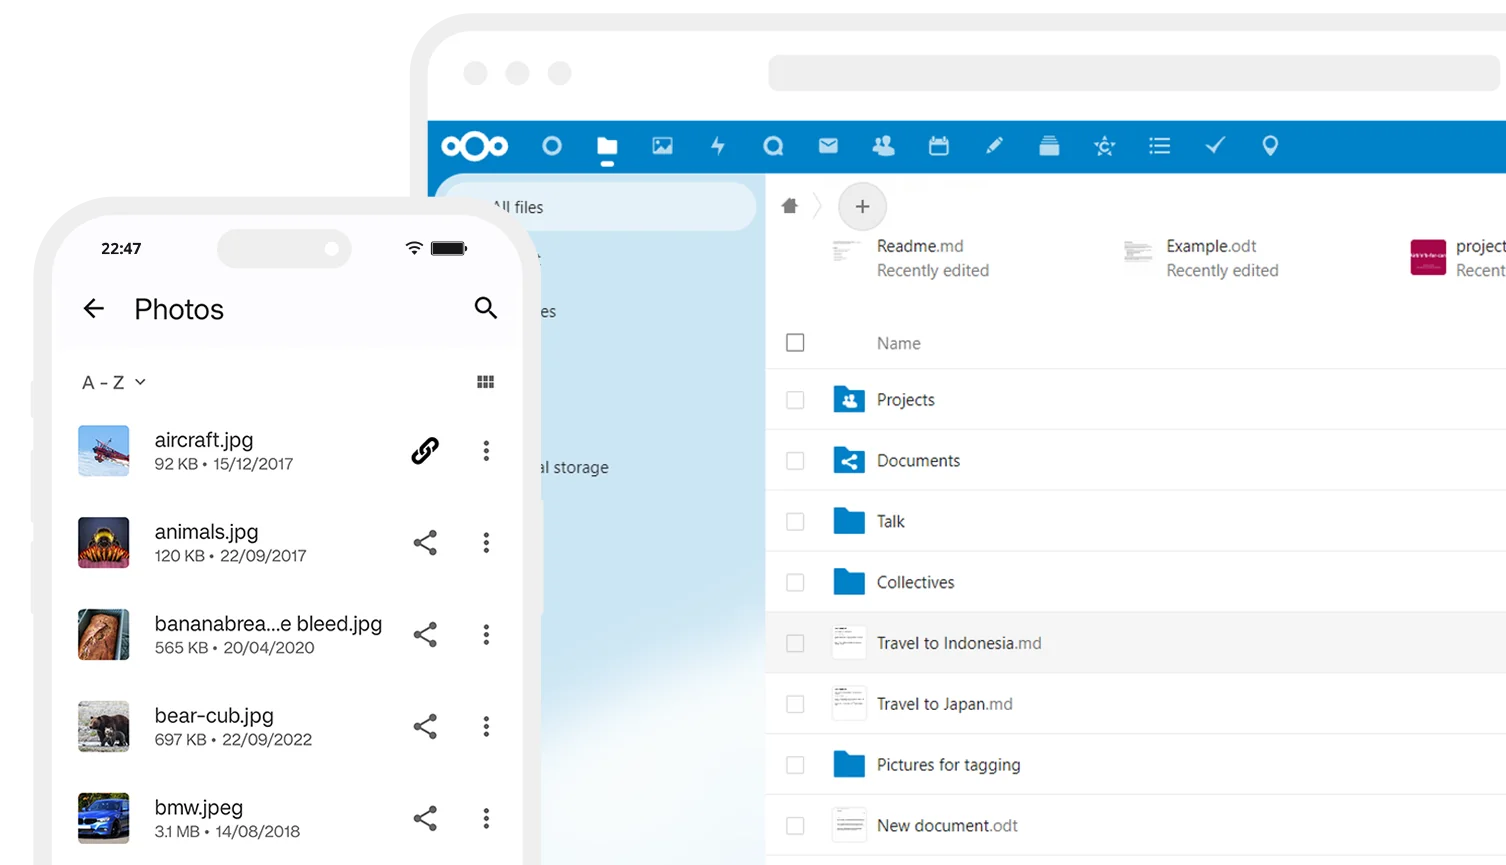
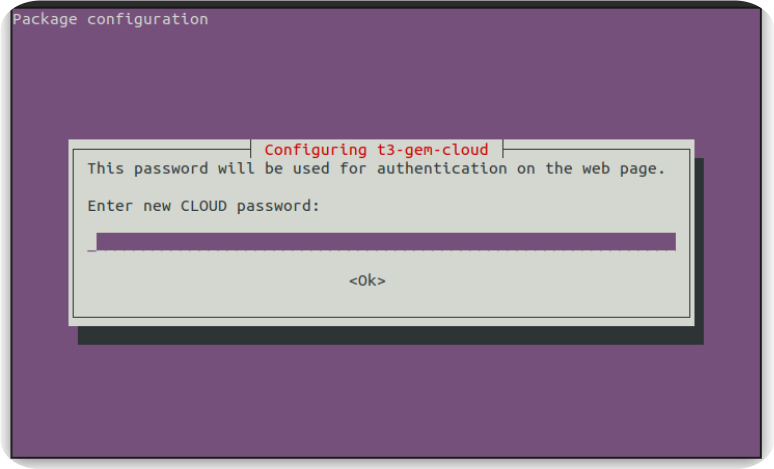
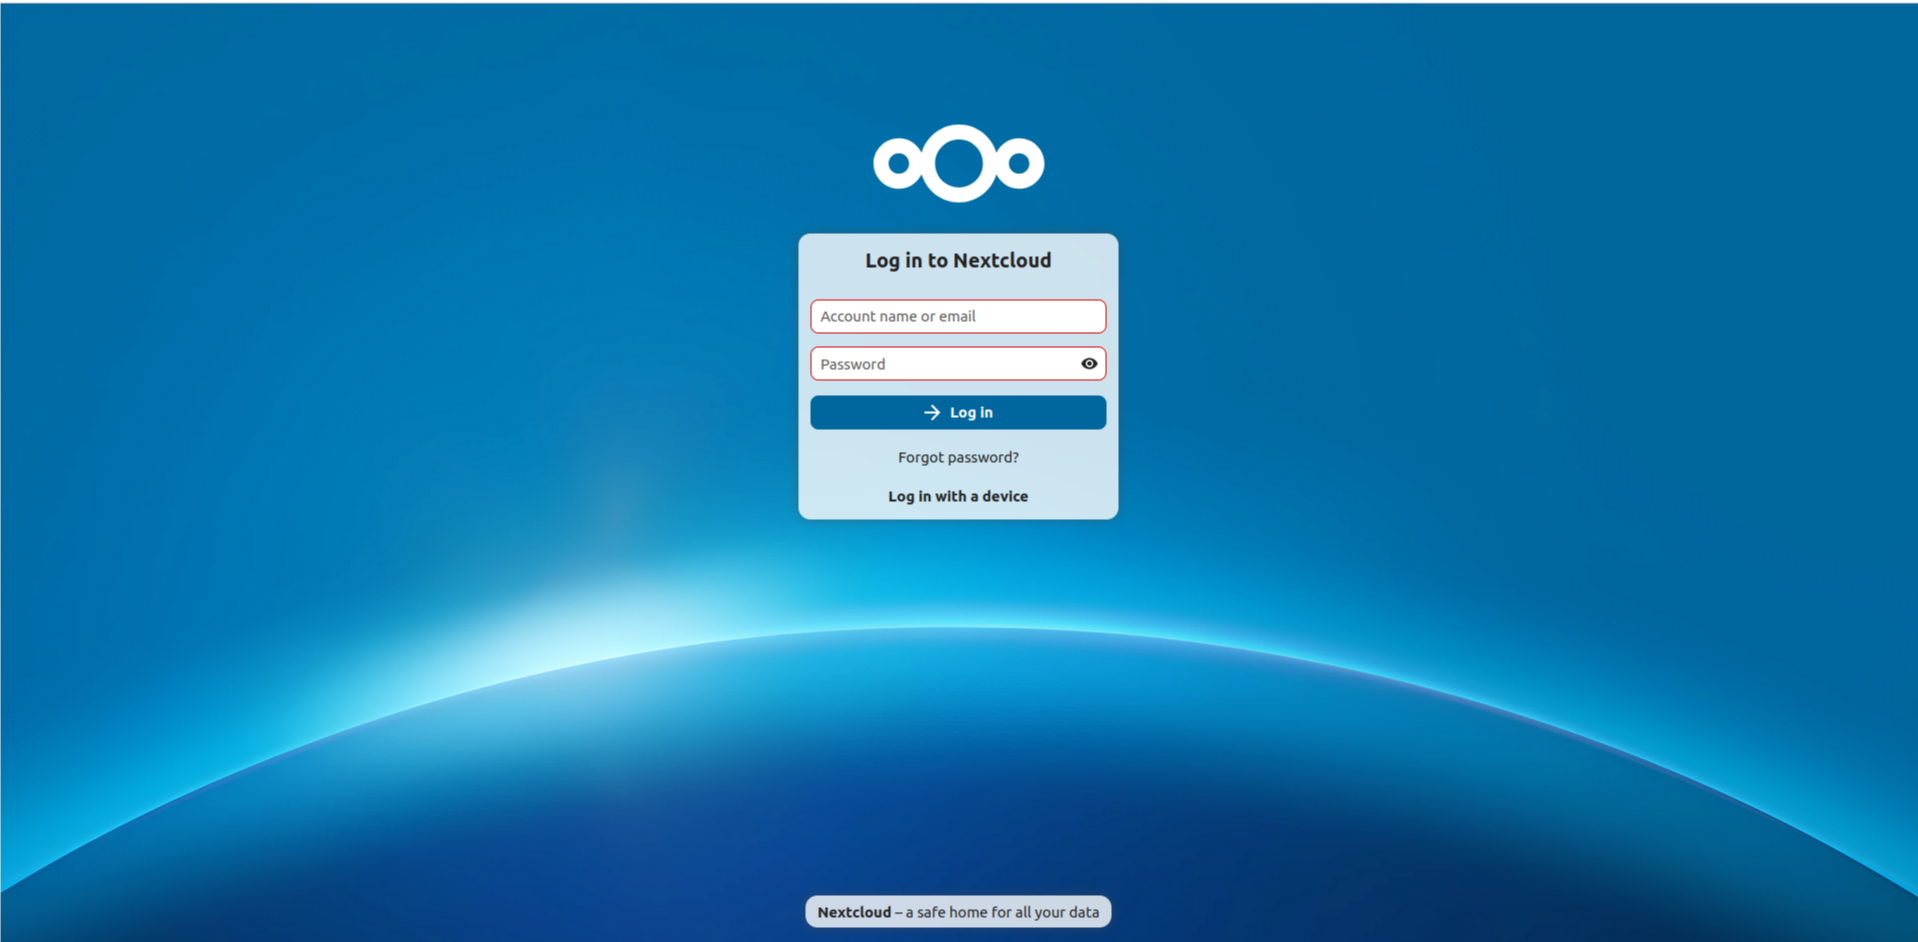
Nextcloud is an open-source cloud solution. It offers applications such as photo and file storage, chat, calendar, password manager, and Kanban task planning in one place. After connecting to the Gemstone development board via terminal connection, start the Nextcloud installation with the following command.admin user password. Choose a strong and memorable password and keep it safe.
3. Access from the Public Internet
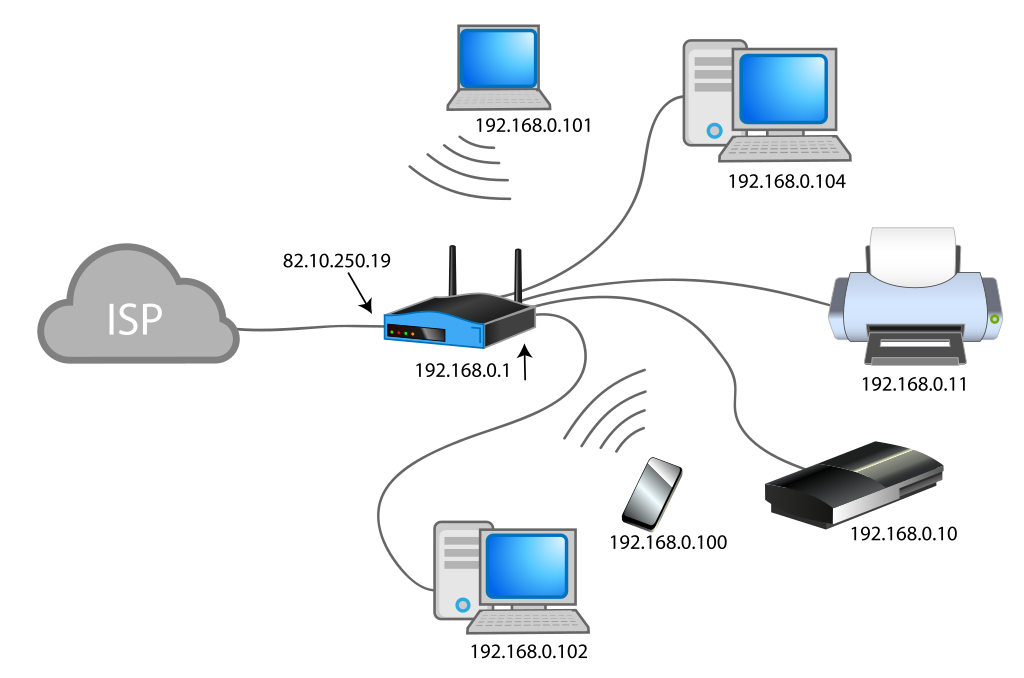
Accessing your home computers by IP address is only possible within your home network. The ability to access recently popular devices like robot vacuums, smart lighting systems, air conditioners controlled from mobile phones, and various household appliances from the outside world is made possible by these devices transferring data to servers set up by their manufacturers. The easiest solution to access the Gemstone Cloud project from the outside world is to call your internet service provider to request a Static IP and set up port forwarding in your modem settings. For users who do not wish to do this, there are various solutions such as Tailscale and Localtunnel.- Example Smart Home System Network
- ISP Modem and Local Network
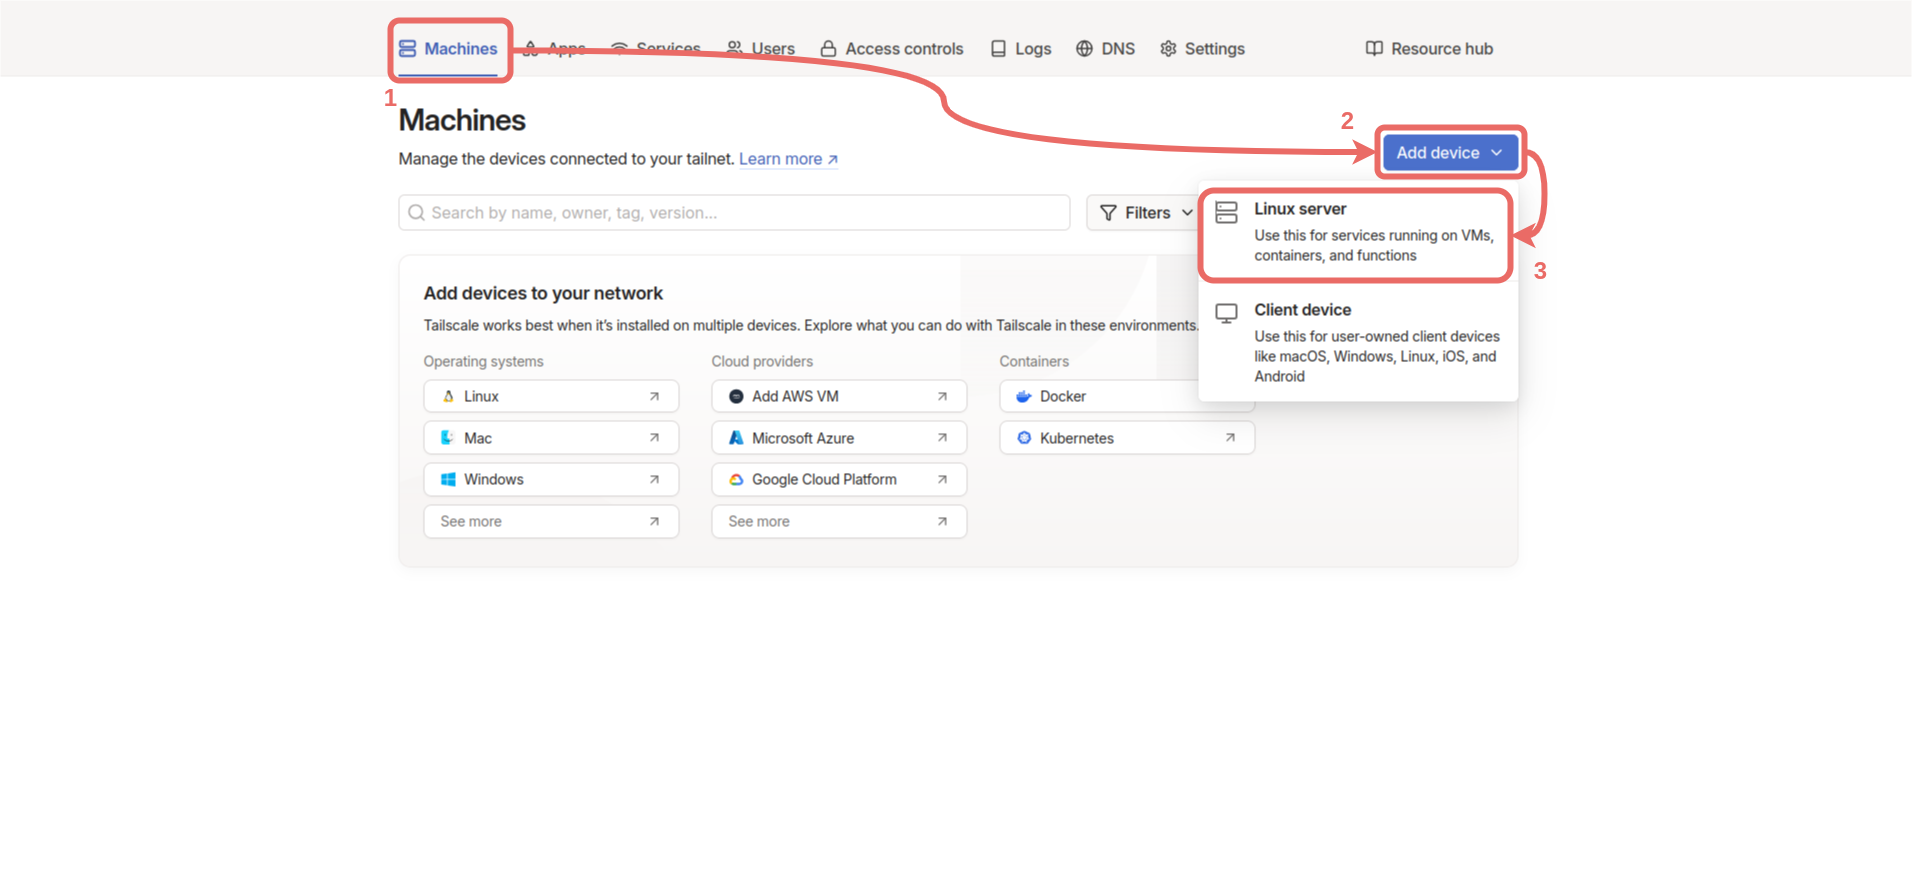
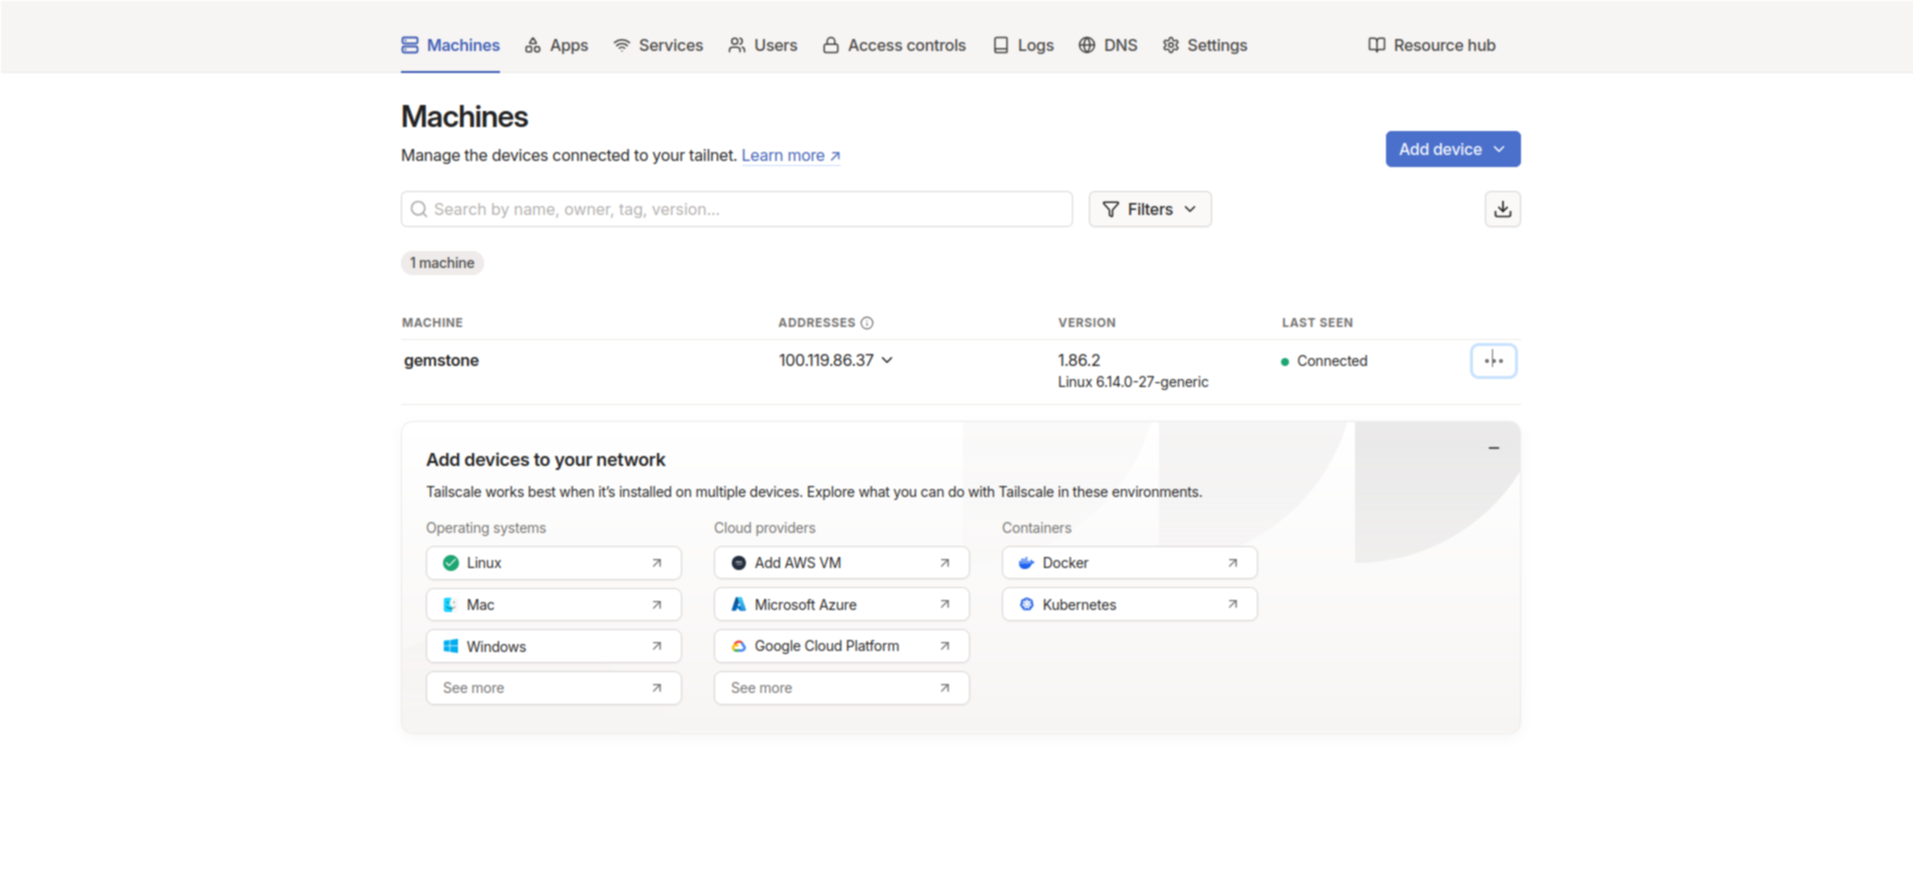
3.1. Tailscale Installation
Machines -> Add device -> Linux server.
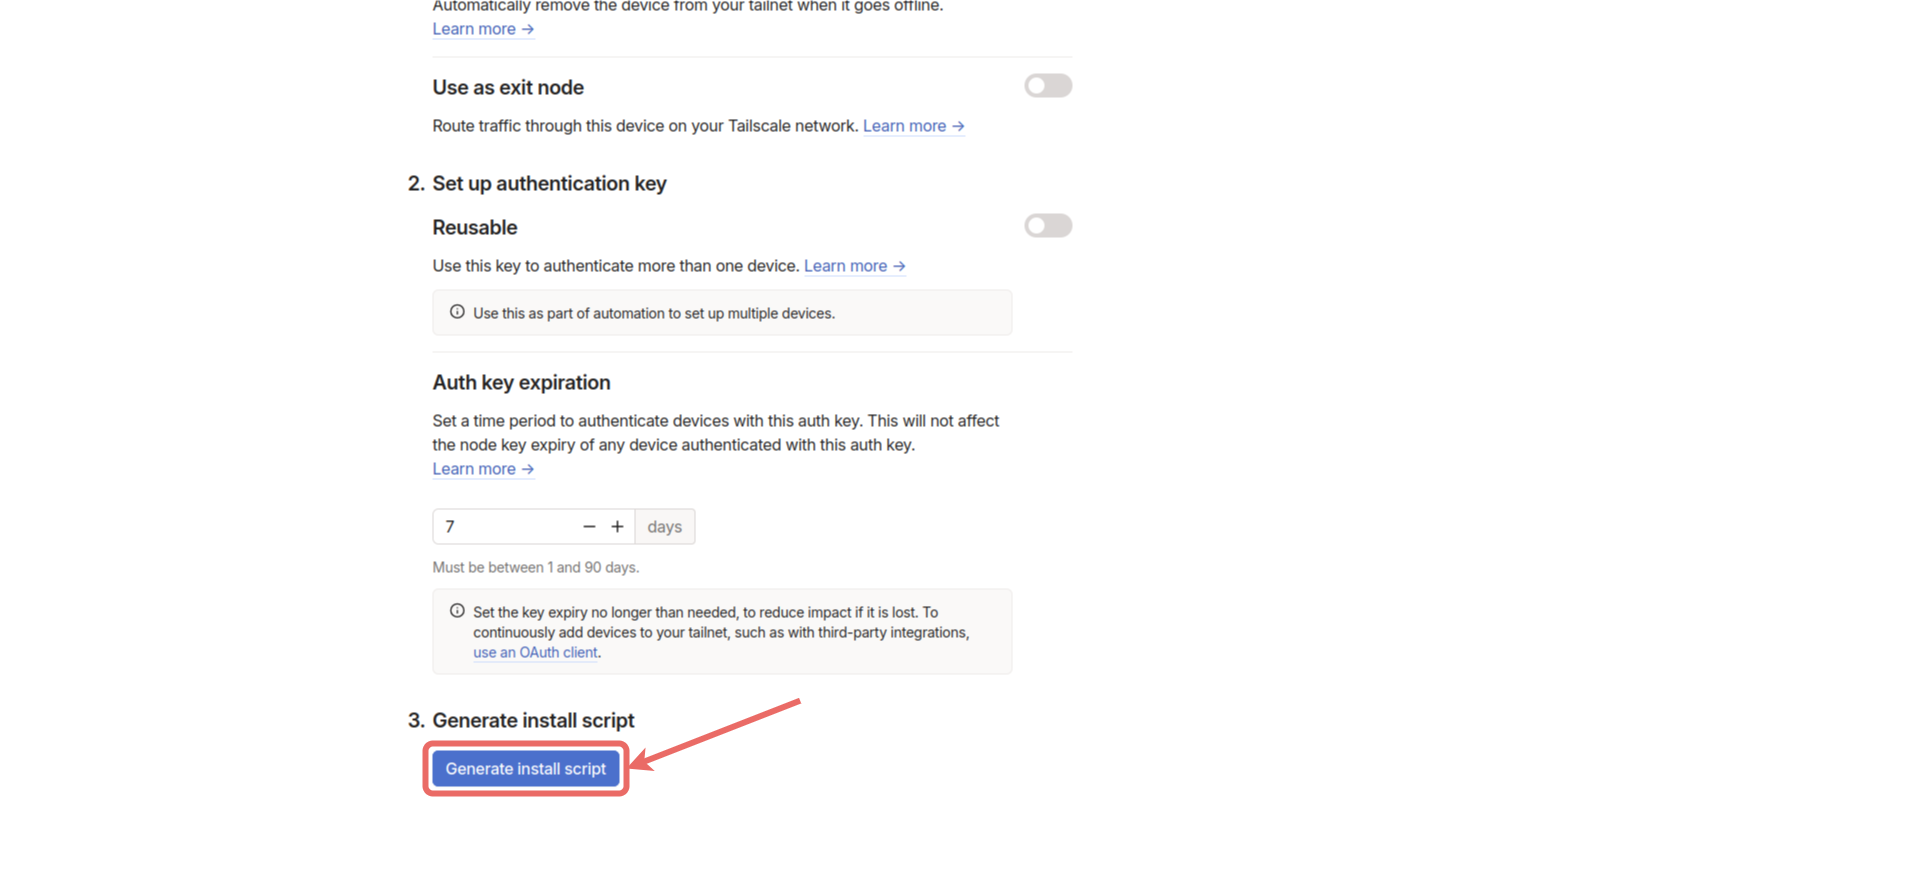
Generate install script button to copy the Tailscale installation command. Then, connect to the Gemstone board via terminal and run the copied command in the terminal.
Machines section in the Tailscale Control Panel to see if it says Connected.
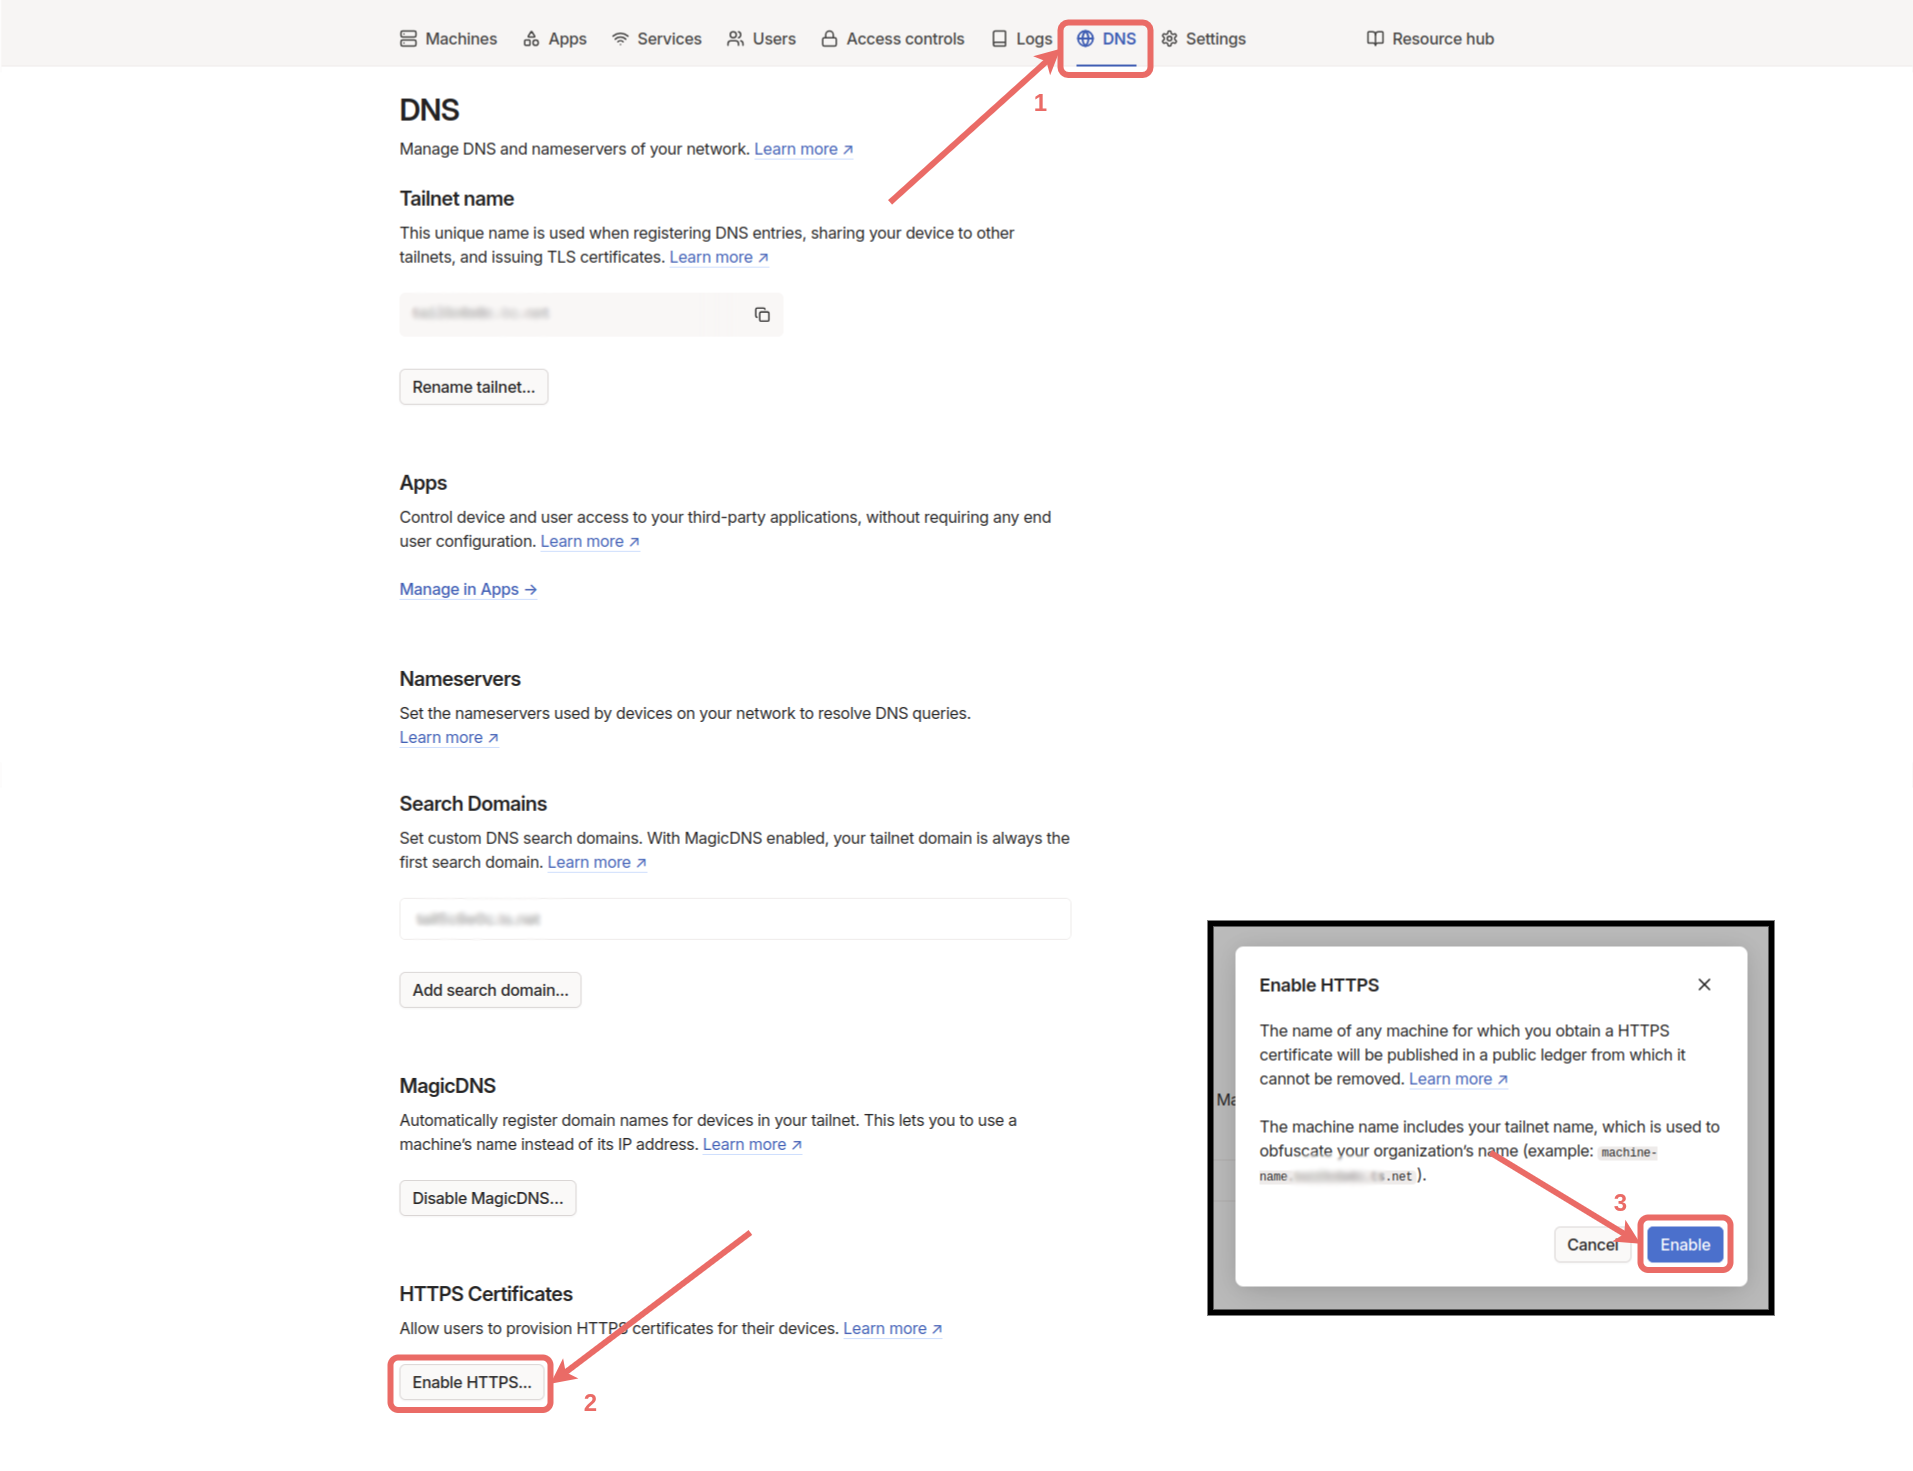
DNS menu in the control panel and click the Enable HTTPS button at the bottom of the page, then click the Enable button.
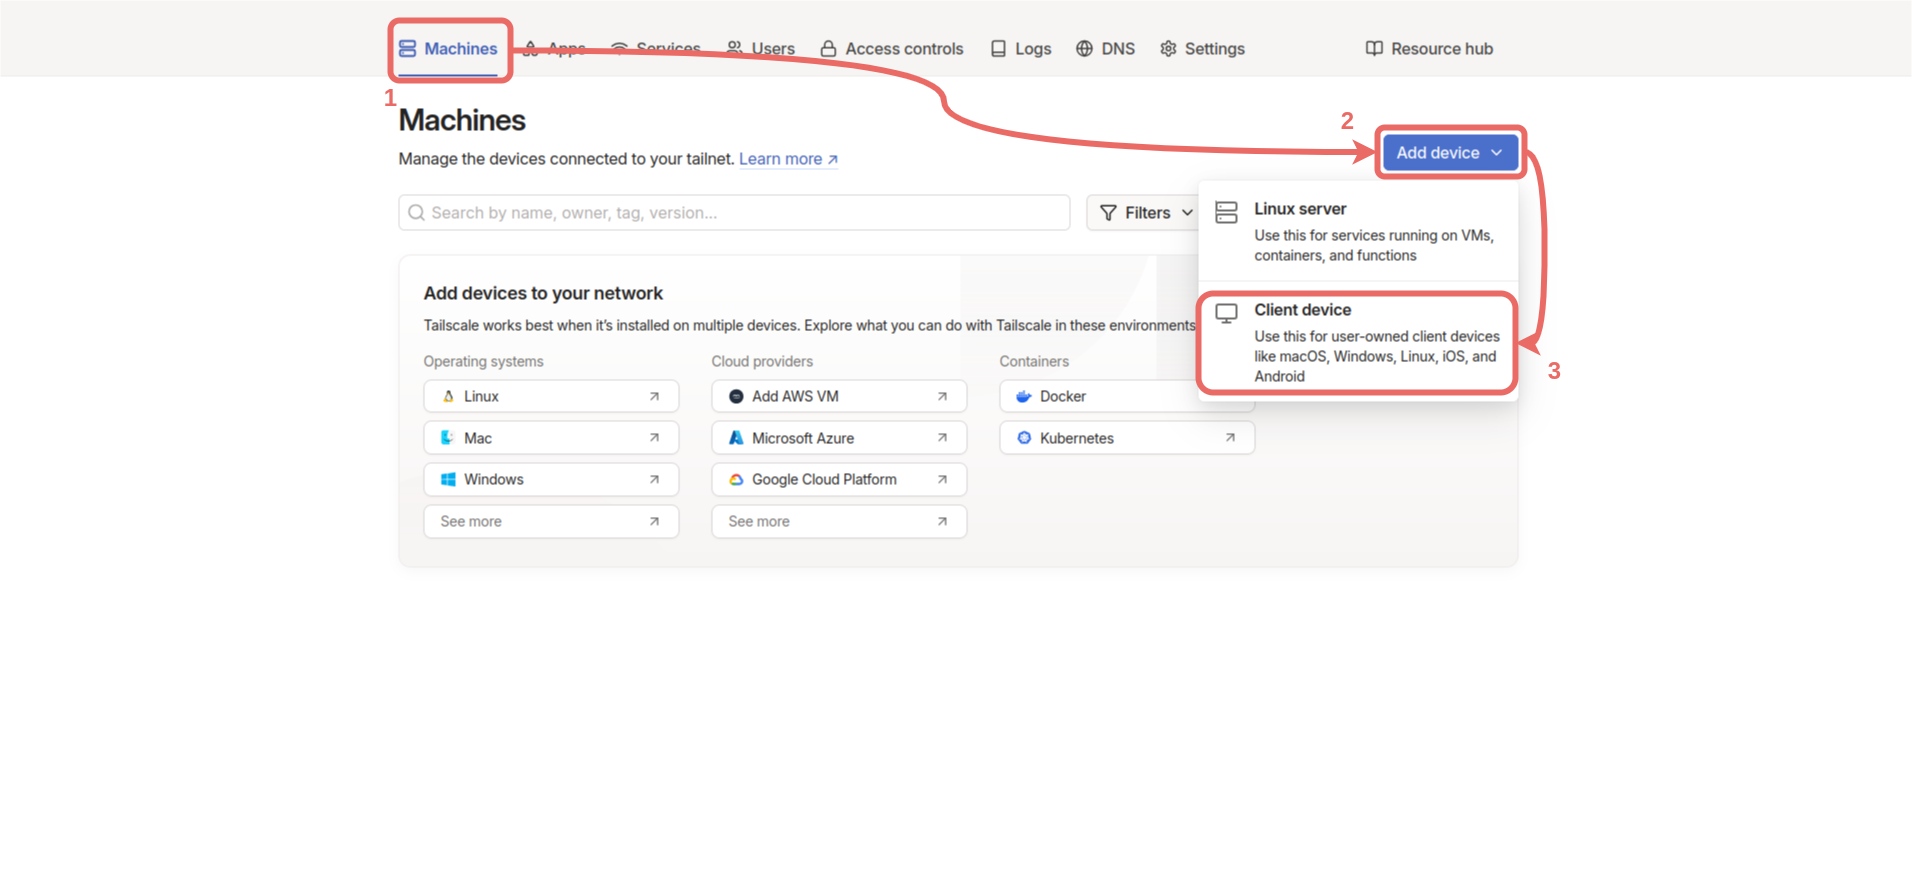
Machines -> Add device -> Client device.
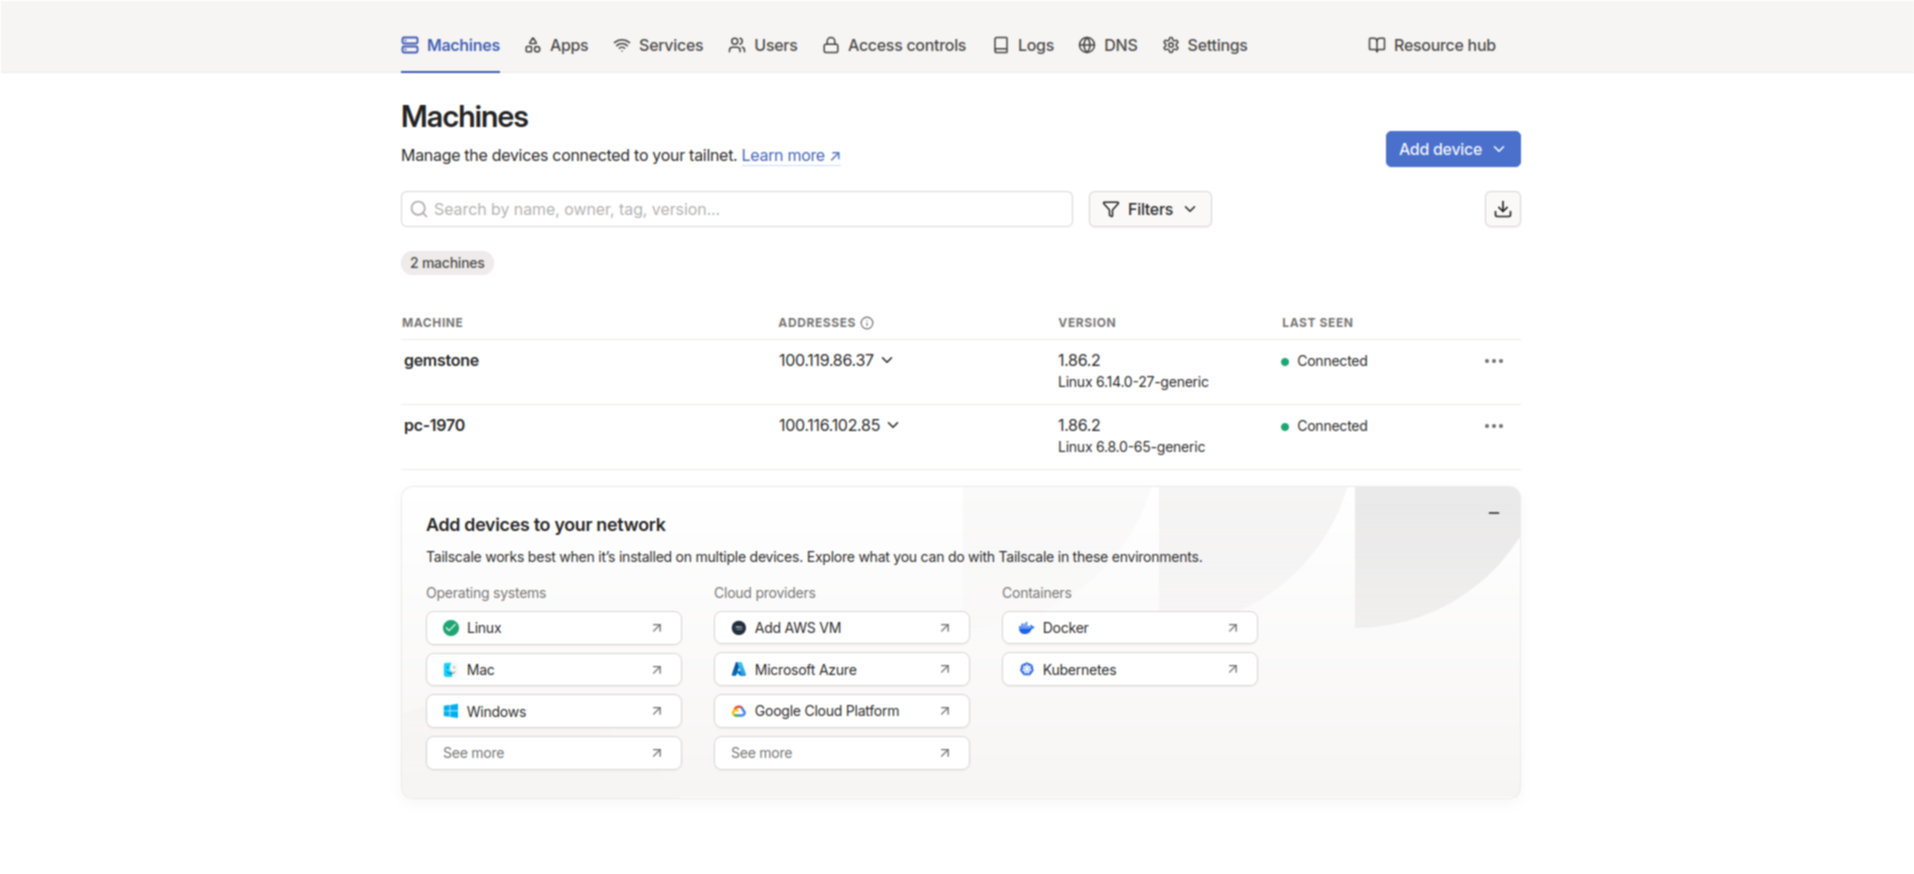
Connected in the control panel.
admin, and the password is the CLOUD password you entered during installation.
3.4. Why is Tailscale Used?
Due to the limited number of IPv4 addresses, internet service providers use CGNAT (Carrier-Grade NAT) to route multiple users through a single IPv4 address to the internet. This situation prevents direct access to servers running at home (in our case, Nextcloud). Tailscale solves this problem by establishing a WireGuard-based VPN network, overcoming CGNAT and traditional NAT barriers. Users can securely connect to the Nextcloud server from anywhere with internet access, using only authorized devices. Thus, a closed and controlled network environment is provided without the need for public IP sharing.3.5. Usage with Static IP
Under construction…4. Advanced Security
4.1. Nextcloud Two-Factor Authentication
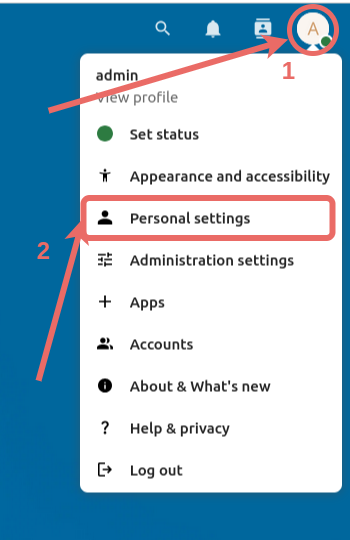
After logging into the admin account, click the profile picture at the top and selectPersonal Settings from the menu that opens.
Security from the left menu and check the Enable TOTP box.
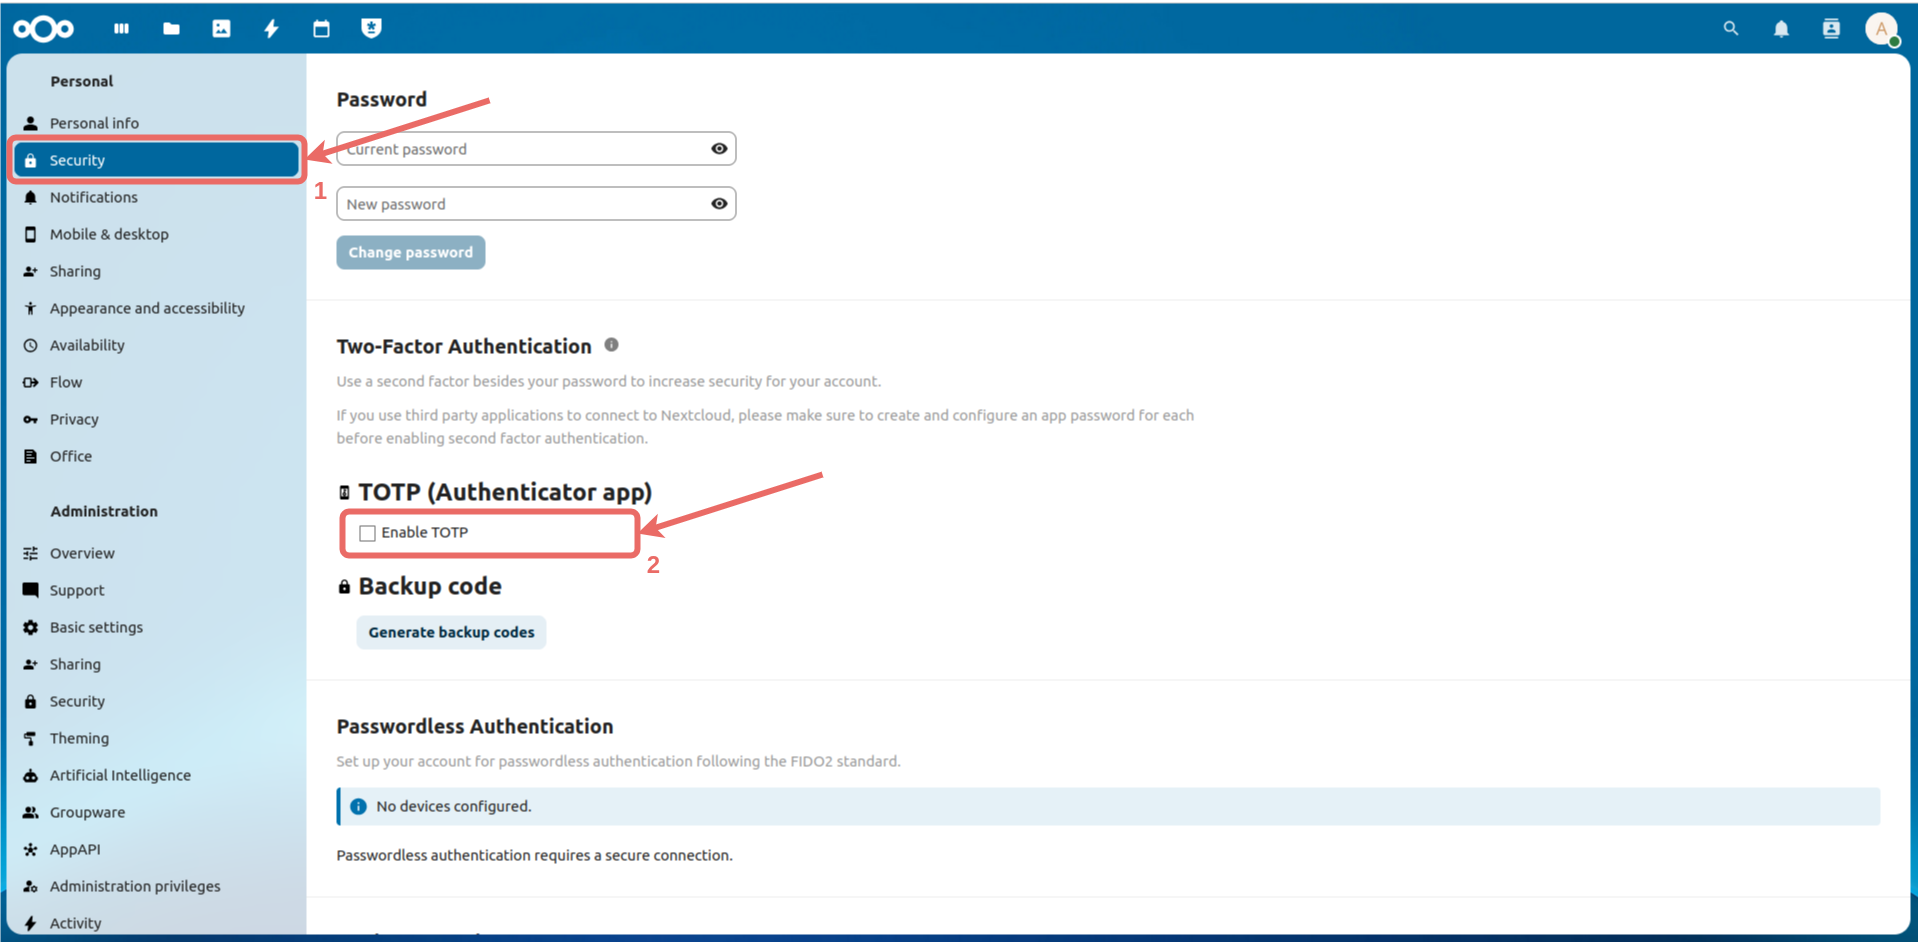
Authentication field and click the Verify button to complete the process.

4.2. Enabling Tailscale Tailnet Lock
In this system, access to Nextcloud is only possible from devices added to the tailnet, making the system secure. However, there is a closed-source server called theCoordination Server by Tailscale that controls which devices can be added to the network. The decision of whether a device can join the tailnet is made by this server.
In the worst-case scenario, if Tailscale targets you, the Coordination Server could add devices to your tailnet without your permission. Tailscale solves this problem with a method called Tailnet Lock. Tailnet Lock stores the keys that allow joining the network on two devices you specify within your network, instead of on Tailscale’s own Coordination Server. Thus, only these two devices can manage entries into your tailnet.
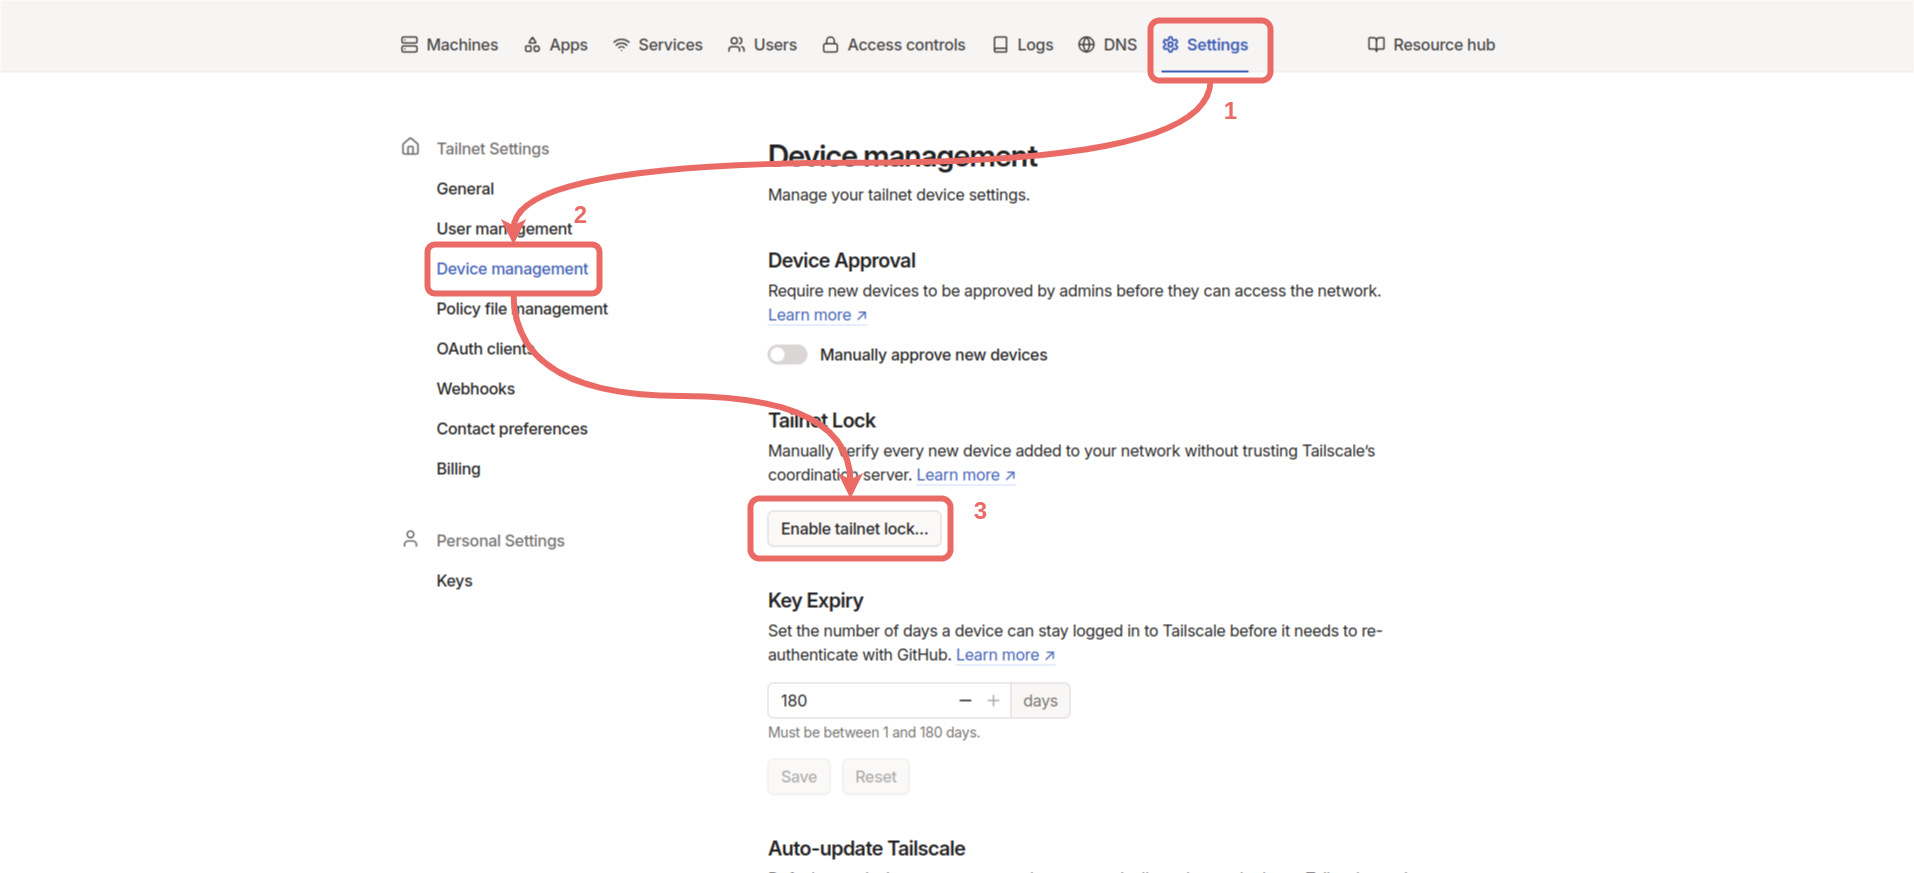
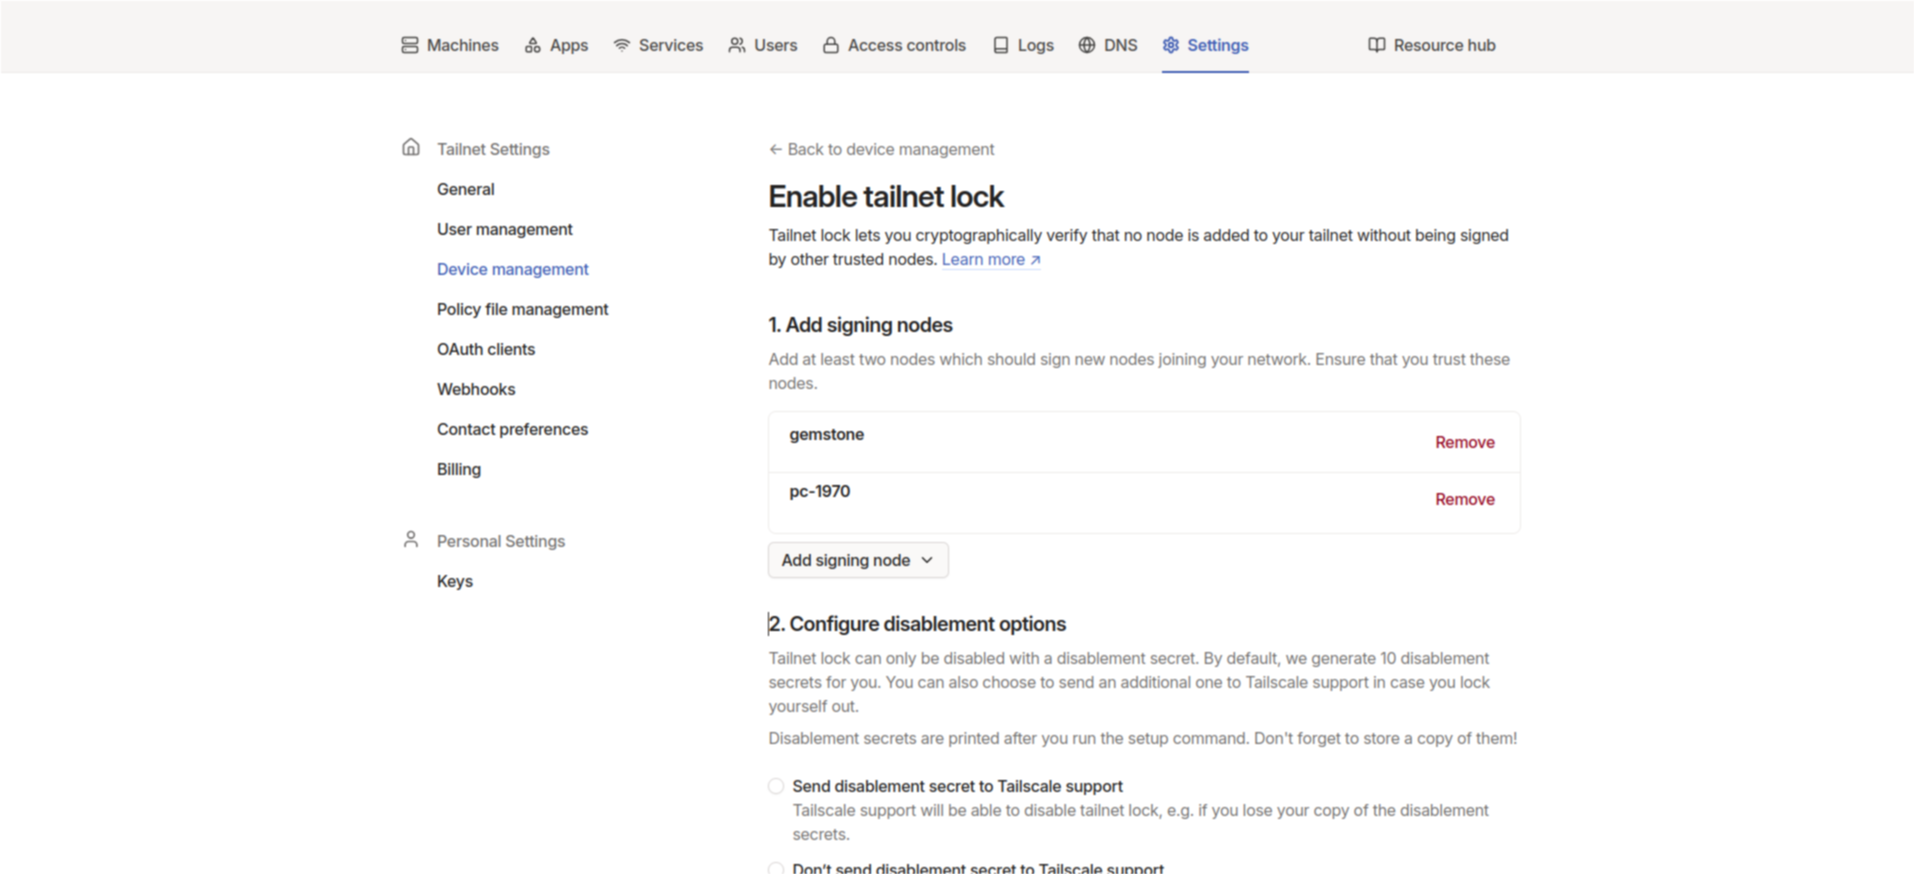
From the control panel, click Settings -> Device management -> Enable tailnet lock.
Add new signing node and select two devices already in the tailnet. If there are other devices in your tailnet, the devices selected here should be ones you trust.
Configure disablement options section and click Don’t send disablement secret to Tailscale support. Copy the command from the Run command from signing node section and run it on one of the devices we added (For example, you can run it on the Gemstone board).
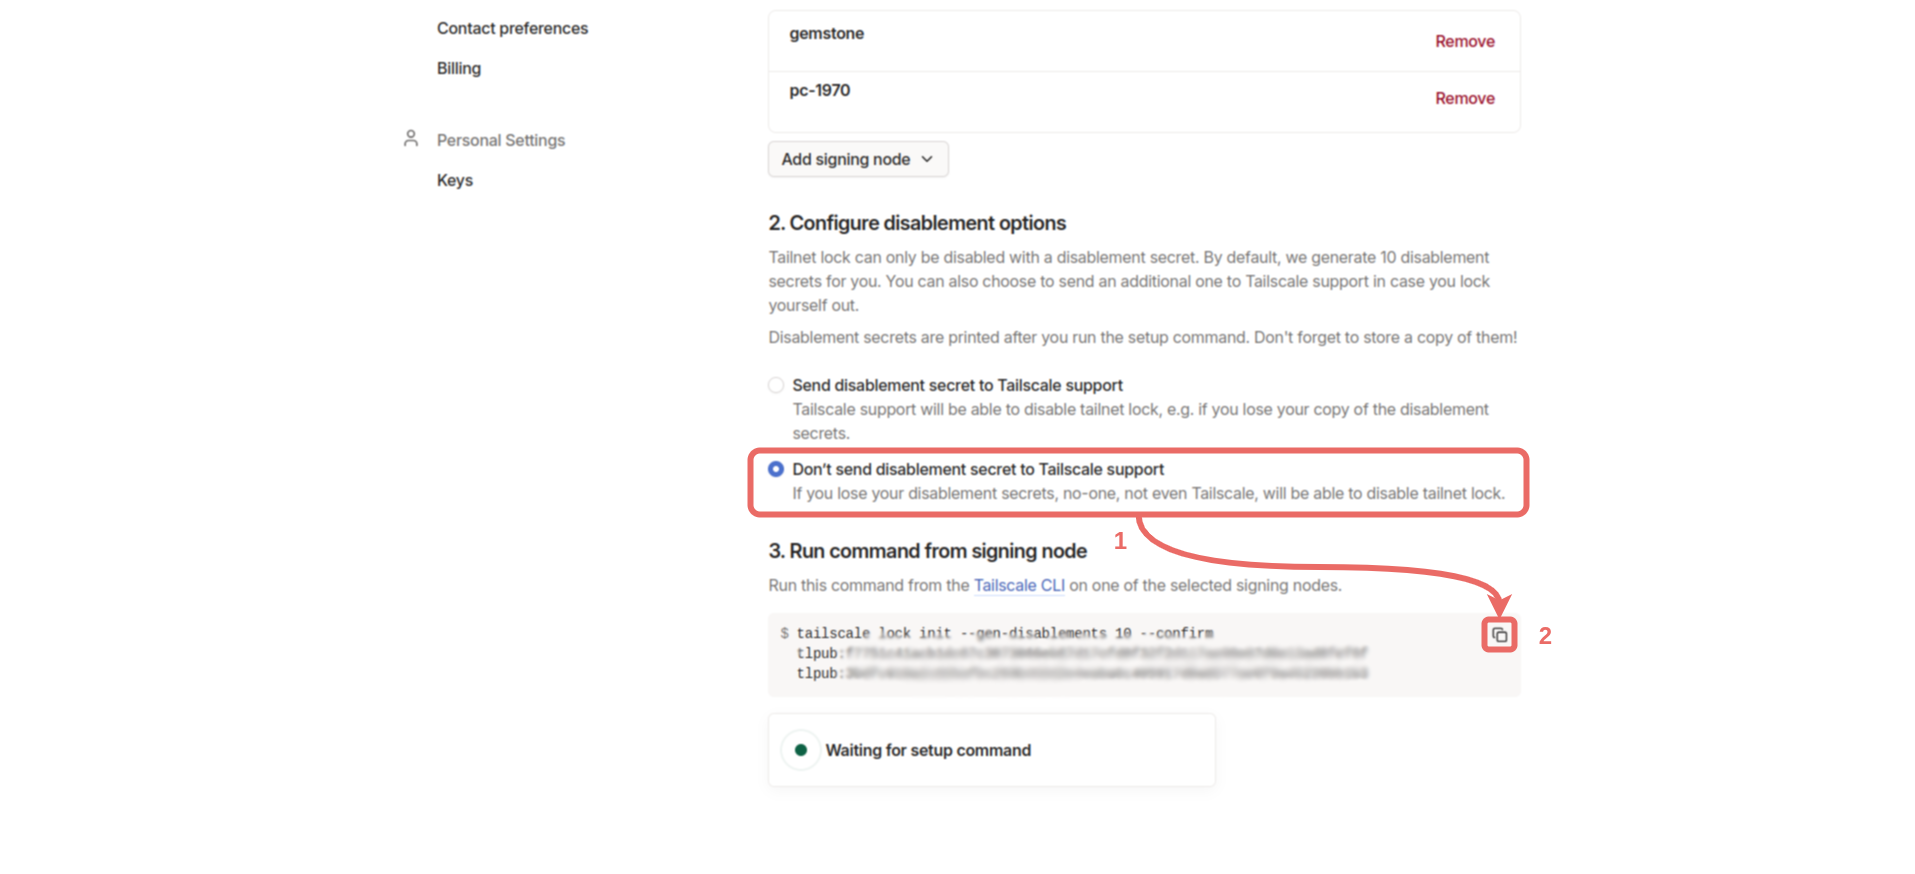
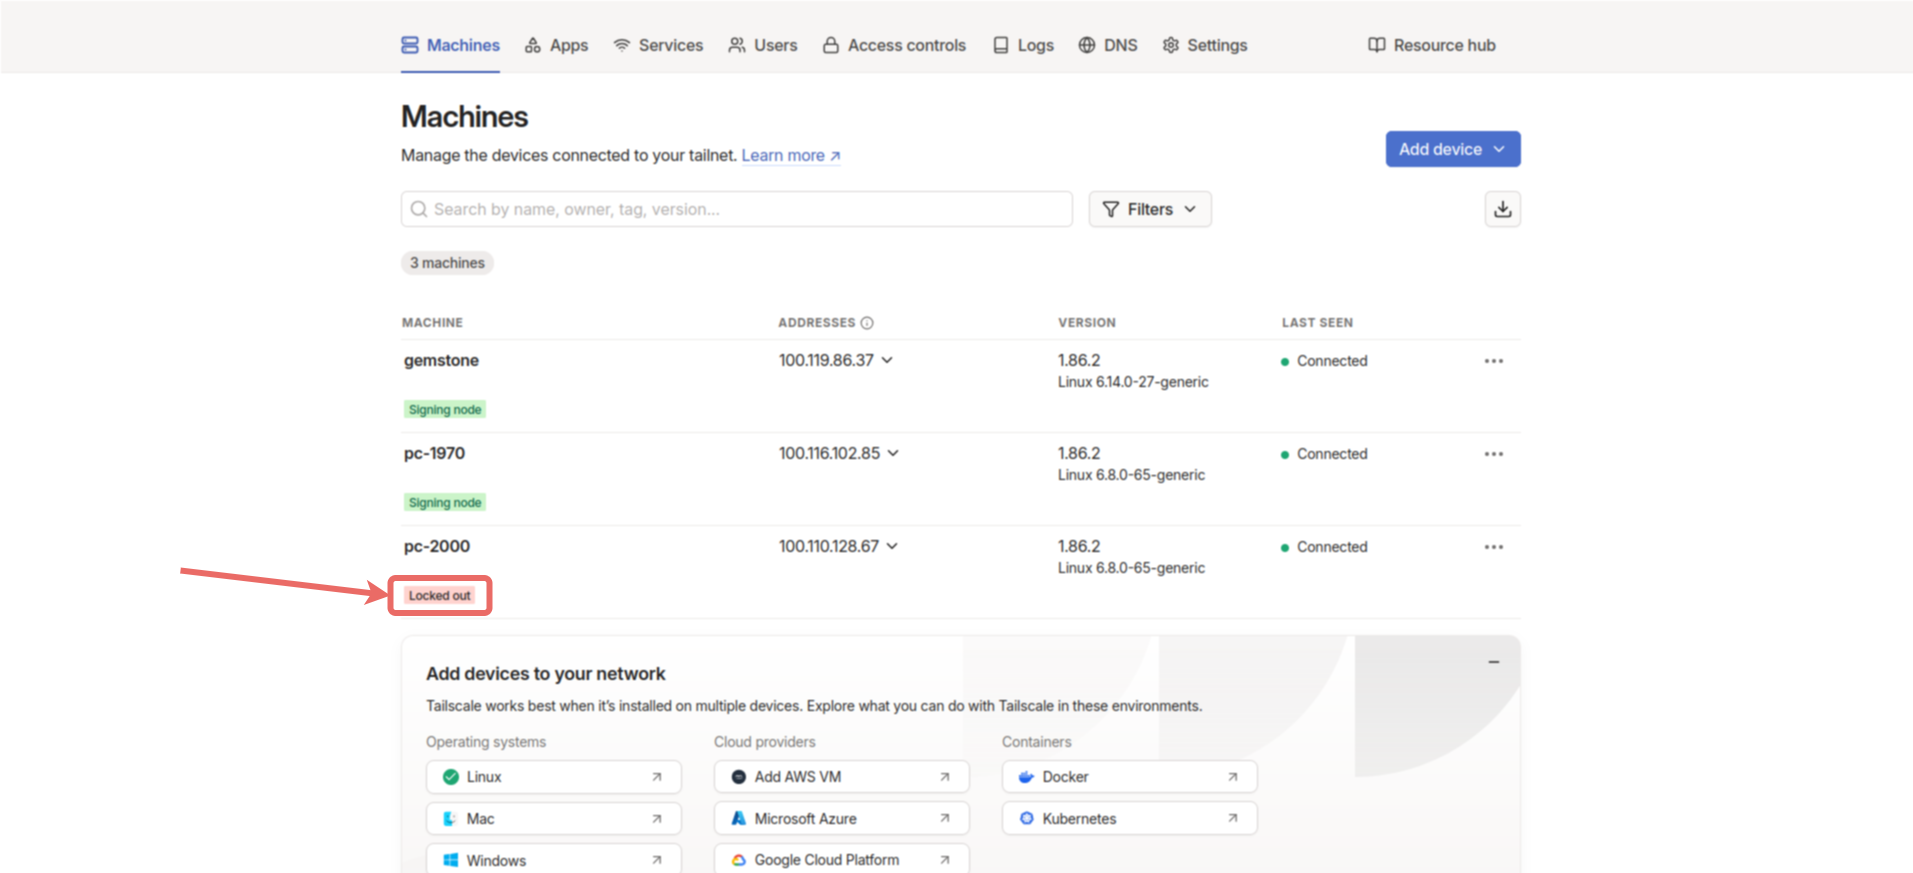
disablement-secret:XXXXXXXX in a secure location. In the control panel, under Machines, you should see the Signing node label under the two devices we selected.

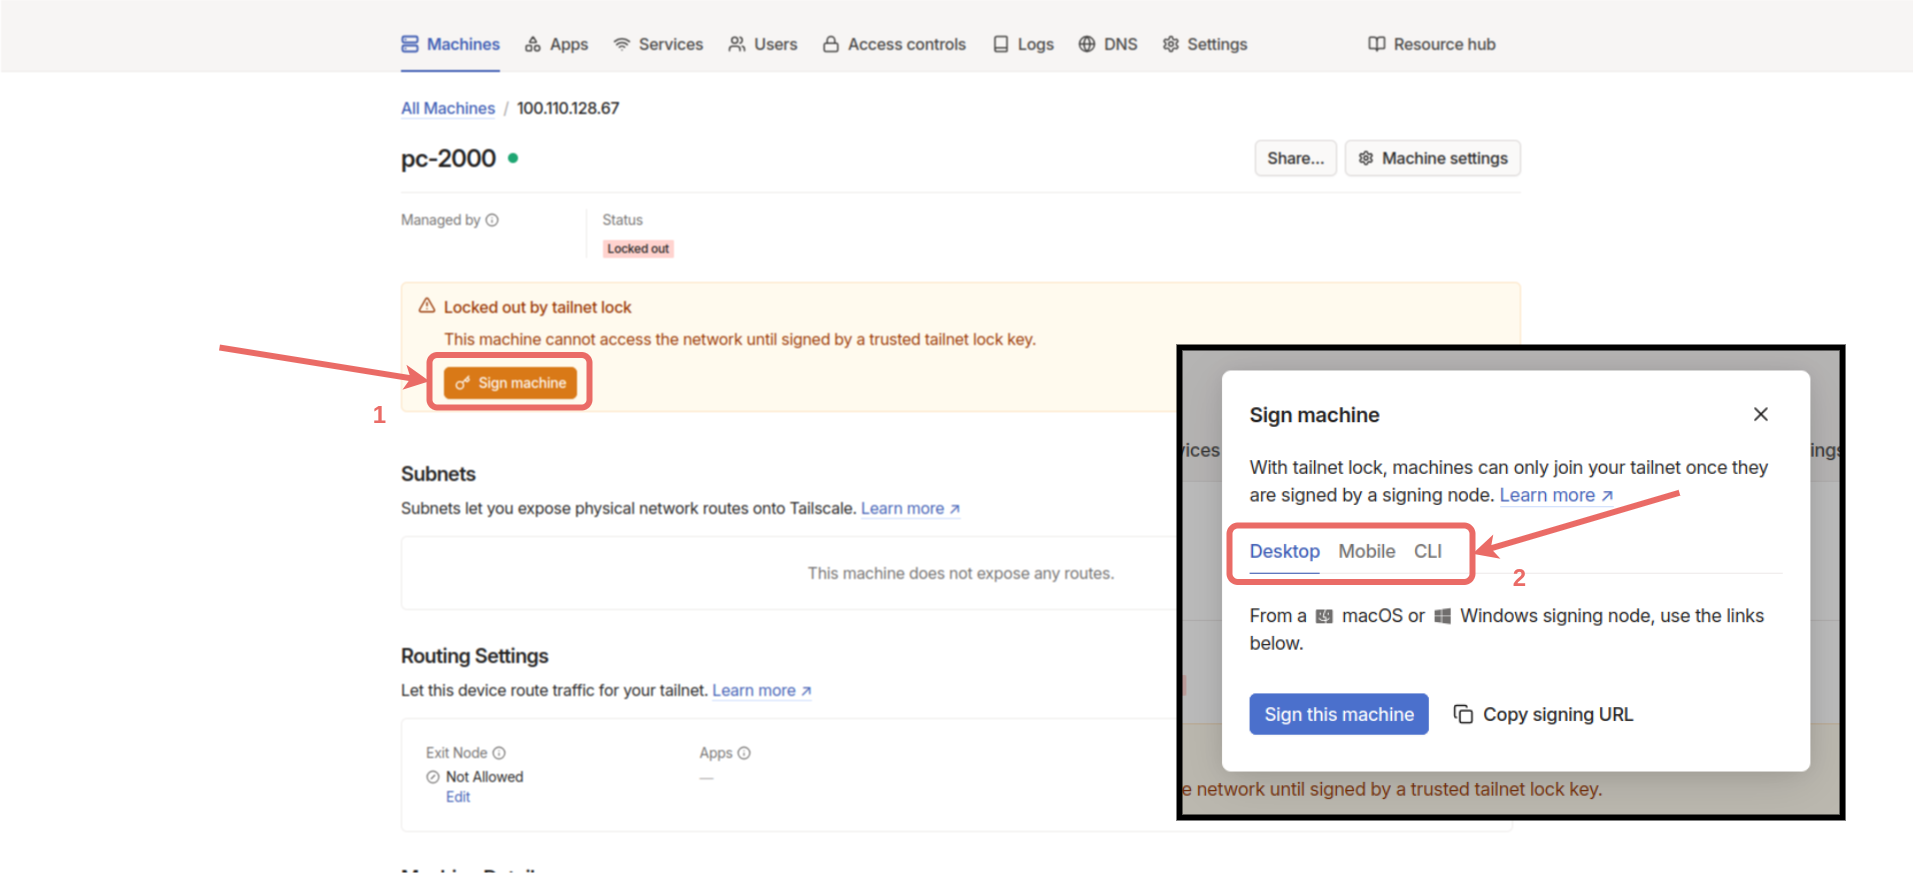
Locked out, as shown below.
Sign machine button. Then, select one of the options appropriate for the device’s operating system and complete the sign process. After the process, the device will be connected to the network. To perform the sign process on the Gemstone board, select the CLI option, copy the generated command, connect to the board via terminal, and run the command in the terminal.