1. Writing an Image to eMMC with USB DFU
USB DFU (Device Firmware Upgrade) is the standard that allows the T3 Gemstone O1 to be programmed directly over USB. An image can be written to eMMC without needing an SD card or a running system.Official DFU documentation for the TI AM67A processor:
USB Device Firmware Upgrade (DFU) — Processor SDK Linux for AM67A
1.1. Switching to USB DFU Mode
Power off the board
If the operating system is running, shut it down properly, then disconnect the power from the T3 Gemstone O1.
Set the bootmode switch to the USB DFU position
Using the switch position shown in the diagram below as a reference, set the bootmode switch to the USB DFU position.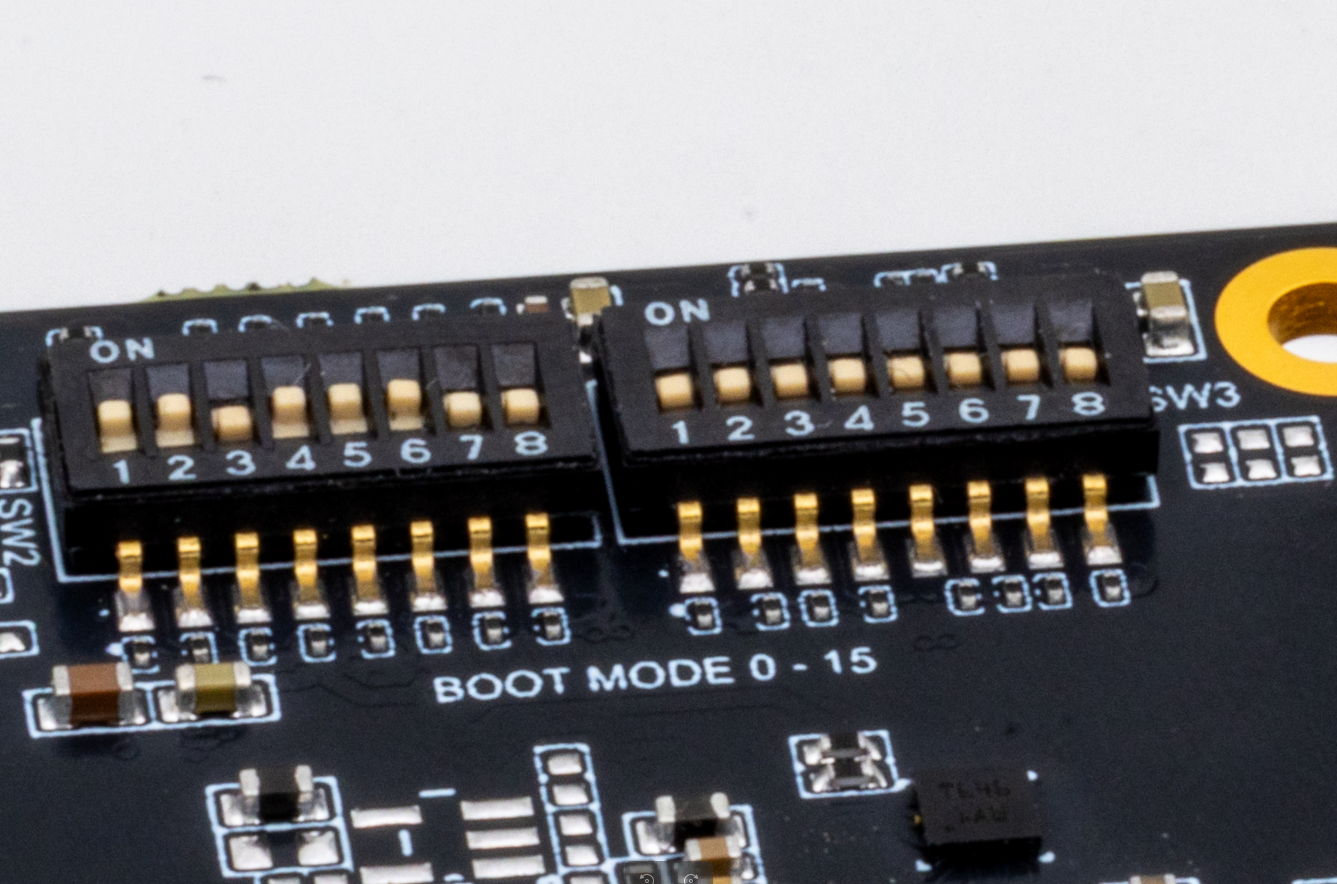

The image above is included to show the physical location of the bootmode switch on the board and is representative.
For DFU mode, follow the switch position from the diagram below.
1.2. Loading the Image with GemImager
GemImager automatically manages the entire DFU writing process — the bootloader files are shipped together with the operating system image and are loaded in the correct order.Select the operating system image
Click the Choose OS button and select the image you want to write.
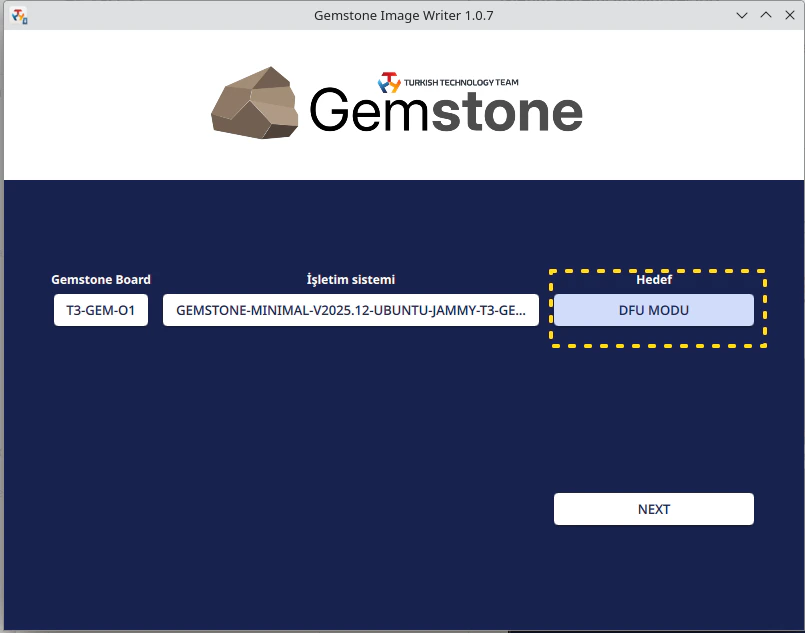
Write the image
Click the Next button to configure the OS customization options (see the
Customization page), then press the Write button.
Power off the board and set the bootmode switch to the eMMC position
Fully power off the board, then set the bootmode switch to the eMMC position as shown in
the image below.
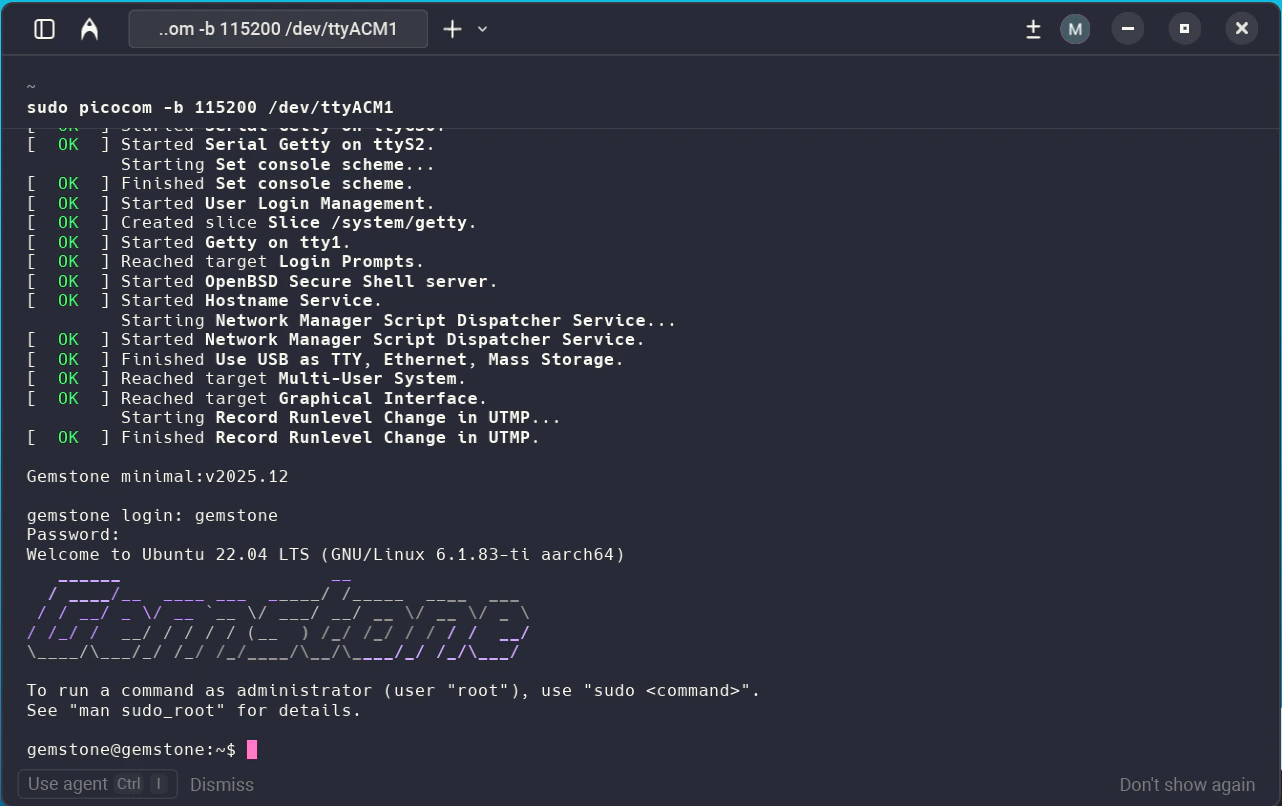
You can monitor the boot process via a serial port connection over UART.
Default baudrate: 115200
2. Manual Image Loading with the SDK (dfu-util)
For more information about building an image from source, see the SDK documentation.
| File | Location |
|---|---|
tiboot3.bin | build/t3-gem-o1/deploy-ti/images/t3-gem-o1/ |
tispl.bin | build/t3-gem-o1/deploy-ti/images/t3-gem-o1/ |
u-boot.img | build/t3-gem-o1/deploy-ti/images/t3-gem-o1/ |
gemstone-*.img | build/debos/ |
Load the first-stage bootloader (tiboot3.bin)
dfu-util -l.Power off the board and set the bootmode switch to the eMMC position
When
dfu-util reports success, fully power off the board, then set the bootmode switch to the
eMMC position.You can monitor the boot process via a serial port connection over UART.
Default baudrate: 115200
2.1. Verification Step
When writing with GemImager DFU, the following operations are performed in order:- Downloads or reads the selected image
- Extracts the bootloader files (
tiboot3.bin,tispl.bin,u-boot.img) - Writes each bootloader stage over DFU
- Transfers the full OS image to the eMMC (
rawemmcalt setting)
Verify the DFU device
Verify that the board appears as a DFU device.You should see an entry with VID:PID 0451:6165 containing the If the device does not appear in the list, try again starting from step 1.
- Linux
- Windows
If the application named
dfu-util is not installed, install it on your Ubuntu computer with the sudo apt install dfu-util command.bootloader and SocId
alt settings.