By the end of this section, you will have experience in the following topics:
How the model required to use the image processing capabilities of the Gemstone O1 development board is prepared via Edge-AI.
Edge AI Studio is an ecosystem developed by Texas Instruments that allows data collection, data labeling, model training, and model compilation operations through a graphical user interface.
You can choose from pre-trained models in the TI Model Zoo and, if you wish, retrain them with your own data to increase accuracy and performance. Edge AI Studio is cloud-based and can be used without installing anything on your computer.
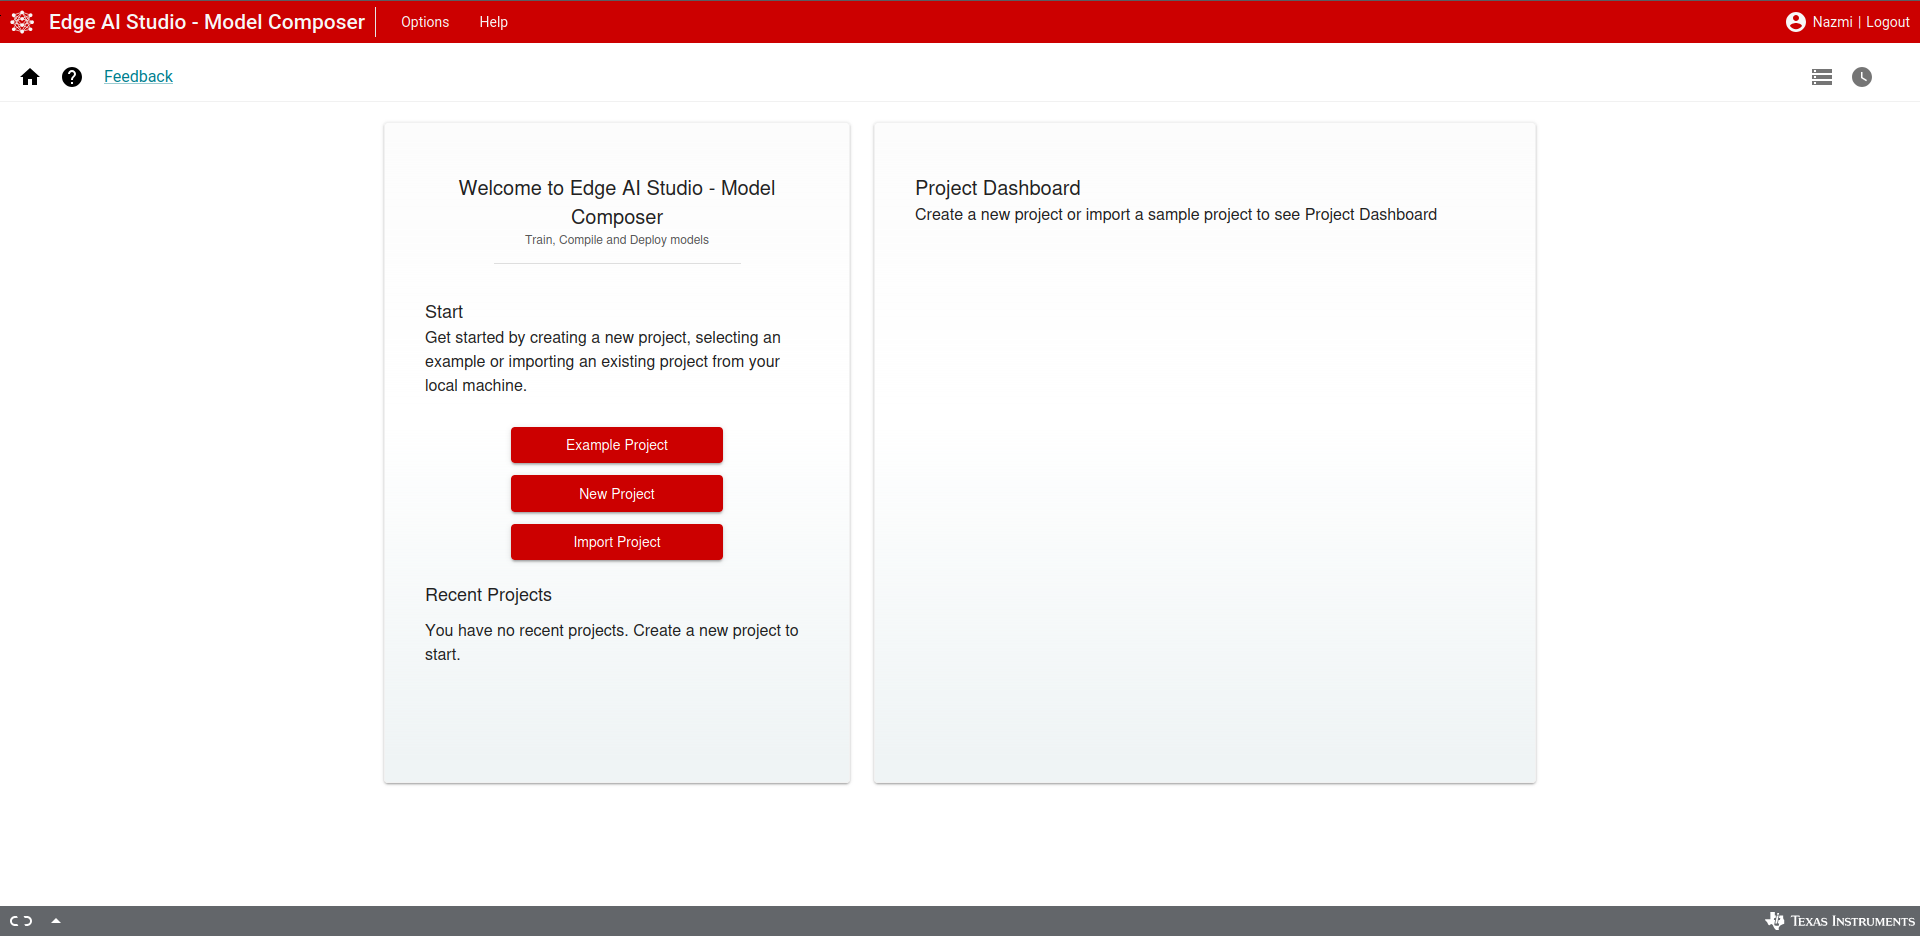
You can go to EdgeAI to create a new project, log in to your existing project, or examine sample projects.
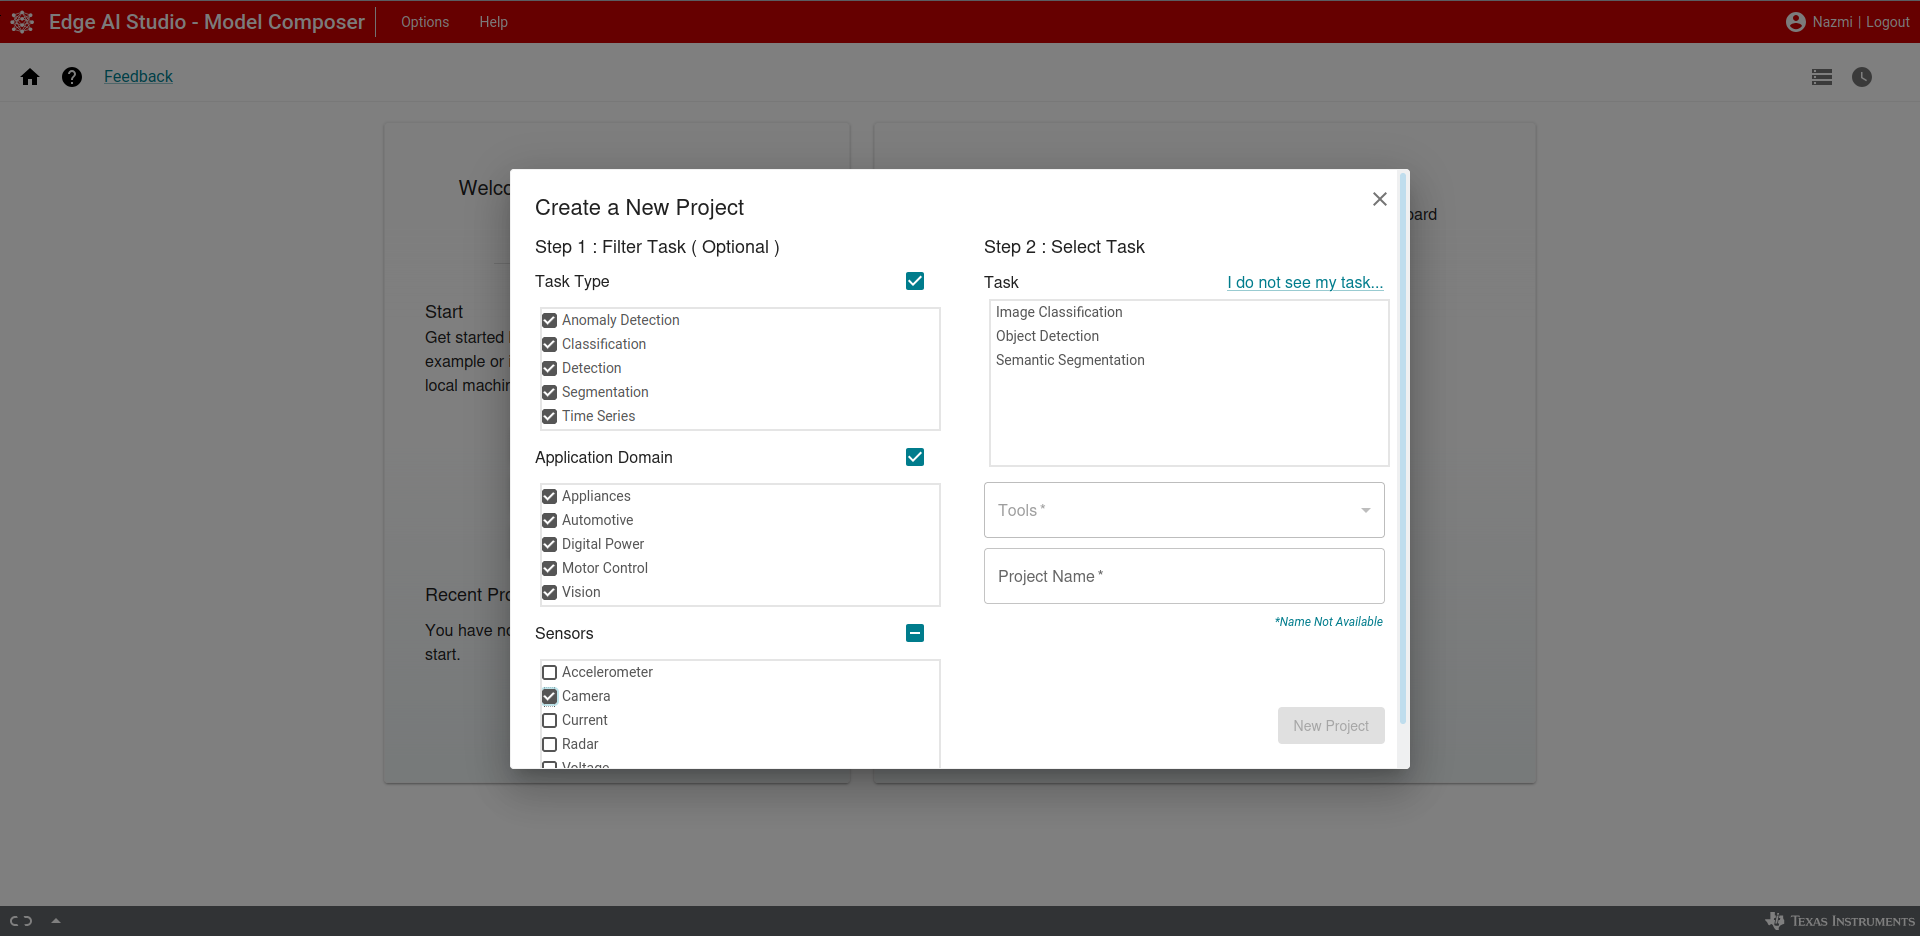
As seen in the image above, various task types can be selected.
Since an image processing application will be performed in this section, only the camera sensor is kept active under the “Sensors” tab.
Depending on this selection, the possible tasks listed are “Image Classification”, “Object Detection”, and “Semantic Segmentation”.In the “Tools” section, “Model Maker - Processor SDK 10.1” should be selected. In the final step, the project creation process can be completed by giving a name to the project.
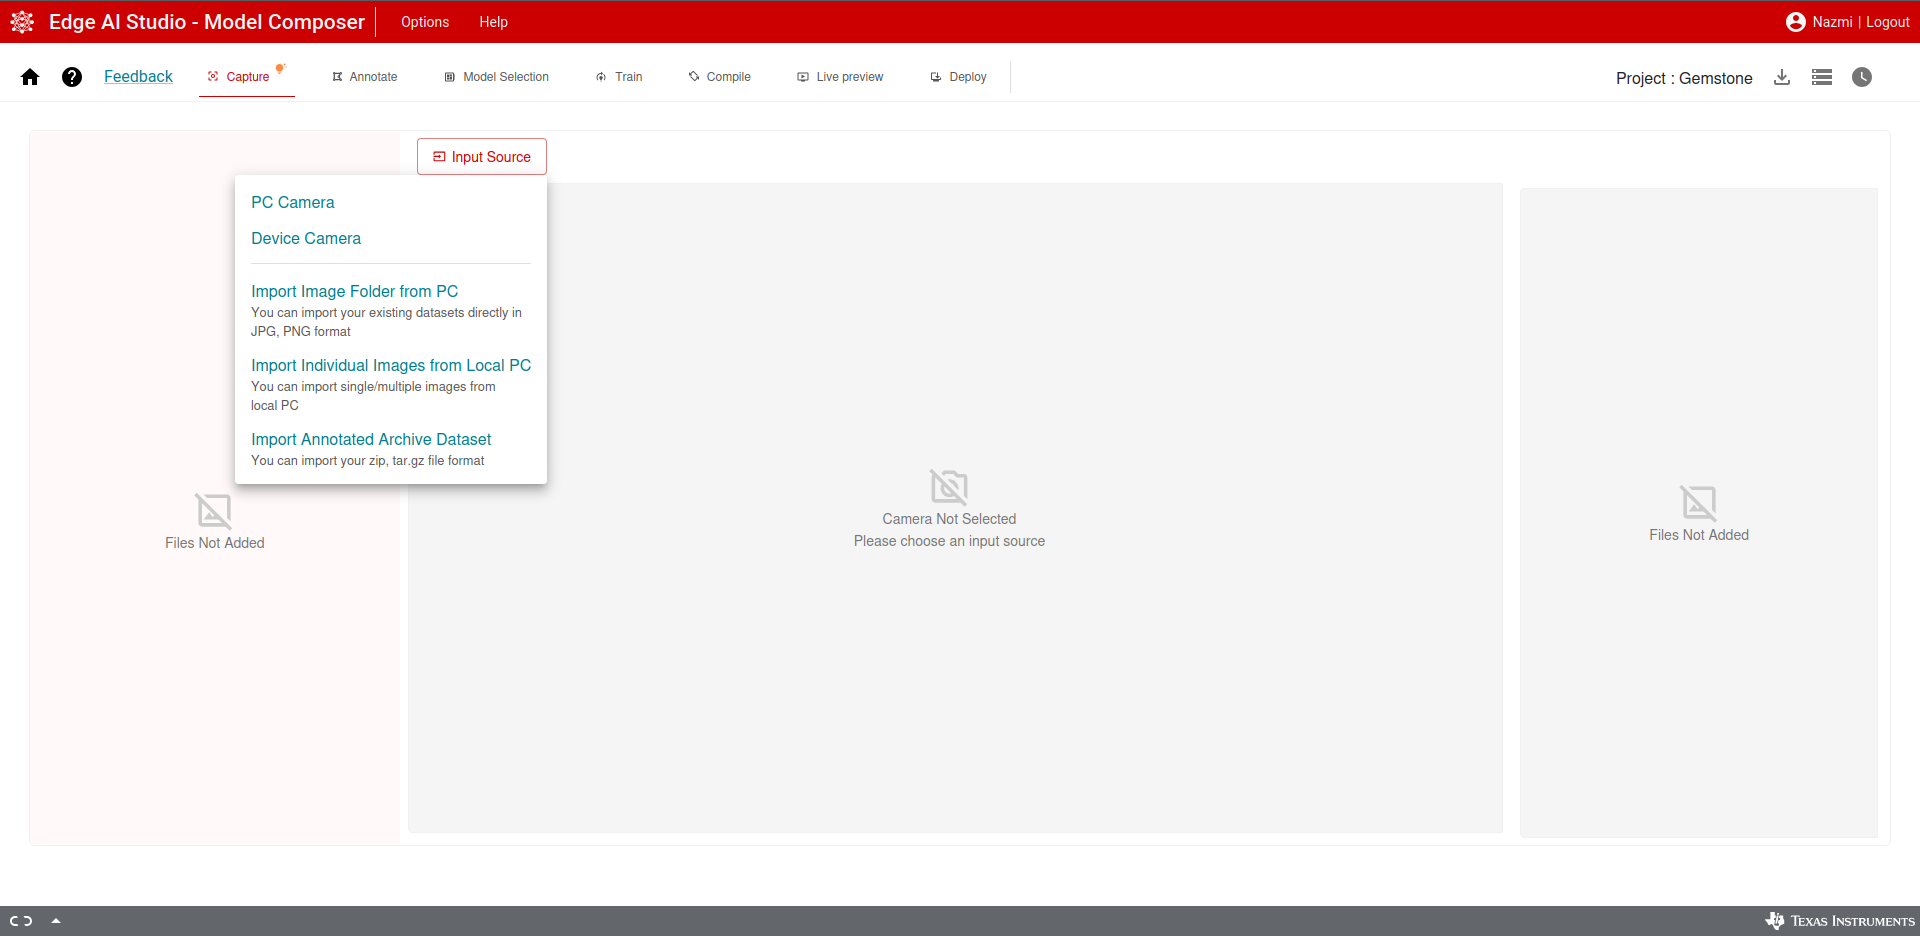
In the next screen, the “Capture” section, images can be added to the system from the computer’s file system or from an image capture device connected to the computer.
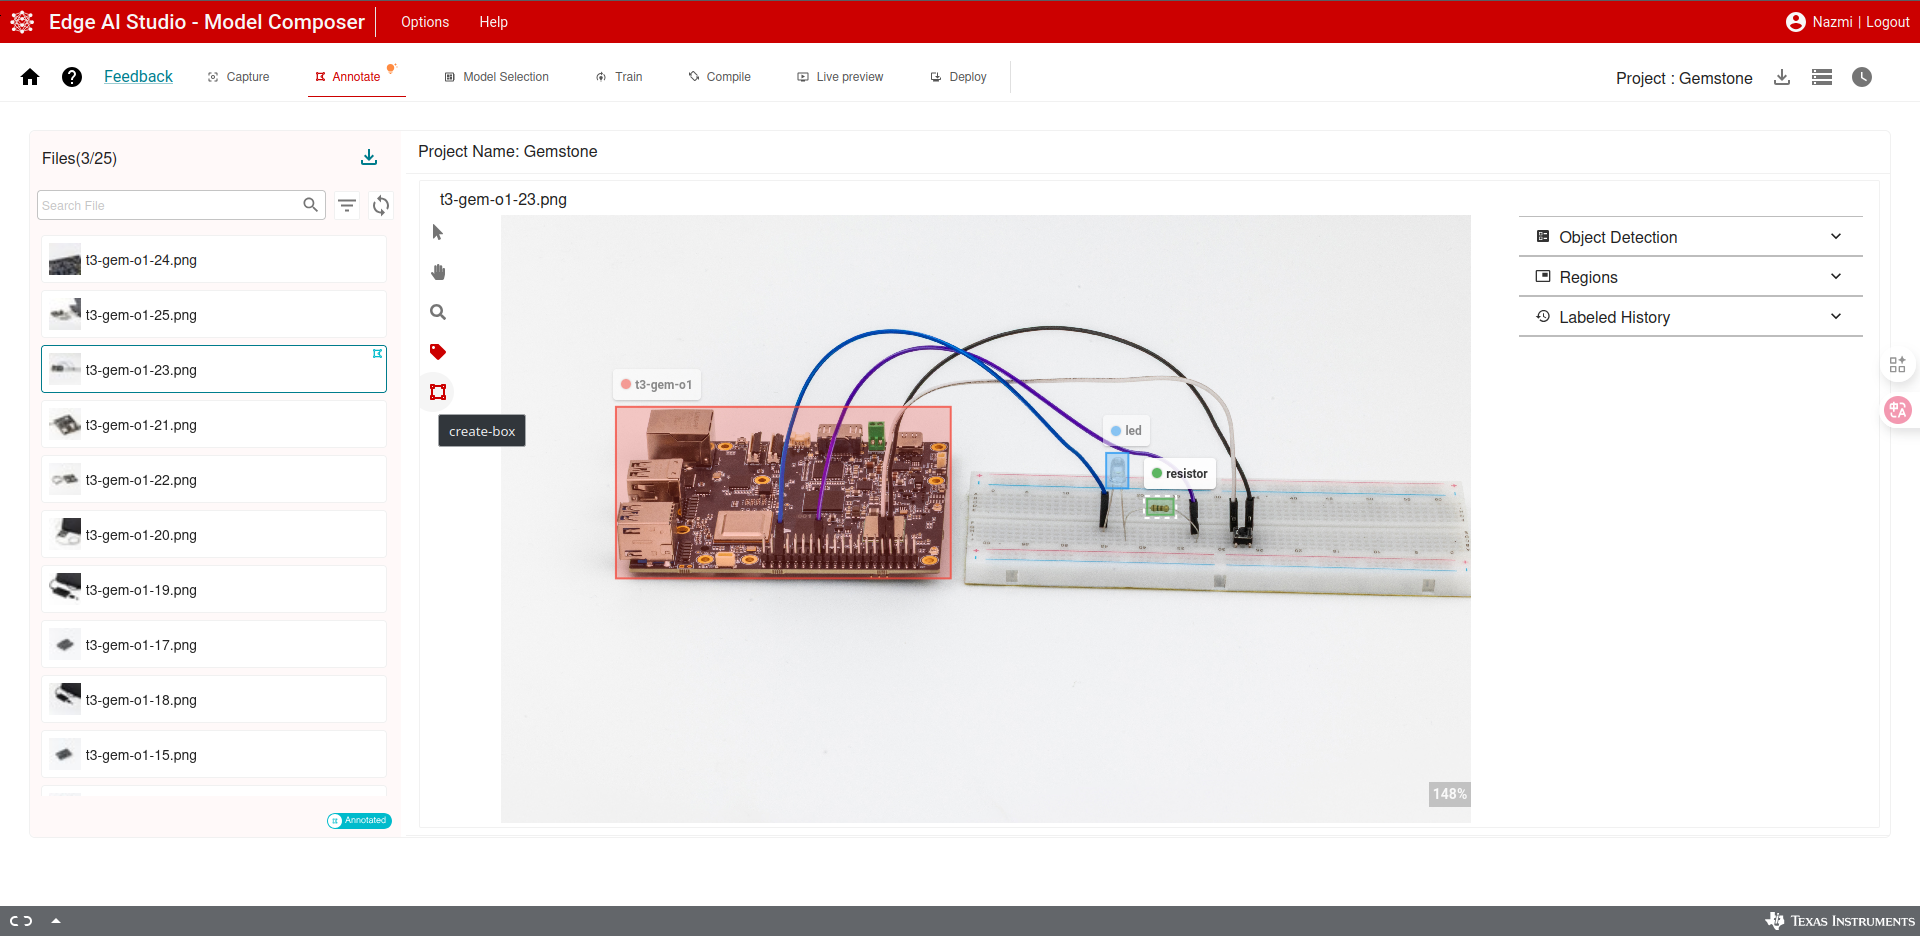
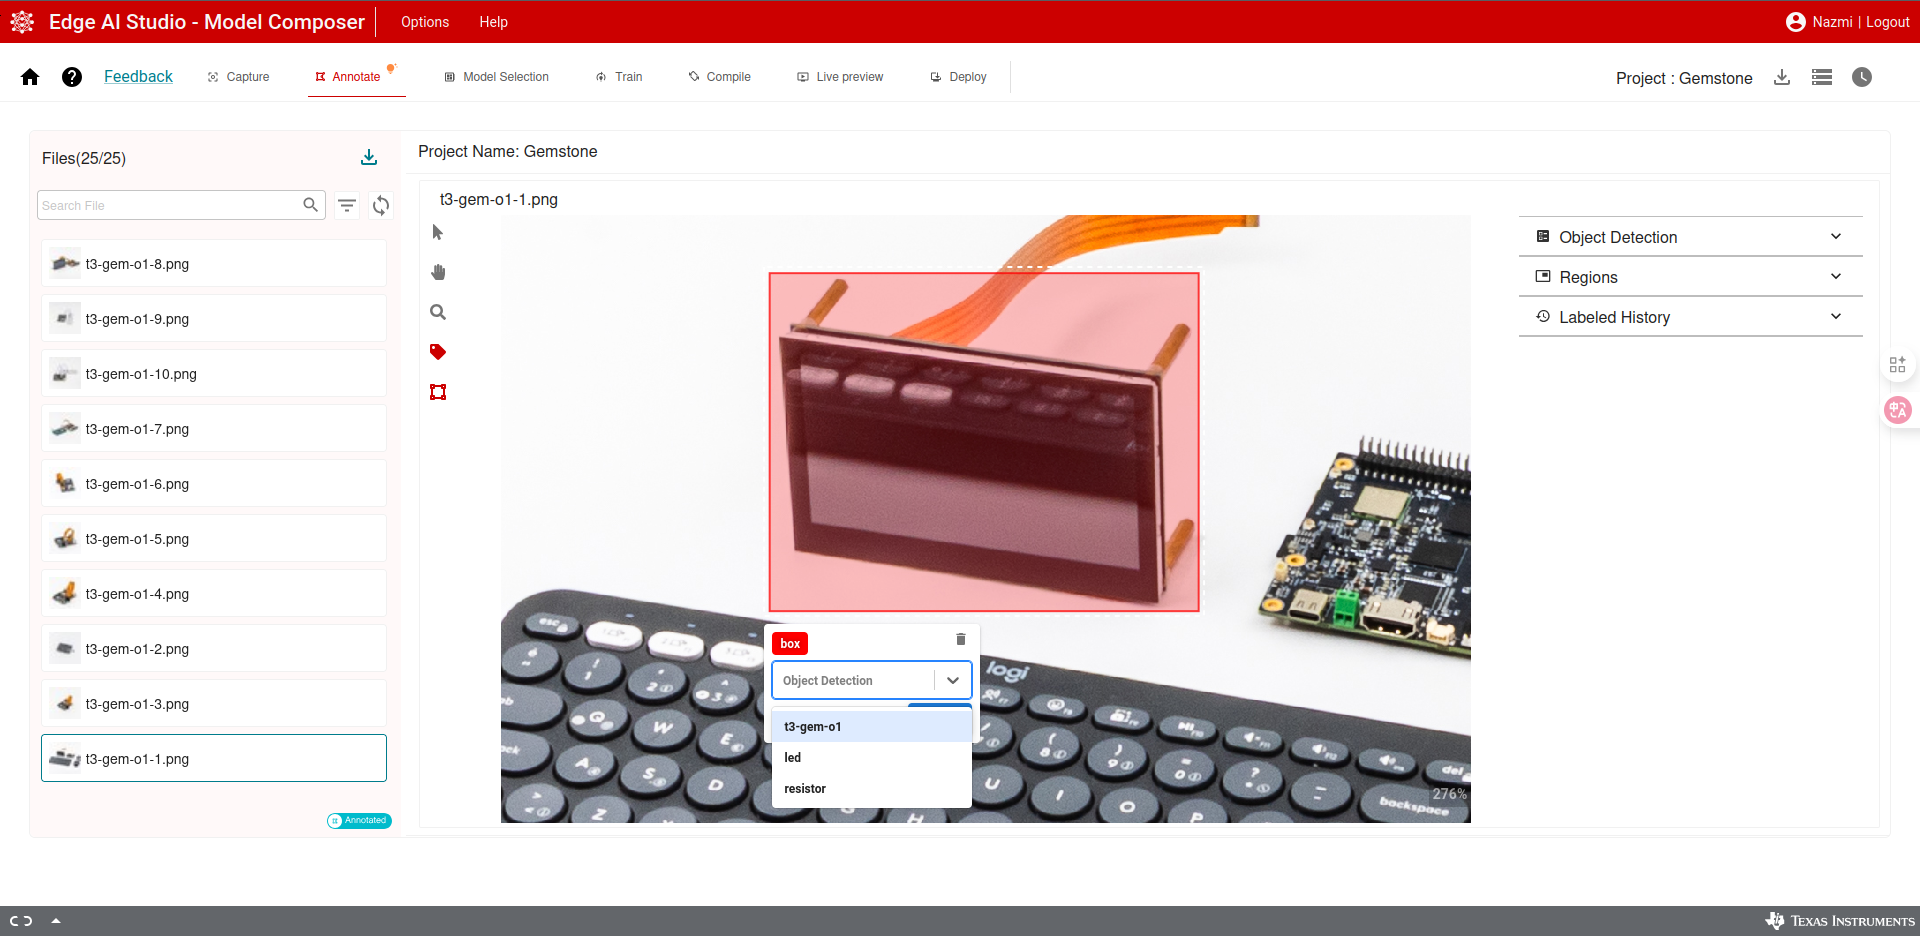
In the next step, the “Annotate” section, all objects in the photos should be selected and classified to train the model.
For this process, click on the “Create Box” option shown in the image above, and objects can be marked using the box creation tool.
As seen above, after a box is created, one of the existing defined class names can be selected, or a different class can be created by typing new text.
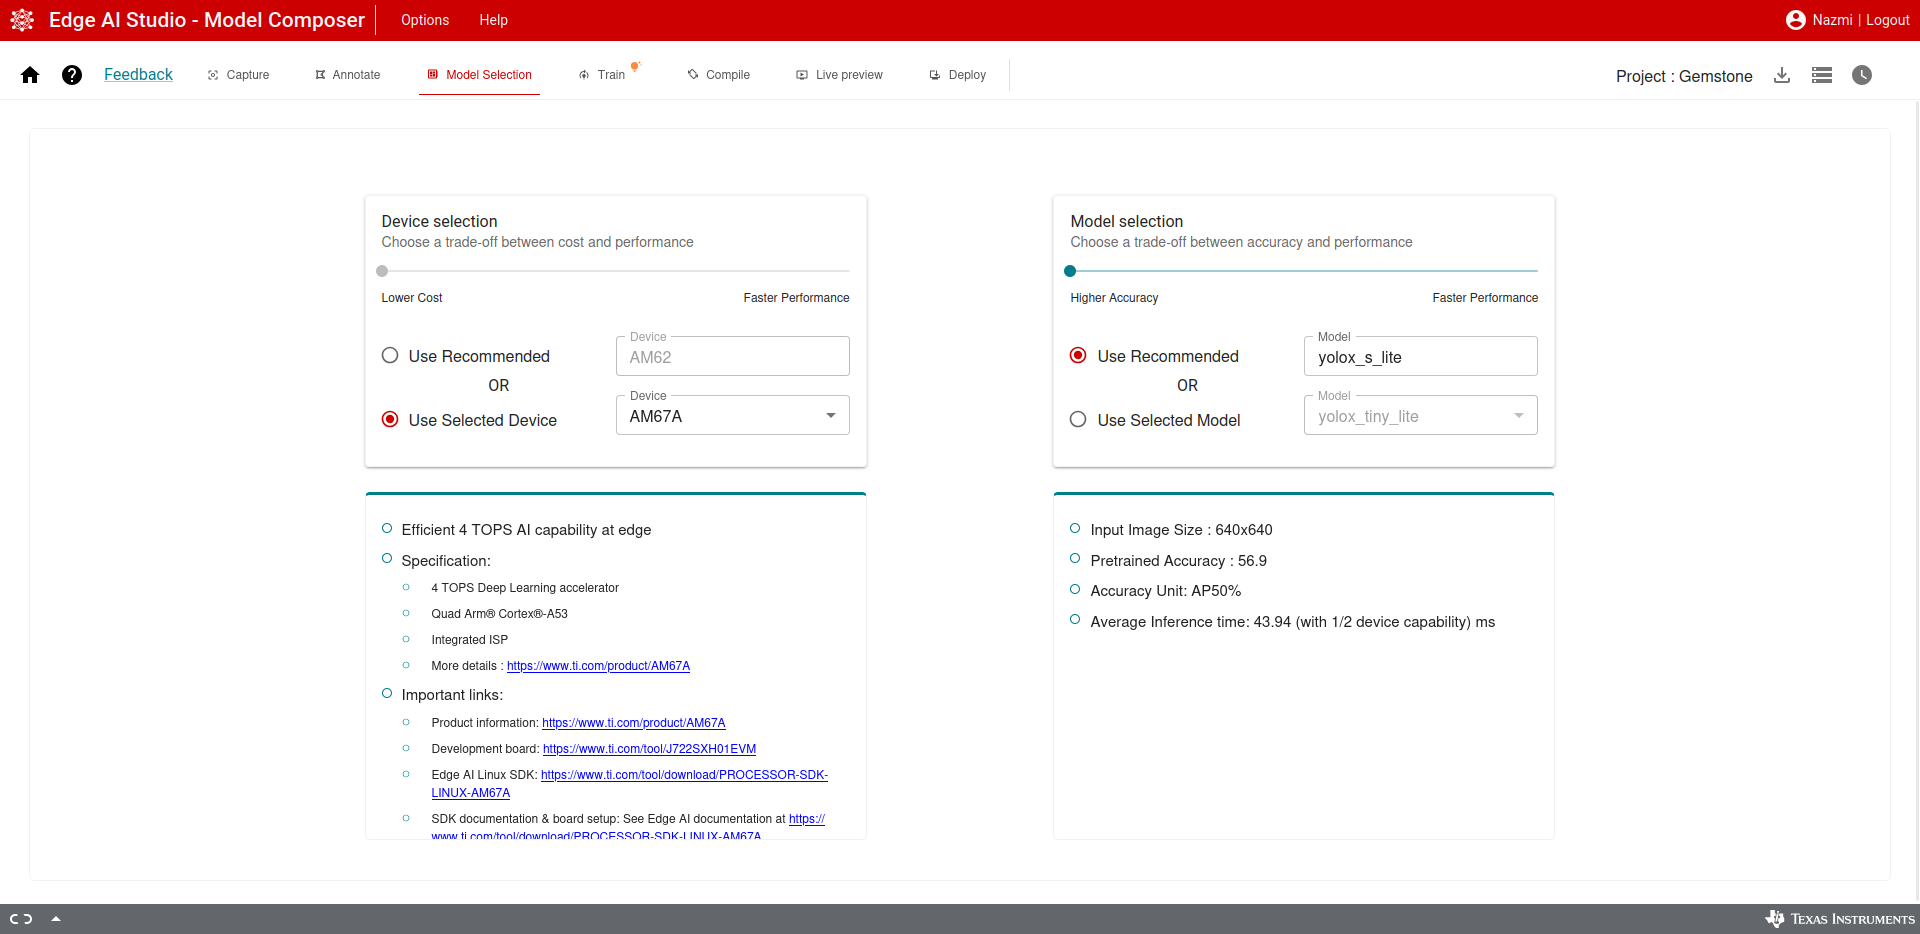
In the next stage, the model selection part, in the “Device Selection” section, AM67A should be selected for the Gemstone O1 Development Board. In the “Model Selection” area, by selecting the “Use Recommended” option, the model recommended by the system can be used by preferring one of the high accuracy or high performance options specified at the top. If you want to select the model manually, you can select the “Use Selected Model” option and choose the model you want from the menu that opens.After the device and model selection is completed, the system will automatically display approximate benchmark values.
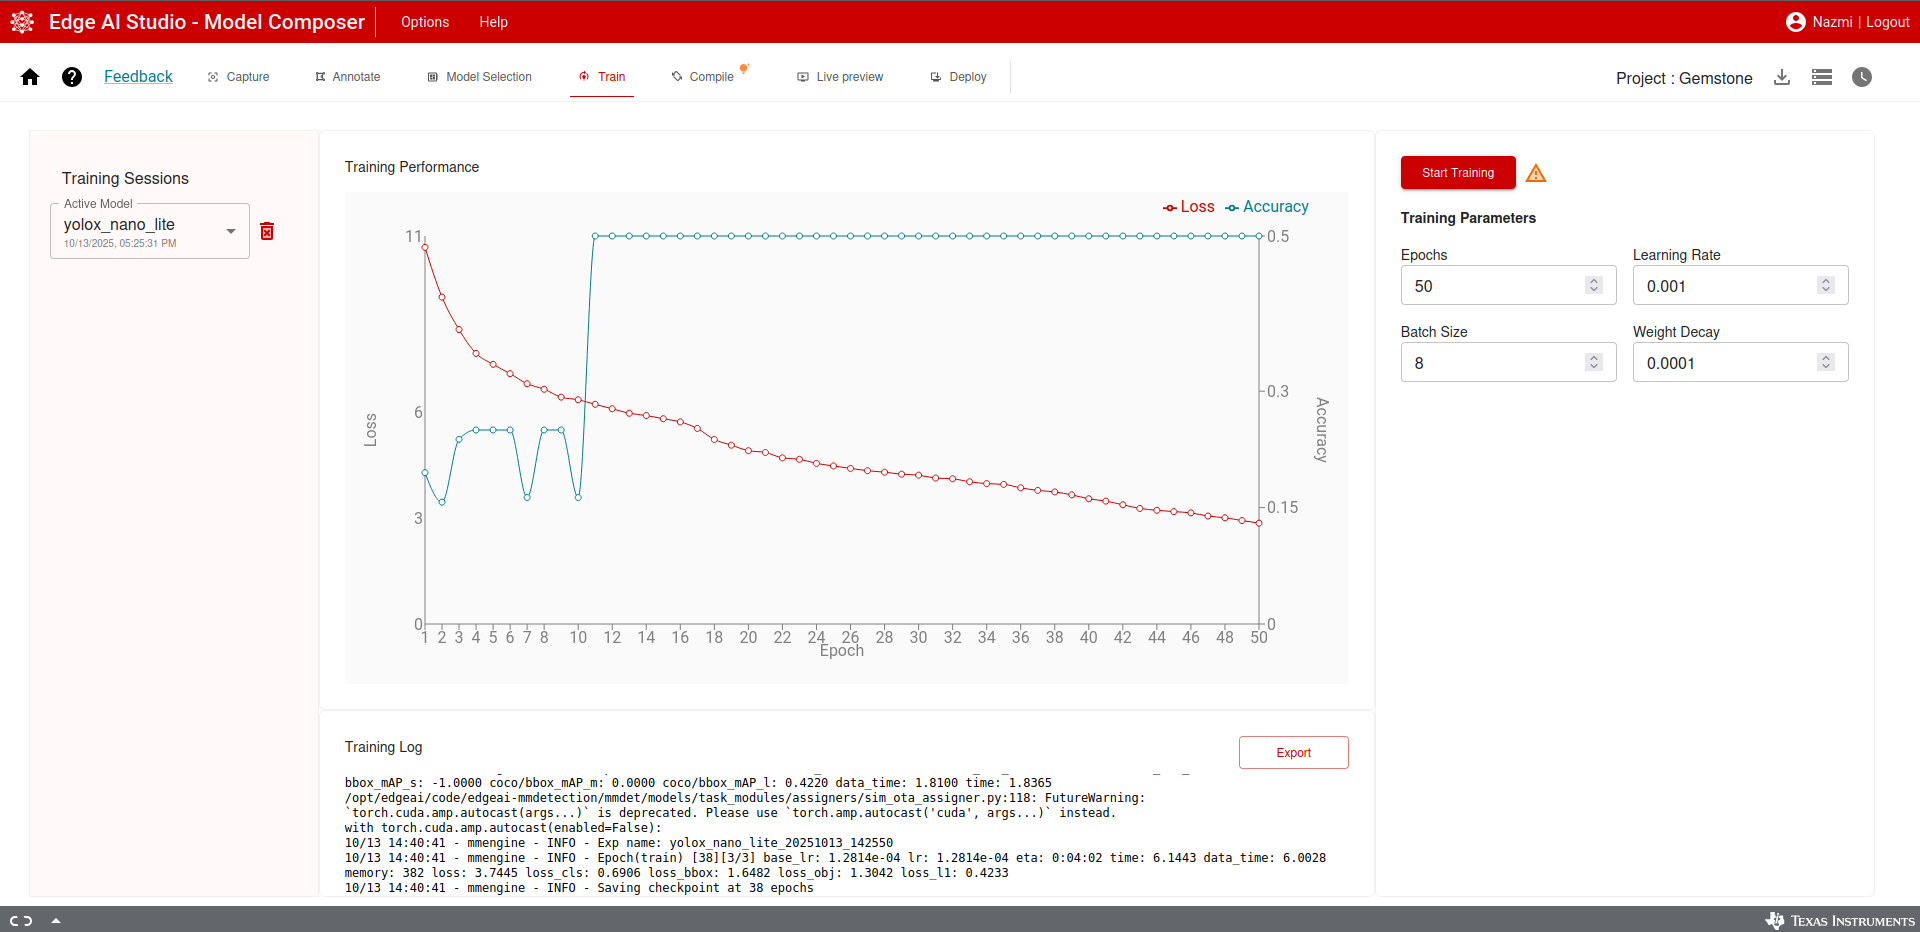
In the “Training” section where the model is trained, the training process can be performed according to the determined parameters.Epoch means the model sees all the training data once completely. Increasing the number of epochs allows the model to learn more from the data, but too many epochs increase the risk of overfitting (i.e., the model memorizes, which is an undesirable situation).Batch is the number of examples the model processes at each step. This parameter is adjusted according to the GPU memory; high batch values require more stable but slower or more memory.Learning Rate is the coefficient that determines how much the model changes its weights during backpropagation.Weight Decay is a penalty term added to the loss function to prevent weights from reaching very large values.If you have prior knowledge about these parameters, it is recommended to update the values. However, if you are encountering these concepts for the first time, it is not recommended to change the default settings.Finally, you can start the training process by clicking the “Start Training” button. The training duration may vary depending on the size of the dataset you entered and the model you selected.
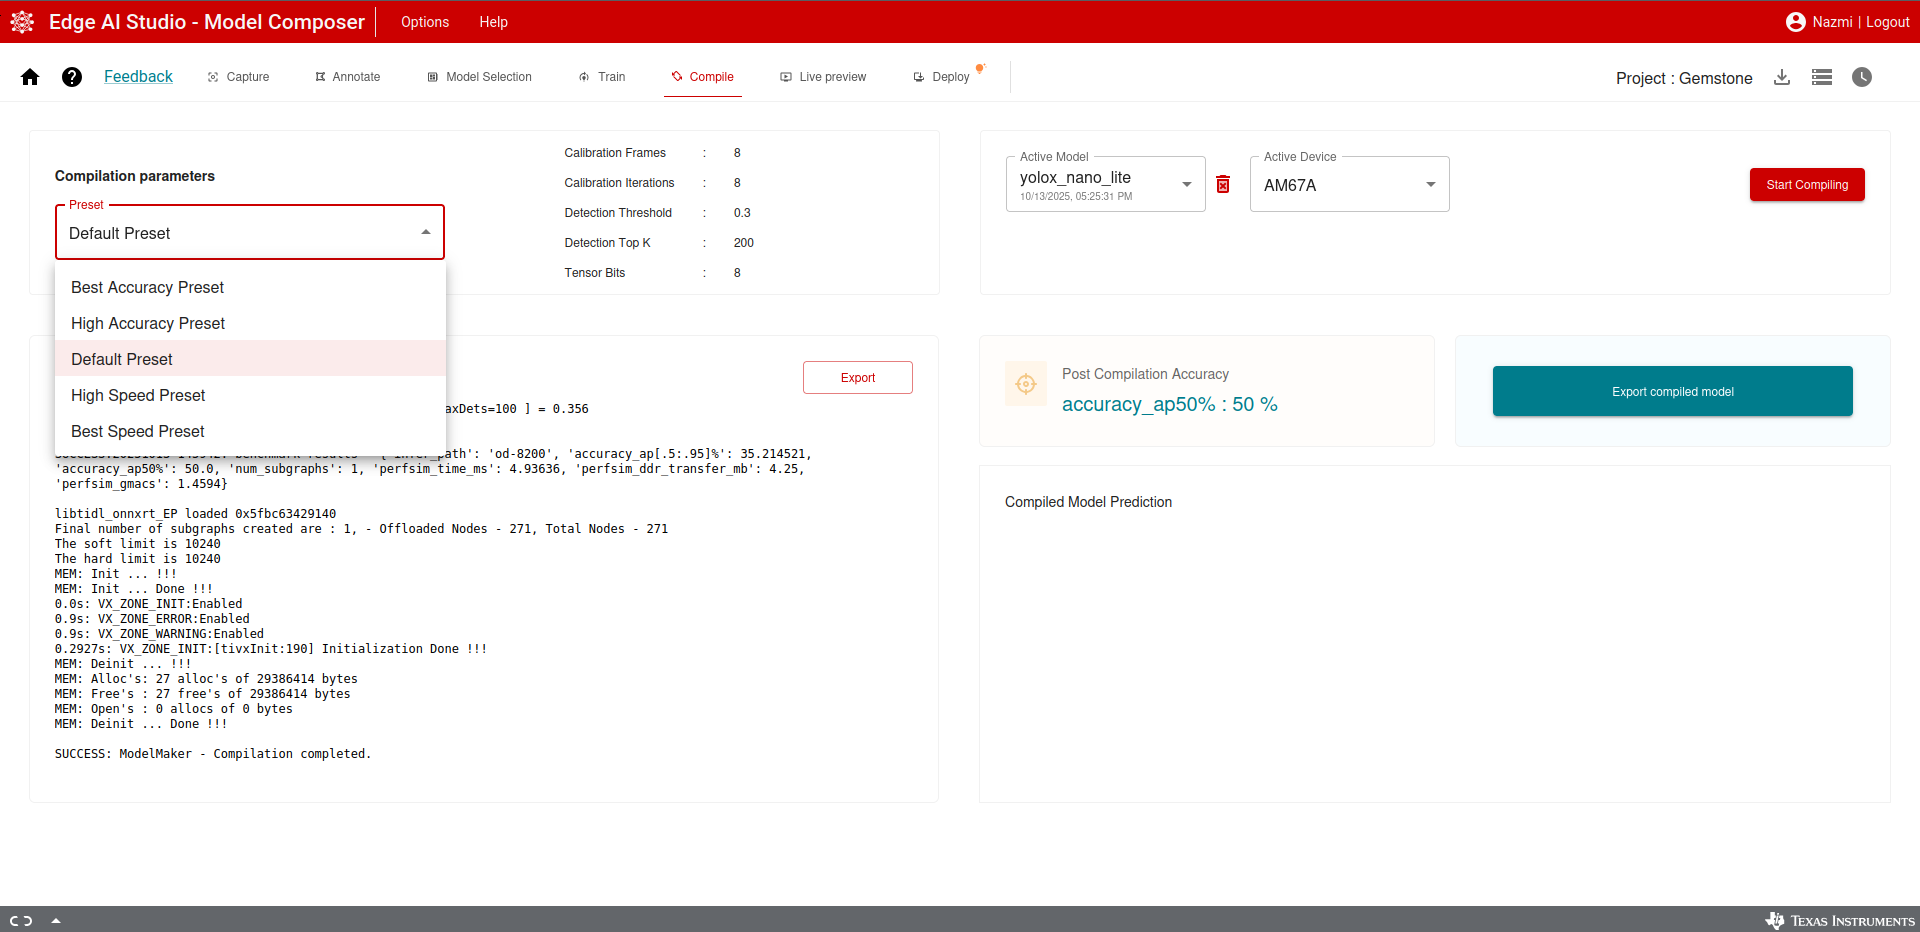
In the final step, as seen above, after selecting the most suitable preset from the predefined ones, you can start the model compilation process by clicking the “Start Compiling” button.After the model creation process is completed, you can download the model to your computer by clicking the “Export Compiled Model” button.